Showing posts with label Legumes. Show all posts

Monday, 3 February 2020

Dal Palak (without onion and garlic) | Palak Dal | Easy Dal Palak Recipe


Recipe for the day is this warm and yummy Dal Palak which always reminds me of our Pune days. This hot bowl of simple yet flavorful palak dal was enough for us to eat scores of phulkas and extra extra helpings of rice. Did I slightly go overboard? Maybe ;) But you get the drift right. It is healthy too. All you need is that bowl of dal and maybe a sabzi. Even if I don't get time to make a sabzi, we manage with boiled egg fry or paneer burji. I love to make this with the palak I used to buy in Pune which gives an earthly flavor to the gravy. With the Chennai palak I feel that's missing. So without much further talk, let's get to the recipe.


Recipe Source: Here


Serves: 3-4 persons


I Took: 

Preparation Time: 5 minutes

Cooking Time: 30 minutes


I Used:


Palak - 2 cups
Tur Dal - ½ cup
Oil/Ghee - 2 tbsp
Cumin seeds - 1 tsp
Ginger - An inch piece - chopped
Green Chilly - 2 nos (medium sized) - chopped 
Red Chilly powder - ½ tsp
Asafoetida - ¼ tsp
Turmeric powder - ½ tsp
Salt - As Needed

The Way:


1. Rinse the lentil with water for 2-3 times. Then take them in a pressure cooker and add around 2 cups of water. Add salt and turmeric powder to it. If you have time soak the dal for 15-20 minutes before cooking so that they cook faster

2. Pressure cook the dal for 5 to 6 whistles till it becomes soft and mushy


3. Now rinse the palak in water for 2-3 times. Drain them of water. Then chop finely and keep aside. Also clean and chop the ginger and green chillies and keep aside

4. In a pan heat oil/ghee. Using ghee gives a very nice aroma and flavor to the gravy. Then temper the cumin seeds 


5. Reduce the flame to low and then add the chopped ginger and fry till the raw smell goes off

6. Then add the chopped green chillies & fry for 30 seconds

7. Now add the chopped palak and saute for a minute

8. Then add the red chilly powder and asafoetida


9. Now cover the pan and cook for 6-8 minutes till the palak is cooked. Palak will release some water. So no need to add additional water at this point. Just open the lid and saute twice or thrice in between so that the palak doesn't stick to the bottom of the pan

10. Mash the cooked dal so that it is smooth. Once the palak is cooked, add the mashed dal to it

11. Add water (1-2 cups) depending on the consistency you want or the gravy and give a nice stir

12. Check salt and add if needed


13. Simmer the dal for about 5 minutes and then switch off

Serve with nice phulkas/rotis, rice & a sabzi of choice :)

Cheers,
Chitz

Wednesday, 6 November 2019

Chiranga Olan | Bottle Gourd Olan | Churakka Olan | Surakka Olan | Lauki Olan


When the family loves Olan, I try to sneak in as many kind of veggies as I can into it :) Cheranga as such is not liked by us, but Olan with it is an exception. We love it when the bottle gourd is paired with the mild coconut milk and the soft crunch from the boiled red eyed beans.. I have already made olan with Zucchini and Pumpkin & Ash Gourd and this one is no different from them. It is simple to make and healthy and yummy too :) So let's see how to make this easy Olan with bottle gourd..


Serves: 2-3 persons


I Took: 


Preparation Time: 10 minutes

Soaking Time: 8 hours

Cooking Time: 30 minutes


I Used:


Cheranga/Bottle Gourd
Red Eyed Beans/Vanpayar
-
-
1 cup - cubed
¼ cup heaped (after boiling)
Green Chilly - 2 nos - slited
Salt - As Needed
Coconut Milk - ½ cup
Curry leaves - 2 sprigs
Coconut Oil - 1 tbsp

The Way:


1. Rinse and soak the vanpayar (red beans - I used 1/8 cup of the beans to soak) overnight for around 8 hours. In the morning, discard the water. Take the beans in a pressure cooker. Add enough water (around 2 cups) and salt and pressure cook till done. It took me 2 whistles in high and 2 in low. Keep aside

2. While they get cooked, extract the coconut milk and keep ready. I used around ½ cup of grated coconut and ¼ cup of water and ground it in a mixie till the coconut was smoothly ground. Then using a muslin cloth, extracted the milk from the ground coconut


3. Cut and discard the skin of the bottle gourd. Discard the thick pith if it's too ripe. Then cut them into thin cubes as shown in the picture. The thickness should not be more than ¼ inch along both width and length

4. Now take the cut pieces in a saucepan and add required salt and green chilly along with little water (¼ cup) (Instead of water you can also use 2nd coconut milk and boil the bottle gourd) and cook it till done. It will take around 15-20 minutes to get cooked

5. If there is excess water after cooking the bottle gourd, I remove them. Else the coconut milk becomes very thin


6. Add the cooked beans (a heaped ¼ cup) without water to the veggies. Give a gentle stir


7. Then add in the coconut milk and curry leaves and again give a gentle stir. Check the salt now. Add if required. Once the coconut milk is added, it should not boil. It should only get warm. And it would take about a minute or so. Switch off the flame. Add coconut oil and just swirl the pan


Transfer to the serving dish and serve along with rasam and pickle or as a dish in your Onam Sadhya leaf !

Cheers,
Chitz

Thursday, 10 January 2019

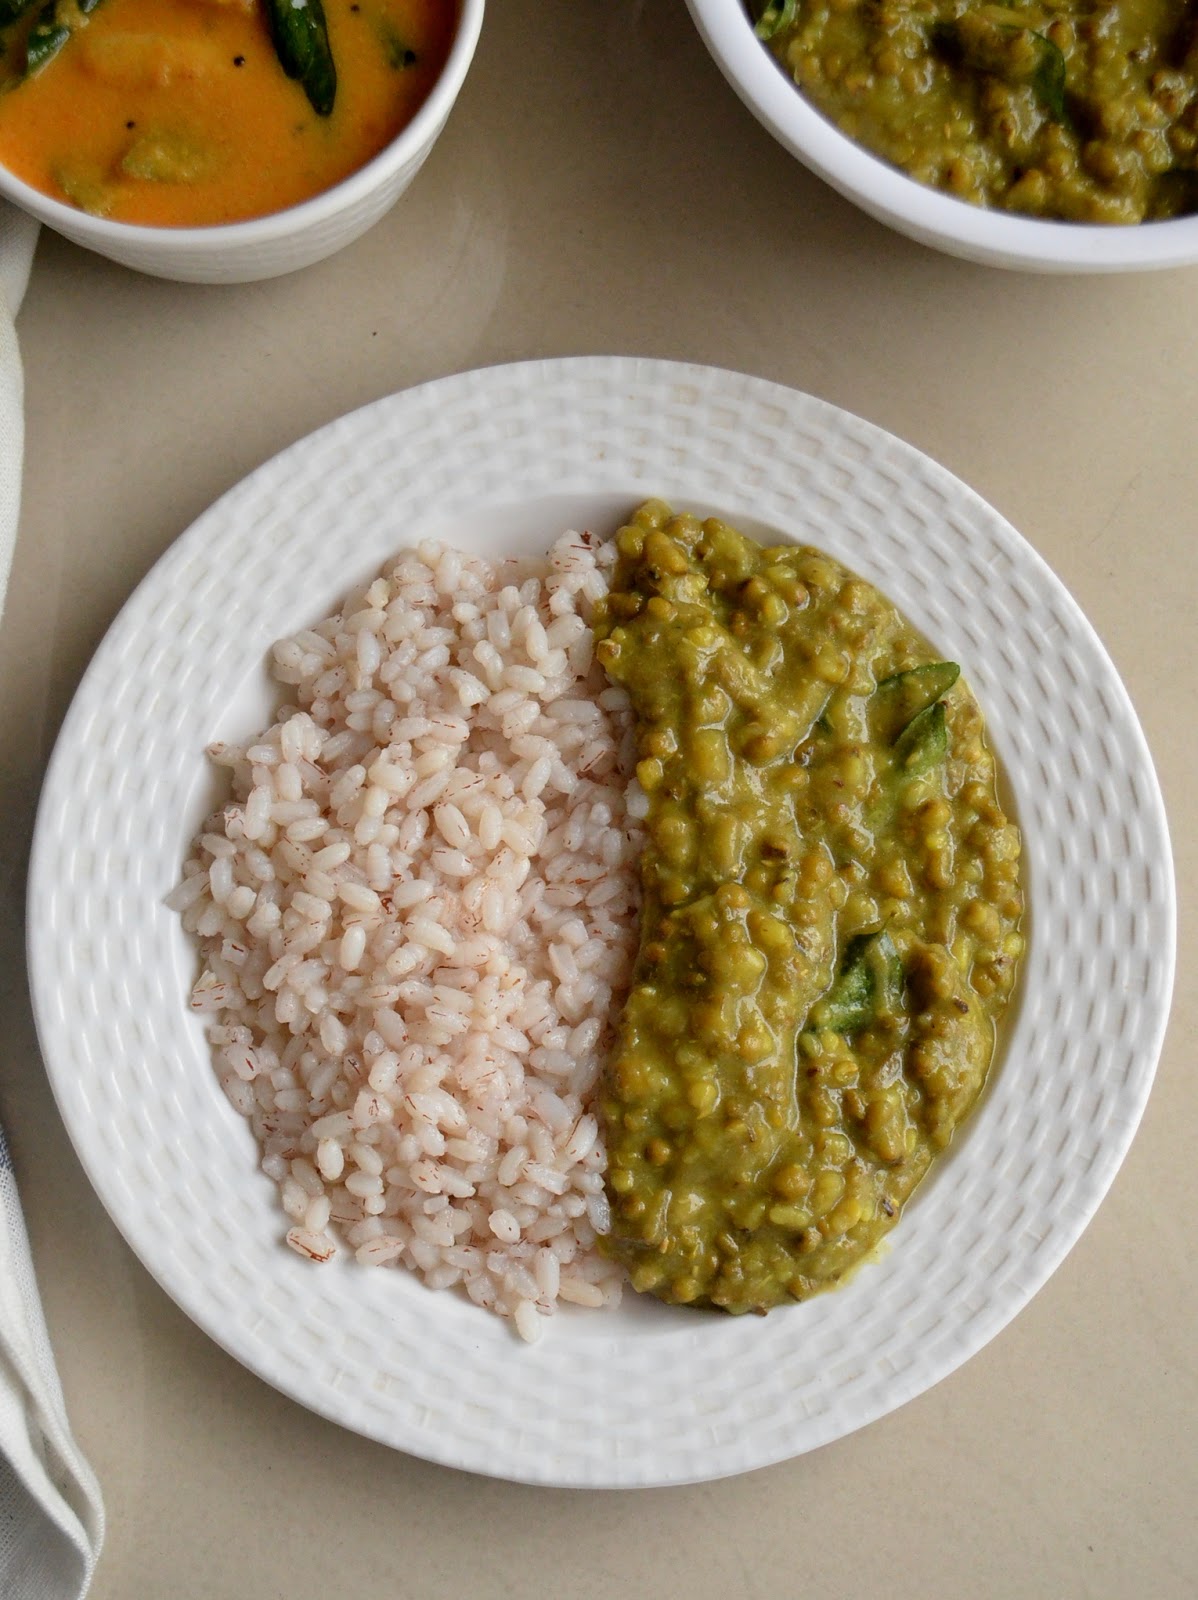
Cherupayar Curry | Green Gram Gravy | Easy Side dish for Puttu


Since I talked quite a lot in my last post, I am in a mood for less talk and more business now ;) So what I am bringing to you today is a very easy side dish for the Puttu, the green gram gravy or the Cherupayar Curry. It is so easy that my entire preparation of puttu and this cherupayar gravy will be ready in less than 45 minutes. And since it is a legume it is quite healthy and makes the puttu-cherupayar combo a wholesome meal giving you carbs as well as protein. The only thing that will consume your time will be grating the coconut. If you have that handy then the rest is a breeze. So shall we see how to make this yummy gravy.. 


I Took: 

Preparation Time: 5 minutes

Cooking Time: 30 minutes


Serves : 2-3 persons


I Used:


Cherupayar/Green Gram - ½ cup
Turmeric powder - ¼ tsp
Salt - As Needed
Curry leaves - 2 sprigs

To Grind:
Grated Coconut - ½ cup
Cumin Seeds - ½ tsp
Green Chilly - 2 nos - slit


To Temper:
Coconut Oil - 1 tbsp
Shallots - 6-8 nos - sliced

The Way:


1. Rinse the green gram in water 2-3 times. Then take them in a pressure cooker. Add enough water (around 2-2.5 cups) and salt. Pressure cook them till done. I keep 2-3 whistles in high and 8-10 whistles in sim flame

2. The green gram should be cooked till they turn soft and mushy. If you want to reduce the cooking time then soak the green gram in water overnight or for 3 hours before cooking

3. While the green gram is getting cooked, grind together the grated coconut, green chillies & cumin seeds to a smooth paste along with little water


4. Once the green gram is cooked, allow the pressure to release naturally. Then add the ground paste and turmeric powder and give a nice stir

5. Allow them to cook on simmer for 3-4 minutes till they come together and then switch off the flame


6. Now in another tadka/small pan, heat coconut oil. Add the sliced shallots. Reduce the flame and saute them till they change colour to golden brown. Take care that they are not burnt

7. Once they change colour, switch off flame and add them to the green gram gravy. Add the curry leaves and give a gentle stir


Serve hot with Puttu !

Cheers,
Chitz

Wednesday, 10 October 2018

Channa Sundal | Kondakadalai sundal | White Chickpeas Sundal | Navarathri Recipes


Today being the first day of Navarathri this year, I though I should post a sundal recipe. Sundal makes a healthy snack and very easy to prepare as well. Just cook the legume/pulses and then add tadka/tempering to it. Tada! done.. Generally on the nine days of Navarathri festival, nine varieties of sundal is offered as neivedhyam (offering) to God during the evening pooja. I do not do gollu at my place, but definitely go on golu hopping whenever I can. It is fun and who can say no to tasty sundals and yummy payasams (kheers), right:) So off to the recipe for the most easiest and my favourite sundal, Channa Sundal...


Soaking Time : 8 hours

Cooking Time : 20 minutes


Serves : 2 


I Used:

Channa/Kondakadalai - ½ cup
Coconut - 3 tbsp
Salt - As needed

To temper:

Oil - 1 tsp
Mustard - ½ tsp
Urd Dal - 1 tsp
Asafoetida - 1 pinch
Red Chilly - 2 nos - broken
Curry leaves - 1 sprig


The Way:

1. Rinse and soak channa in water overnight or for at least 8 hours. If you are hard pressed for time, then soak channa in hot water for 3-4 hours

2. Now take the soaked channa in a pressure cooker. And pressure cook for 4-5 whistles or until done. The channa should not be under cooked or over cooked. It should be soft and hold it's shape after cooking

3. In a pan, heat oil. Temper mustard


4. Add urad dal and fry till it changes colour. Then add the broken red chilly, asafoetida and curry leaves. Take care not to burn

5. Now add the cooked channa (without the water) to the tempering. Gently stir for 2 minutes till the moisture content in the channa evaporates and it becomes dry

6. Then add the grated coconut and give a gentle stir. Switch off the flame and serve


Notes:

  • Red chilly can be replaced with green chilly
  • Can also crush coconut and green chilly together and add 
Cheers,
Chitz

Thursday, 9 August 2018

Vanpayar Thoran | Kerala Style Red Cow Beans Thoran


I love eating legumes.. And lentils too :) And for me this is one favorite way to eat Vanpayar (Red Eyed Beans).. I loove to pair it with some moru kachiyathu, matta rice and any non vegetarian dry dish. Ahh, bliss :) I like it more when I add some grated coconut to it but Deeps and Dhruv prefer it without coconut. It is such a simple dish and comes in very handy when you run out of stock of veggies :) Only thing to remember is to soak the beans overnight :) So shall we see how to make this yummy & simple thoran..


Serves: 2-3 persons


I Took: 


Preparation Time: 10 minutes

Soaking Time: 8 hours

Cooking Time: 30 minutes


I Used:


Red Eyed Beans/Vanpayar-¼ cup heaped 
Coconut Oil-2-3 tbsp
Mustard
Red Chilly
-
-
¼ tsp
2-3 nos (broken)
Shallots
Garlic
-
-
12-15 nos (sliced)
5 nos (sliced)
Curry leaves-A sprig
Salt-As needed


The Way:


1. Rinse and soak the vanpayar/red beans overnight for around 8 hours. While making the thoran, discard the water. Take the beans in a pressure cooker. Add enough water (around 2 cups) and salt and pressure cook till done. It took me 2 whistles in high and 2 in low. Keep aside


2. Meanwhile peel and slice the shallots and garlic

3. Heat the coconut oil in a pan. Splutter the mustard seeds


4. Then add the sliced shallots and curry leaves

5. Also add in the sliced garlic and saute till they slightly turn colour and become soft (around 6-7 minutes)


6. Now add in the boiled beans/vanpayar and give a stir. Keep on high flame and allow all the water to evaporate off (If you like it semi dry, then you can adjust the consistency accordingly) 

7. Finally add the grated coconut and saute for another minute or two. Switch off the flame and serve with a gravy of your choice


Notes:


  • Do not cook the beans very mushy. It tastes nicer when they are not soggy and just cooked right
  • If you like the dish super dry, then saute coconut first for a minute or two after the shallots and garlic have changed colour. Then finally add the cooked beans
  • if you do not like garlic flavour, you can skip that

Cheers,
Chitz

Friday, 27 July 2018

Kaya Cherupayar Puzhukku | Ethakka Cherupayar Curry | Kerala Style Green Gram Raw Plantain Mash


My hubby's aunt makes the best puzhukku that I have ever had.. Even if no non vegetarian dishes are there and there is only this puzhukku and some chammanthi and some pappadam, the kanji (rice gruel) sells like hot cakes in the household ;) Actually I started having this puzhukku after marriage only. My mother does not make them. It was the hubby who first made them for me :D But it was the aunt who actually made me fall in love with this dish. You can make it with any veggies, basically tubes like yam, colocassia etc in addition or instead of raw plantain. It tastes just awesome with kanji (rice gruel) and even good with chapathi. You can make it watery or with very less water as per your taste. It's so easy to make and rich in proteins and fibre and makes a wholesome meal with your kanji :)


Recipe Source: Ma


I Took: 

Preparation Time: 15 minutes

Cooking Time: 30 minutes


Serves : 3-4 persons


I Used:

Cherupayar/Green Gram - ½ cup
Kaya/Raw plantain - 1 no - medium sized - chopped into small cubes
Green Chilly - 2 nos - slit
Turmeric powder - ¼ tsp
Salt - As Needed
Coconut Oil - 1 tbsp
Curry leaves - 2 sprigs


The Way:


1. For making this dish you can use either soaked or un-soaked green mung dal. If you soak for 2 to 3 hours, the cooking time will be little less. I soaked my dal overnight

2. Take the green gram in a pressure cooker.Add chopped raw plantain, slit green chillies, turmeric powder and salt

3. Add about 2 cups of water. If un-soaked dal is used, you may add an extra cup of water as it has to be cooked for 4-5 whistles more

4. Pressure cook them till done. I kept in high flame for 2 whistles and another 4-5 whistles in low flame


5. Once done, allow the pressure to release on it's own. Then open the lid and using a spatula or masher, mash the green gram and plantain very nicely

6. Then add water, as per your preference. If you need a more watery consistency add more water. allow it to come to a boil. And when done, switch off the flame. If you do not want it watery, then skip this step

7. Drizzle the coconut oil on top of the puzhukku and add the curry leaves and give a nice stir


Serve with kanji or chapathi as per your wish :)

Cheers,
Chitz

Friday, 28 July 2017

Punjabi Lobia Masala | Black Eyed Beans Masala | Karamani Masala | Cow peas Masala


Which is your favourite lentil or legume? For me it's this cute looking black eyed peas or cow peas. It's known by many names like lobia or karamani in tamil or vanpayar in malayalam. And with this black eyed peas I made Punjabi lobia masala to bring to you folks! It's a very easy recipe, a fail proof recipe and that which brings fond memories of my London weekends. This was a regular most of the weekends for me. Coz I love this dish and it's very easy to make and it doesn't consume much time and I can go back to binge watching series with a happy tummy and less dishes to wash. That's good right.. So let's see how to make this easy recipe..


Serves: 2-3 persons


I Took: 

Preparation Time: 5 minutes

Soaking Time: 30 minutes

Cooking Time: 30 minutes


I Used:


Lobia/Karamani - 1 cup
Oil - 1 tbsp
Mustard - ¼ tsp
Onion - 1 medium sized (finely chopped)
Tomato - 2 medium sized (finely chopped)
Red chilly powder - 1 tsp
Coriander powder - 1 tsp
Turmeric powder - ¼ tsp
Garam masala - ½ tsp
Salt - As needed
Coriander leaves - To Garnish


The Way:


1. Soak the cow peas/lobia in water for 30 minutes - 1 hour as time permits for you

2. Pressure cook the soaked peas with salt for 3-4 whistles. I keep for 2 whistles in high and 2 in sim. If you do not have time to soak the peas then pressure cook for more whistles say 7-8


3. In a pan heat oil. Splutter mustard 

4. Then add the onions and a little salt (little for the onions as the lobia is already boiled with salt) and saute. The onions should turn transclucent

5. Then add the powders - turmeric, chilly, coriander powders and garam masala. Saute well and allow it to cook for 2-3 minutes till the raw smell goes off


6. Now add the chopped tomatoes and saute. The tomatoes should turn mushy


7. Then add the boiled cow peas along with the water and give a nice stir. Add more water if required to suit your needs of gravy

8. Allow it to cook on low flame (preferably with a lib to the pan) for 4-5 minutes to allow the masala to coat the peas well

9. Before switching off the flame add garam masala and give a quick stir and off the flame. Garnish with coriander leaves


Serve hot with rice or phulkas !

Notes:


  • I generally do not add ginger or garlic or ginger-garlic paste to this. If needed you can add 1 tsp ginger garlic paste or 1 tsp finely chopped ginger and 1 tsp finely chopped garlic
Cheers,
Chitz

Tuesday, 9 April 2013

Kerala Style Kadala curry | Black Chickpeas Curry | Kala Channa Gravy

Black Chickpeas cooked in ground coconut & shallots paste


This is an easy peasy side dish for the chiratta puttu or normal puttu. This is the popular side dish for puttu. Not much of ingredients or elaborate process. Pressure cook the chickpeas & side by side prepare the ground paste and the whole dish will be complete in less than half an hour. Yummy tasty gravy ready for the puttu !! So without much story, diving into the recipe straight :)


Recipe from Deeps:


Yields : For 2 persons


Preparation Time: 30 minutes


I Used:


Black Chickpeas - ½ cup
Grated Coconut - ¼ cup
Shallots
Garlic
-
-
5-6 nos
3-4 nos
Red Chilly powder - 1 tsp
Coriander powder
Garam Masala
-
-
2 tsp
½ tsp 
Salt - As Needed
Oil - 1 tbsp
Curry leaves - A sprig

The Way:


1. Soak the chickpeas overnight in water

2. Rinse the soaked chickpeas in water & boil it in pressure cooker & keep aside

3. Heat 2 tsp oil in a pan. Add grated coconut & 5 shallots and saute


4. When they start to turn a little golden color add the red chilly powder & coriander powder and saute for about 30 seconds and remove from flame, else it will burn

5. Grind the roasted ingredients to a fine paste


6. In a pan, take the boiled chickpeas (along with the water used to boil) and add the ground paste and salt to it. Allow it to come to a boil

7. Take a tsp oil in a pan. Add 1 chopped shallot & the curry leaves to it. When the shallots turn brown, add them to the chickpeas curry


Serve hot with puttu/idiyyapam.

Cheers,
Chitz