Showing posts with label Vegetable Oil. Show all posts

Friday, 14 October 2016

1 minute Vanilla Mug Cake | Easy Vanilla Mug Cake


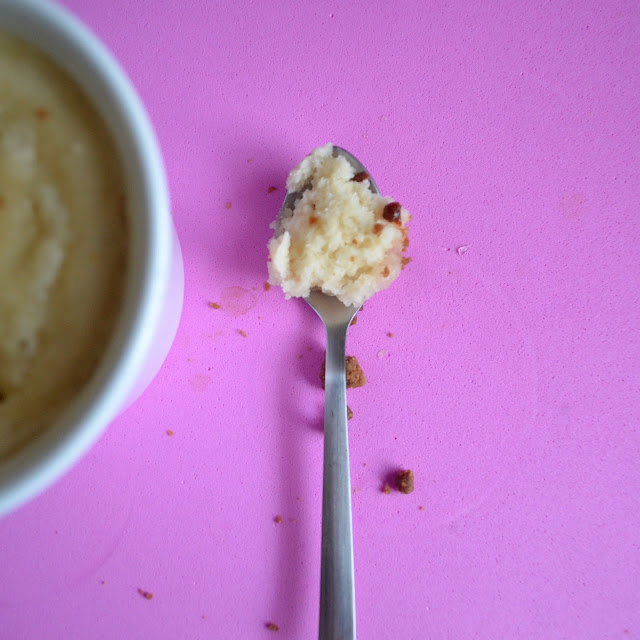
Today's recipe is very simple and very quick to make. As the name suggests, it is a 1 minute microwaved mug cake. As it is a 1 minute cake, the quantity is less. So if you are a cake person whose cravings are difficult to satiate, I guess you would have to microwave 3-4 cups at a go ;) But this is a quick fix recipe for those sudden hunger pangs or craving callings. Today was one such day when I wanted to have a cake. I know this mug cake is best with chocolate, but I didn't have cocoa powder in my pantry, hence had to feel contented with the vanilla version. 

The best part is that, it looks like DD fell in love with this cake. He was coming back from his encounter with his toys every now and then for a nibble. When I wiped the ramekin clean, he leaned over and took a nice look at it. Made sure, it was empty and then returned back to his toys :D :D I feel I have a cake lover son. That thought does make me very happy indeed :D So, this recipe is to many more cake testing and eating together with my DD :) :)


I Took: 

Preparation Time: 5 minutes

Cooking Time: 2 minutes


Serves : 1 person


I Used:


Dry Ingredients:

All purpose flour/Maida - 2 tbsp
Sugar - 1.5 tbsp
Baking powder - ¼ tsp
Salt - A pinch


Wet Ingredients:

Milk - 2 tbsp
Oil - ¾ tbsp
Vanilla Essence - 3-4 drops (As much as you prefer)

The Way:


 1. In a bowl, take all the dry ingredients and mix them together. 

2. Add the wet ingredients to it and mix them well. The sugar should dissolve completely.

3. Now transfer the contents to a microwave safe ramekin or mug or glass.

4. Set the oven to microwave setting at the highest temperature for 1 minute. I set to 900 W.

5. Bake them. Check after a minute if a tooth pick inserted comes out clean or is without moisture. If not keep for a few more seconds according to how much the cake is moist at that point.

Serve hot. 

Notes:

  • If you let them sit for long, they become hard or rubbery. If you need to serve it later, transfer to another cup or serving dish
  • I doubled the measurements and made, as my ramekin is bigger in size. Hence I microwaved for 2 minutes

Cheers,
Chitz

Monday, 15 July 2013

Lemon Glow Chiffon Cake - Baking Partner Challenge #12

So Baking Partners are back with a bang to celebrate it's one year anniversary of successful baking.. Yes, we have turned 1 year old. And this time there were 2 suggestions for baking the recipe of the month 'Cakes'. Humi suggested 'Medovik/Russian Honey Cake' & Saraswathy suggested 'Chiffon Cakes'. As I had an eye on baking Chiffon or Foam cakes from a long time, I chose Chiffon cake for this month's challenge. Thanks Saraswathy & Swathi for this wonderful challenge. Now let me share some facts with you that Saraswathy shared with us on Chiffon cake.


Chiffon (pronounced She-fon) cakes are a type of foam cakes and are light & soft & definitely yummy !! They contain egg yolks and whites separately whisked and folded in together with vegetable oil, all which makes them moist, soft & light.. This cake doesn't call for butter & the lower quantity of sugar gives me an extra reason to savor this low cholesterol cake;) Use of oil instead of butter aides in the airy quality of the cake & gives a longer shelf or refrigeration life. Refrigeration makes the oil in the cake soft & the cake becomes all the more tender. Deeps liked to have it chilled & directly from the fridge. He said, 'It tastes better when chilled'. Even my neighbor & friend 'P' was very happy with the cake & said it tasted awesome :D

The chiffon cake was created by Harry Baker, a Los Angeles insurance agent, in 1927.  Baker carefully guarded his secret technique for almost two decades, only selling his cakes to celebrities and the famous Brown Derby restaurant. The popularity of his cakes grew quickly, and he eventually sold the recipe to General Mills in 1947. 

I have halved the recipe here & used some substitutes for ingredients not available in this town. Refer the notes too while baking this cake, as they can help you get a perfect cake on your first attempt itself. The whisking of the egg whites is the most important part.. U get that right, consider half the work done. So lets see how to make this soft & tender cake. I have used normal buttercream icing & strawberries for serving.


Recipe Source: Adapted from The Cake Bible by Rose Levy Beranbaum


Serves: An 8 inch round cake pan with a ramekin in the middle


Store: Stays fresh for 3 days in room temperature, 10 days refrigerated, 2 months frozen


I Took:

Preparation Time: 30 minutes

Baking Time: 50 minutes

Cooling Time: 85 minutes


I Used:


Dry Ingredients
All purpose Flour-1 cup (refer notes)
Corn flour-2 tbsp
Caster Sugar-¾ cup
Salt-¼ tsp
Baking Soda-¼ tsp
Lemon Zest-½ - 1 tbsp
Wet Ingredients
Canola/Sunflower Oil-¼ cup
Large Egg yolks-1 no / 65 g
Water-⅓ cup
Lemon juice-1 tbsp
Vanilla Essence-½ tsp
For Meringue
Cream of Tartar-¾ tsp (refer notes)
Sugar-1 tbsp
Large Egg Whites-3 nos


The Way:


  1. In a large mixing bowl combine the dry ingredients. First work the sugar & lemon zest together with your fingertips until the sugar is grainy & very aromatic. Add the all purpose flour, corn flour (or the cake flour - refer notes), baking soda and salt to it
  2. Whisk together until all the dry ingredients are incorporated. If you have a stand mixer, use the beater attachment & beat on low
  3. Then make a well in the center of the ingredients and add the oil, egg yolks, lemon juice and vanilla. Mix until the batter is smooth & has no lumps. In a stand mixer, mix for about 1 minute on medium speed
  4. In a second large mixing bowl, beat the egg whites until they are foamy. Add lemon juice (or cream of tartar) & beat (if on stand mixer, beat on medium speed) until they reach soft peak stage. This happens when the whisk or the beater start to leave a trail or when the peaks fall over when the whisk is raised
  5. At this stage add the 1 tbsp sugar & continue to beat the egg whites until they form stiff peaks when the whisk is raised
  6. Using the balloon whisk (or a slotted spoon) add ⅓ of the egg whites to the cake batter & gently stir until incorporated. Add the remaining egg whites to the cake batter and very gently fold them into the batter until they are incorporated and no trace of egg whites remain
  7. Pour the batter into an ungreased tube pan and run a metal spatula or knife through the batter to prevent air pockets. If you do not have a tube pan but would like to have a similar shape, then place an oven usable ramekin in the centre of your round pan and pour the batter to the sides of the ramekin as I did
  8. Preheat the oven on conventional mode at 165 degrees
  9. Bake in the lower rack of the oven for 50-55 minutes (refer your oven manual too) or until the cake bounces back when lightly pressed in the center
  10. Once cooked, take the cake pan & immediately turn it upside down on a bottle (or another ramekin or tumbler - whichever suits best for the pan). Allow to cool completely which took about 85 minutes for me
  11. Use a palette knife and loose the sides of the cake. Pull out the sides and work similarly on the bottom. Turn it over on to a plate upside down & sprinkle with a dusting of icing sugar or a topping of your choice & serve


Notes:

  • Do not grease or line or flour the cake pan. This will hinder the cake from rising up
  • Always use large eggs as called for in the recipe. Do not use medium or small sized eggs
  • Try to use castor sugar than normal ones 
  • The recipe calls for cake flour, but since I could not get it here, I used the substitute. Take an equal amount of All purpose flour. Remove 2 tbsps of flour from it & replace it with 2 tbsps of corn flour (NOT corn meal). This works just fine
  • Cream of tartar is used to stabilize the egg whites while beating up. Since I couldn't get those, I used the substitute lemon juice. Works perfectly OK
  • Make sure that the bowl used to whisk egg whites are clean & grease free. Traces of grease or egg yolks will not guarantee you proper whisking of whites
  • Proper & correct whisking of egg whites is essential to ensure the texture of the cake. Under or over beating can cause the cake to collapse or become too hard. Do the 'Overturn bowl test' to ensure that your whisking is the right amount. When you overturn the bowl of the whisked egg whites, it should hold & must not fall off
  • Do not let the egg whites sit for long once whisked. Immediately fold it onto the cake batter as this stage of stiff peaks is short lived
  • Take care while folding in the egg whites as over folding can cause the egg whites & thus the cake to deflate. Fold in gently using a whisk
  • Before pouring the batter into the pan, take the bowl and hit against the kitchen counter. This will cause bubbles to rise up to the top and pop. Do not hit the pan after pouring the batter as this may cause the formation of more bubbles

Here are some links that helped me greatly. Hope you guys too find it useful !

http://allthatmatters2rei.blogspot.no/2008/07/chiffon-cake-tips-and-trouble-ii.html
Cheers,
Chitz

Wanna see what the others in the Baking Partners group baked?? 

Wednesday, 30 January 2013

Ultra Moist Chocolate Cake


I had been thinking for quite a while now to post a cake recipe. But the main reason I didn't do so far was because, I hadn't baked one for about a month now. Not because of anything else.. But with the New Year and all, I was thinking on reducing the calorie intake. You know !! 


But I couldn't hold out for long. As always, New Year resolutions are meant to be broken ;). So I just found out the perfect excuse and the apt reason for me to bake one :D It was the birthday of three of my darling friends Iman, Pallavi and Lavanya on yesterday, day before and last Saturday.. Yes, we all are part of the same gang who used to hang out together for every breakfast, lunch and tea on weekdays. Quite a co-incidence na that the birthdays are so close !! And yes, we all love foooooodd... So here is it, a dedication from me to you guys ;) So here is my all time favorite dessert, moist chocolate cake which I had with a scoop of ice cream. Trust me, they tasted heavenly thumbs up


Recipe Source : Maria's Menu


I Took: 

Preparation Time : 15 minutes

Cooking Time : 50 minutes


I Used:

    Milk                           - 1½ cups
    Butter                        - 100 gm
    Oil                            - ¼ cup 
    Cocoa Powder              - ½ cup
    Self Raising Flour        - 1 cup (refer notes below)
    Egg                            - 1 beaten (room temp)
    Baking Soda                - ½ tsp
    Sugar                         - 250 gm


    The Way:


    1. Preheat the oven @ 180 C for 10 minutes before baking
    2. Grease your cake mould with butter and keep aside
    3. In a pan mix together milk, butter, oil & coco powder and heat in a medium flame till the butter melts. Then allow it cool to room temperature
    4. In another bowl whisk together flour, baking soda and sugar
    5. Add the beaten egg followed by the cooled wet ingredients to the flour mix
    6. Beat it using a beater till its mixed well
    7. Pour the batter into the greased cake mould and bake for 35-40 minutes @ 180 C or until a toothpick inserted comes out clean

    Notes:


    Substitution for Self Raising flour
            All purpose flour - 1 cup
            Baking powder   - 1 ½ tsp
            Salt                   - ¼ tsp

    Cheers,
    Chitz