Showing posts with label Tamil Recipes. Show all posts

Tuesday, 19 May 2020

Easy Moru Kachiyathu | Kerala Style Kachiyamoru | Moru Curry without Coconut | Seasoned Buttermilk


This is a simple, ready in a jiffy and yet a yummy gravy with yogurt that can please your palate as well as your time :) I make it mostly once a week, especially when I have non vegetarian side dishes like chukka or roast or some grilled chicken. My folks are happy and that makes me too happy :) It is basically nothing but tempered curd or yogurt. So I don't want to ramble much.. Just one more thing before we head on to the recipe. It tastes great with potato fry or koorka upperi as well ;) Here in this pic I have served it with Unnipindi upperi, simple chicken kebab, beef roast & beetroot pachadi :)


Serves: 2 persons


I Took: 

Preparation Time: 15 minutes


I Used:


Coconut Oil - 1 tbsp
Mustard/Kaduku - ½ tsp
Fenugreek/Uluva - ¼ tsp
Ginger - 1 tsp - finely chopped
Garlic - 1 tsp - finely chopped
Red Chilly - 2 nos - chopped/broken
Green Chilly - 2 nos - chopped/broken
Curry Leaves - 2 sprigs
Turmeric powder - ½ tsp
Salt - As Needed
Curd
Water
-
-
1 cup - beaten/whisked
As Needed - If required


The Way:


1. Beat the curd nicely and keep aside. You can use a mixie or whisk for this. If using a mixie, add the curd in the jar along with water and salt and pulse them once or twice and you will get smooth curd. If using whisk, add water to the curd along with salt and whisk well till no lumps are there and the curd is smooth

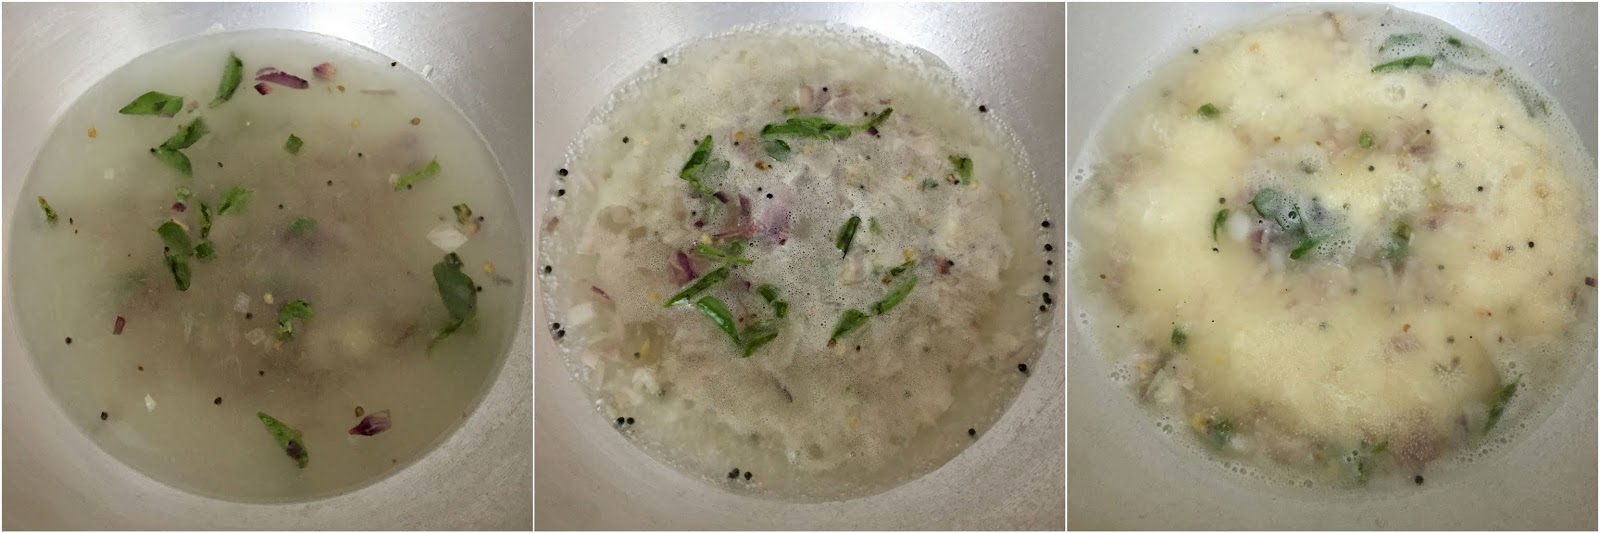
2. Heat coconut oil in a pan/kadai. When it's hot, splutter the mustard. When it splutters,add the fenugreek seeds 

3. Then the chopped ginger and garlic and saute for 30 seconds 

4. Then add the chopped green chillies, red chillies and curry leaves and give a quick saute


5. Finally add turmeric powder (with the flame at low, else the powder will get burnt easily) and asafoetida if using and saute for another 30 seconds

6. Now add the whisked curd and give a quick stir and switch off the flame. Else it will start to split


Serve warm with matta rice and a spicy non veg side dish of your choice!

Cheers,
Chitz
Friday, 1 May 2020

Coconut Chutney | White Coconut Chutney | South Indian Thengai Chutney with Pottu Kadalai | Easy Side dish for Idly/Dosa/Uthappam/Pongal | Vella Cutney


This is one of the most versatile and easy chutney that you can ever make. You know why versatile, coz it can be paired with almost many of the South Indian tiffins/breakfast dishes like idly, dosa, uthappam, pongal, upma, vadai etc etc.. It is a simple, clean and yet another ready in a jiffy recipe :) Since it is a basic recipe I am tagging it under basics here :) Most of the households would have a variant of this chutney recipe yet some of the ingredients remain the core ;) Grind, taste, adjust and repeat.. That's how you roll when you are a beginner. After a few times you will get the hang of it. So let's see how this simple humble chutney is made..


Serves: 4 persons


I Took: 

Preparation Time: 10 minutes


I Used:


Grated Coconut - ½ cup
Green Chilly - 2 nos
Ginger - An inch piece
Fried Gram/Pottukadalai - 2 tbsp
Salt - As Needed
Water - As Needed

To Temper:

Oil (Coconut/Sunflower) - 2 tbsp
Mustard - ½ tsp
Curry Leaves - 2 sprigs


The Way:


1. Take the grated coconut and ginger in a mixer jar. Add little water (¼ cup) and grind them coarsely

2. Now add the green chilly, fried gram dal/pottu kadalai and salt and grind them nicely to a smooth (as smooth or coarse as you want) consistency


3. In a tadka pan, heat oil. Splutter mustard seeds

4. Then add the curry leaves. Switch off flame

5. Add the tadka to the chutney


Serve with idly, dosa, uthappam, pongal !


Notes:

  • Use freshly broken & scraped coconut. The taste really differs when you use even a day old (refrigerated) coconut
  • While you grate there will be some red or brown coloured scrapings as well. Avoid them for this chutney as it will affect the colour ;)
  • Avoid using old coconut and also kopra
  • Add water according to the consistency of the chutney that you need. I would suggest using less water while grinding. Add more if needed once you grind and transfer the chutney to a container
  • For runny chutney you can add more pottu kadalai but be cautious if you do not like the taste
  • Ginger is optional. Pottu kadalai is also optional. Add both or either one or none as per your liking
  • Adjust the chillies as per your taste. Quantity of ingredients given are guidelines and can be adjusted to suit personal tastes
  • You can use the green chillies which has become ripe and turned red in colour. They might slightly change the colour of the chutney but tastes yum
  • If the chutney becomes too runny, add more grated coconut and grind
  • While tempering can add a tsp of urad dal as well


Cheers,
Chitz

Saturday, 11 April 2020

Rava Upma | Upma recipe | How to make upma?


Upma is one of the easiest breakfast that can be made in a jiffy. If you ask me, that would be the fastest breakfast that I can make, not considering idly and podi. But for idly, I would go slightly overboard and make chutney and mostly sambar as well ;) So coming back to upma, many do not like upma. In fact I hated it as a kid. I must say that I started appreciating it more after getting married ;) Not coz it's easy to make. But because my mil makes some kickass upma which is neither dry nor gooey but the perfect consistency. The key is in finding the correct ratio of water required for the consistency that suits your liking. The rest is breeze. Experiment with that and I am sure you will reach there too soon :) The ratio I have mentioned here is for a more firm and fluffy upma. So let's see how to make it..


Serves: 2 persons


I Took: 

Preparation Time: 5 minutes

Cooking Time: 15 minutes


I Used:


Oil/Ghee - 1 tbsp
Mustard - 1 tsp
Urd Dal - 1 tsp
Curry Leaves - A sprig
Roasted Rava/Semolina - 1 cup
Onion - 1 no (medium sized - chopped)
Green Chilly
Asafoetida
-
-
2 nos 
¼ tsp
Water - 2 ¼ cups
Salt - As needed


The Way:

1. Take the rava/semolina in a kadai. Roast the rava on a low or medium flame for 3-4 minutes till they are crisp. Keep stirring else it will get burnt

2. Heat oil in a kadai/pan. Splutter mustard. When it splutters add the urd dal. Allow it to turn golden. Take care not to burn


3. Add curry leaves, chopped onions and green chilly and saute 

4. Add salt and asafoetida as well and saute till the onions slightly turn colour. I don't make them brown and just saute for 2-3 minutes as we like it that way


5. Now add water (refer notes) and check salt. It should taste salty. If not adjust salt. Allow the water to boil

6. Once it boils, reduce the flame and add the roasted rava little at a time and constantly stirring with your other hand. Keep the flame reduced, as the water can splutter 


7. The rava will absorb the water and become thick. Then close the pan with a lid and allow the rava to cook in low flame for about 5-6 minutes

8. Now open the lid and check. You can stir in between if needed or you are worried that it might stick to the bottom of the vessel


Garnish with little grated coconut or coriander leaves before you serve !

Notes:

  • Use ghee for a more yummy flavour and taste
  • You can also add fried cashews for a richer taste
  • I always use roasted rava/semolina as it makes my life easier! If you are using unroasted one, then as the first step roast the rava in a pan for 3-4 minutes in medium flame until you get a nice roasted flavour. Keep stirring else it will get burnt
  • We like our upma plain. If you want to add veggies like carrot, beans or peas, you can add them after sauteeing the onions and then proceed to the next step once the veggies get cooked
  • You can even add tomatoes for a tangy flavour
  • My mom adds some chopped ginger along with the onions, so if you like that flavour you can add them as well
  • The quantity of water mentioned here is for a fluffy upma. If you like more gooey one increase the quantity of water. Either ways make sure the rava is properly cooked. Low flame and covered cooking is the key for a properly cooked and fluffy upma !

Cheers,
Chitz

Sunday, 22 March 2020

Chow Chow Kootu | Chayote Squash Kootu | South Indian Kootu with Bangalore Kathirikkai


Kootu is one of my favourite side dishes. It is a wholesome meal in itself and requires really less effort and time. And luckily my little one also loves it, so I find making them often. Usually I make kootu with any veggies similar to this Pudalangai kootu (Snake Gourd) or this Yellow Pumpkin Kootu (Poosanikai) without coconut. At times I use coconut but do not grind them like in this Vazhaithandu Kootu (Banana stem). For me those recipes are very light on the tummy and the one like this Chow Chow kootu recipe today is a little heavy with coconut and rice flour ground and mixed in. But I like this one too. It also tastes yum and is like the one in restaurants or the ones that they serve in weddings :) 


Recipe Source: Ma


I Took: 30 minutes


Serves : 2 persons


I Used:


Chow Chow (Chayote)-1 medium sized one
Channa Dal/Moong Dal-¼ cup
Ginger-An inch piece
Garlic-2-3 cloves
Turmeric powder-¼ tsp
Salt-As needed


To Grind:

Grated Coconut - 3-4 tbsp
Red Chilly - 1 no
Cumin Seeds/Jeerakam - ½ tsp
Rice Flour - 1 tsp

To Temper:
Oil-1 tbsp
Mustard -½ tsp
Urad Dal-1 tsp
Red Chilly-3 nos
Curry leaves-A sprig
Asafoetida-2 pinch


The Way:

1. Rinse channa (or moong) dal thoroughly in water. Then soak the dal in water (I took 1.5 cups) for 20-30 minutes. Channa dal pairs well with chow chow but at times I use moong dal too

2. Remove the skin of chow chow (and also the seed in the middle) and dice it and keep aside

3. Add salt & turmeric powder to the soaked dal, diced chow chow, crushed ginger (optional) & crushed garlic (optional) in a pressure cooker. Pressure cook it for 3-4 whistles or until it is done 

4. Alternately you can cook them in a pot as well. If using a pot, make sure you add sufficient water and cook the dal & chow chow. Also take care to see that the water doesn't dry up and leave you with a burnt vessel. However chow chow takes longer to cook. So it's better to use a pressure cooker for faster cooking


5. While the chow chow is getting cooked, take the grated coconut, cumin seeds, red chilly & rice flour in a mixer along with 2-3 tbsps of water and grind it to a smooth paste 

6. Once the chow chow is cooked and the the pressure is released, open the cooker. Add the ground paste to it and give a nice stir

7. If water is less, add enough for your desired consistency. Allow the kootu to boil in low flame


8. Now for the tadka/tempering, heat oil in a tadka pan/kadai

9. Add the mustard seeds. When they splutter, add the urd dal. As it slightly turns colour add the remaining ingredients (red chilly is optional - add to adjust the heat of the kootu) and give a nice stir

10. Add the tadka to the kootu and mix and serve


Tastes awesome with Plain Rice / Rasam Sadam / Kathirikai Kara Kuzhambu / Pavakkai Puli Kuzhambu

Notes:

Instead of boiling the moong dal, you can pressure cook as well. Just about 2 whistles should suffice. 

Cheers,
Chitz

Friday, 8 November 2019

Ponnanganni Keerai Poriyal | Ponnangani Greens Stir Fry | Dwarf Copper Leaf Stir Fry


Here I go with yet another greens stir fry recipe. This time it is none other than the iron & calcium rich Ponnangani leaves. They come in two shades - green and red. Here I have prepared the stir fry using green leaves today. You can follow the same recipe for the red leaves as well. Ponnangani leaves has many medicinal benefits. To mention a few, it is recommended as a very good medicine for all your eye problems and for also maintaining a healthy and glowing skin. It is said to reduce body heat and is a good remedy for piles problems. And it is very effective against stomach ulcers, gut problems and also to improve your overall health. And so I guess by now you must have very well understood how great these greens are for your health, so let's go check out how to make a simple and tasty stir fry with them :)

This is how it looks :)


Serves: 4-5 persons


I Took: 

Preparation Time: 15 mins

Cooking Time: 25 mins


I Used:


Ponnangani Keerai - 2 cups
Sesame oil - 1 tbsp
Mustard - ¼ tsp
Urad Dal - 1 tbsp
Red Chilly - 4 nos (slit)
Onion (chopped)
Asafoetida
Turmeric Powder
-
-
-
½ cup - 1 medium sized
2 fat pinch
¼ tsp
Mung Dal - 2 tbsp (boiled) (Take 1 tbsp raw and soak)
Grated Coconut - 2 tbsp


The Way:


1. Take the moong dal in a bowl. Rinse well in water. Then soak the dal in ¼ cup of water for 15-20 minutes

2. Once soaked, add a little salt (not much coz we will be adding in the poriyal as well) and cook them till done. First keep the flame in high till the water boils and then simmer and cook covered till done. The dal should not turn mushy. They should be cooked and retain their shape. It should take around 8-10 minutes for them to get cooked

3. Meanwhile clean and keep the greens (keerai). Remove old or wilted or yellow coloured leaves. I use only the leaves and discard the stem

4. Rinse the greens (keerai) in water 2-3 times to remove the dirt and mud particles. Then drain the water and chop them roughly and keep aside


5. Chop the onions and keep aside

6. In a pan, heat sesame oil. Use sesame oil for this stir fry. It is highly recommended. If you do not have it replace with sunflower or coconut oil

7. Splutter mustard. Then reduce the flame and add the urad dal and broken red chillies. Saute them. Take care not to burn the red chilly or dal


8. Add the chopped onions and saute. The onions should turn translucent and slightly start to turn colour

9. Then add asafoetida and turmeric powder. Give a quick saute

10. Add the chopped greens and give a nice stir. Add 2-3 tbsp of water and give a quick stir. Cover and cook for 5-6 minute till the leaves wilt and get cooked. Check in between to see that they do not get stuck at the bottom and saute to avoid that


11. Once the greens are cooked, add the cooked moong dal and give a gentle stir and leave it for a minute

12. Then add the grated coconut and give a quick and gentle stir


13. Switch off flame and serve with rice and a gravy of choice

Cheers,
Chitz

Friday, 28 June 2019

Paruppu Keerai | Sirukeerai Paruppu Kadayal | Sirukeerai Paruppu Masiyal | Quick Spinach Dal Recipe


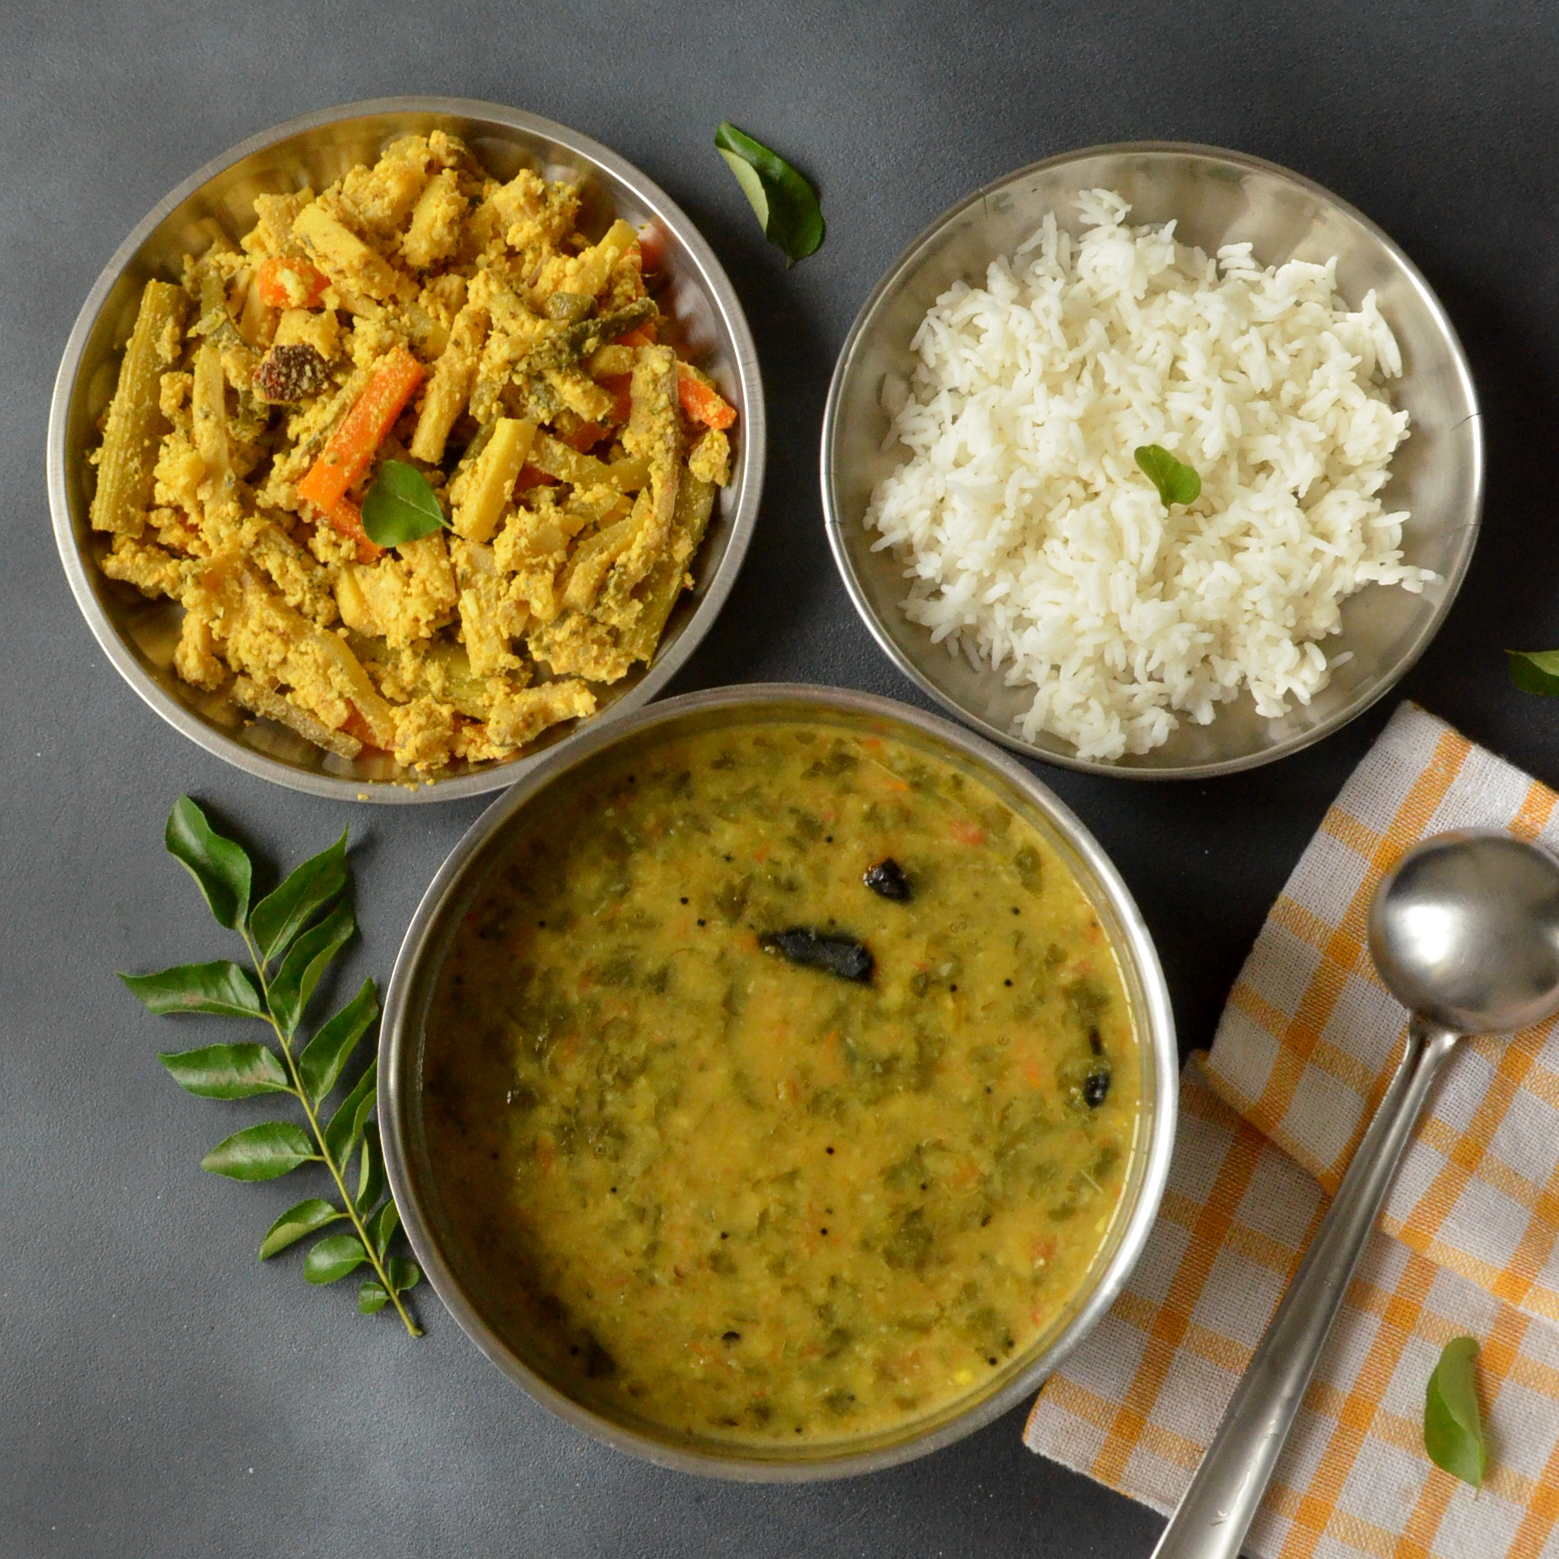
This preparation used to be the only spinach dish that I liked when I was a child. And still this remains my favourite. I basically never liked spinach and that's the reason I loved this recipe. It masks the taste of the spinach to a good extent with the tur dal in it. And it's a one pot recipe, so it saves a lot of time on a busy day morning provided you can cleaned spinach ready :) If you are in Tamil Nadu, then there is no dearth to the varieties of spinach that you can get. And this recipe tastes great with Sirukeerai, pasalai keerai (Malabar spinach), paruppu keerai and palak as well. 

If you would like to peek into my other spinach recipes, then here they are - Cheera Parippu CurryCheera Thalippu, Cheera Thoran, Vallarai keerai PoriyalChembila MezhukkupurattiChembin Thandu Parippu Curry & Palak Paneer


Serves: 3-4 persons


I Took: 

Preparation Time: 10 mins

Cooking Time:  mins


I Used:


Keerai/Spinach - 1 ½ cup - chopped
Tur Dal - ½ cup
Tomato - 2 medium sized ones
Green Chilly - 3-4 long ones
Garlic - 4-5 pods
Tamarind (optional) - A blueberry sized
Turmeric Powder - ¼ tsp
Asafoetida - ¼ tsp
Salt - As Needed


To Temper:

Oil - 1-2 tbsp
Onion Vadagam (refer notes) - 1 tbsp
Mustard - 1 tsp
Red Chilly - 1-2 nos - broken

The Way:


1. Rinse the tur dal 3-4 times with water. Then add around 2 cups of water and soak it for 20-30 minutes

2. Meanwhile, rinse the spinach leaves (refer notes) in water 2-3 times so as to remove the dirt and mud from it. You can use the leaves and the tender stem. This recipe is best suited for Sirukeerai, pasalai keerai (Malabar spinach), paruppu keerai and palak 

3. Then chop the spinach leaves and keep aside

4. Roughly chop the tomatoes as well. Peel the skin of the garlic and slit the green chillies and keep


5. Now take the soaked tur dal along with the soaked water in a pressure cooker. Add turmeric powder, asafoetida, chopped tomatoes, garlic, green chilly and tamarind to it. Addition of tamarind is optional. If the tomatoes are tangy enough then you can skip tamarind

6. Pressure cook the dal for 2 whistles on high and then 3-4 whistles on simmer

7. Then switch off the flame and allow the pressure to release naturally

8. Once the pressure is released, open the cooker. Check how much water (or stock) is there. If you have more than a quarter cup of water then take them out onto a glass or container and keep aside. This is done because it is difficult to mash the gravy to a smooth consistency is more liquid is present

9. Then mash the dal-spinach using a masher so that the gravy becomes smooth. Now you can add the stock that you have kept aside, depending on the consistency of the gravy that you need


10. In a tadka pan, heat oil. Splutter the onion vadagam. If you do not have the vadagam, you can make a tadka using mustard seeds & red chilly. You can add sliced shallots too in the tadka if you like

11. Now add this tadka to the dal and mash it again and mix it well


Serve with rice and a stir fry of choice. I usually like to pair it with yam fry, plantain fry or beetroot thoran

Notes:

  • This gravy will taste yummiest when made with siru keerai, pasalai keerai (Malabar spinach), paruppu keerai and also palak
  • After buying the spinach, clean them properly. Remove any leaves that have turned yellow or starting to turn yellow. Also discard the leaves that are infested with pests or have small holes or white coloured formation in them. Also use only the tender stalks
  • I use onion vadagam for tempering. If not available you can make a tadka of mustard, red chilly and shallots
Cheers,
Chitz

Friday, 21 June 2019

Vallarai Keerai Poriyal | Brahmi Leaves Thoran | Pennywort Stir Fry


Now that we have shifted our base back to Chennai, I am able to buy and cook some native veggies and greens :) Vallarai Keerai is one such green that I have not seen even once in Pune. So last week when I saw some in the local market, I immediately grabbed a bunch. When I bought them I thought that they are used to make dosas but when I checked with my mom it turned out that the greens used for making dosa is 'Mudakkathan Keerai' and not this. And she told me the recipe to make this poriyal. She said that this Vallarai Keerai (Brahmi) is bitter and hence to make it into an appeasing poriyal you need to add some supporting ingredients like tomato, dal and coconut. 

This is how it looks :)

Generally when we make keerai (greens) poriyal we do not add any of them . Just plain saute of onions and chillies and then the spinach. And as she said, when I tasted the poriyal before adding dal and coconut it was very bitter. But once it was done, it tasted yum and there was only a very faint bitterness to it that even my little one relished it :) And also this leaves are very good for our brain, so if you get hold of some Vallarai Keerai, do buy and make them, now that you have a fool proof recipe :) Also let me know how it turned out..

My other keerai recipes are - Cheera Parippu CurryCheera ThalippuCheera Thoran, Sirukeerai Paruppu MasiyalChembila MezhukkupurattiChembin Thandu Parippu Curry & Palak Paneer


Serves: 4-5 persons


I Took: 

Preparation Time: 15 mins

Cooking Time: 25 mins


I Used:


Vallara Keerai (Brahmi)-2 cups
Sesame oil-1 tbsp
Mustard-¼ tsp
Green Chilly-3 nos (slit)
Asafoetida-¼ tsp
Onion (chopped)-½ cup
Tomato (chopped)-½ cup
Tur Dal (or Mung Dal)-2 tbsp
Grated Coconut-2 tbsp


The Way:


1. Take the tur dal (or moong dal) in a bowl. Rinse well in water. Then soak the dal in ¼  cup of water for 15-20 minutes

2. Once soaked, add a little salt (not much coz we will be adding in the poriyal as well) and cook them till done. First keep the flame in high till the water boils and then simmer and cook covered till done. The dal should not turn mushy. They should be cooked and retain their shape. It should take around 8-10 minutes for them to get cooked

3. Meanwhile clean and keep the greens (keerai). Remove old or wilted or yellow coloured leaves. The stem is edible too. If the stem is clean and tender use it as well

4. Rinse the greens (keerai) in water 2-3 times to remove the dirt and mud particles. Then drain the water and chop them finely and keep aside

5. Chop the onions and tomatoes and keep aside

6. In a pan, heat sesame oil. Use sesame oil for this stir fry. It is highly recommended. If you do not have it replace with sunflower or coconut oil

7. Splutter mustard


8. Add the chopped onions and slit green chillies and saute

9. The onions should turn translucent and slightly start to turn colour

10. Then add asafoetida and turmeric powder. give a quick saute

11. Add the chopped tomatoes and give a nice saute. Maybe you can close and cook for 2 minutes till the tomatoes slowly start to turn mushy


12. Add the chopped greens and give a nice stir. Cover and cook for 5-6 minute till the leaves wilt and get cooked. Check in between to see that they do not get stuck at the bottom and saute to avoid that


13. Once the greens are cooked, add the cooked tur dal (or moong dal) and give a gentle stir and leave it for a minute

14. Then add the grated coconut and give a quick and gentle stir

15. Switch off flame and serve with rice and a gravy of choice


Cheers,
Chitz