Showing posts with label Snacks. Show all posts

Friday, 14 October 2016

1 minute Vanilla Mug Cake | Easy Vanilla Mug Cake


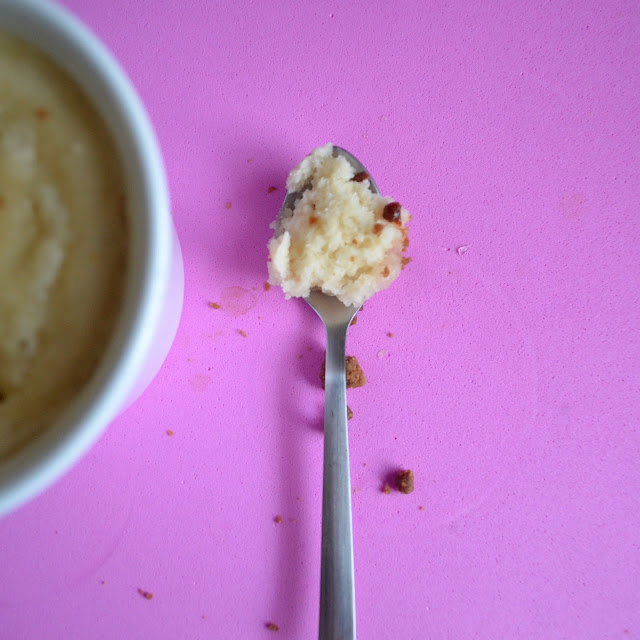
Today's recipe is very simple and very quick to make. As the name suggests, it is a 1 minute microwaved mug cake. As it is a 1 minute cake, the quantity is less. So if you are a cake person whose cravings are difficult to satiate, I guess you would have to microwave 3-4 cups at a go ;) But this is a quick fix recipe for those sudden hunger pangs or craving callings. Today was one such day when I wanted to have a cake. I know this mug cake is best with chocolate, but I didn't have cocoa powder in my pantry, hence had to feel contented with the vanilla version. 

The best part is that, it looks like DD fell in love with this cake. He was coming back from his encounter with his toys every now and then for a nibble. When I wiped the ramekin clean, he leaned over and took a nice look at it. Made sure, it was empty and then returned back to his toys :D :D I feel I have a cake lover son. That thought does make me very happy indeed :D So, this recipe is to many more cake testing and eating together with my DD :) :)


I Took: 

Preparation Time: 5 minutes

Cooking Time: 2 minutes


Serves : 1 person


I Used:


Dry Ingredients:

All purpose flour/Maida - 2 tbsp
Sugar - 1.5 tbsp
Baking powder - ¼ tsp
Salt - A pinch


Wet Ingredients:

Milk - 2 tbsp
Oil - ¾ tbsp
Vanilla Essence - 3-4 drops (As much as you prefer)

The Way:


 1. In a bowl, take all the dry ingredients and mix them together. 

2. Add the wet ingredients to it and mix them well. The sugar should dissolve completely.

3. Now transfer the contents to a microwave safe ramekin or mug or glass.

4. Set the oven to microwave setting at the highest temperature for 1 minute. I set to 900 W.

5. Bake them. Check after a minute if a tooth pick inserted comes out clean or is without moisture. If not keep for a few more seconds according to how much the cake is moist at that point.

Serve hot. 

Notes:

  • If you let them sit for long, they become hard or rubbery. If you need to serve it later, transfer to another cup or serving dish
  • I doubled the measurements and made, as my ramekin is bigger in size. Hence I microwaved for 2 minutes

Cheers,
Chitz

Thursday, 2 June 2016

Savory Semolina Cake | Savoury Rava Cake | Eggless Savory Rava Bread


So, here I am back with an easy recipe for all you lovely readers out there.. Am I going to be regular here from now on? I hope so.. So this is a very interesting recipe that can be served for breakfast or as a snack too ! I always have a soft spot for baked goodies & when I saw this interesting recipe with a twist at 'Erivum Puliyum', I decided I had to make it :) It is very easy except for the veggie chopping part. The rest is just whisk, whisk, whisk & bake !


Recipe Source: Here


I Took : 

Preparation Time : 15 minutes

Baking Time : 30 minutes


Makes : An 8 inch loaf


I Used:

Semolina  - 1 cup
Carrot  - 1 medium sized (finely chopped)
Beans - 6-8 no (finely chopped)
Ginger - 1 inch piece (finely chopped or grated)
Green Chilly - 3 nos (finely chopped)
Thick Yogurt - ½ cup 
Butter - 1 tbsp
Baking Soda - ½ tsp
Oil - 3 tbsp
Water - As required
Salt - As required
Coriander Leaves - 2 tbsp (finely chopped)

To Temper:

Mustard  - 1 tsp
Cumin Seeds - 1 tsp
Sesame  - 1 tsp


The Way:

  1. Preheat the oven to 180 degree C
  2. Combine together the semolina (rava), salt & yogurt. Now add the chopped carrot, chopped beans, chopped ginger, finely chopped green chillies, chopped coriander & mix well
  3. Heat oil in a pan. When it heats up, splutter the mustard. Then add the cumin seeds & sesame. Take care not to brown. Now add this tempering to the semolina batter & give it a mix
  4. Grease the baking pan with butter
  5. Add baking soda to the batter & give it a whisk
  6. Pour the batter into the baking pan & garnish the top with some sesame seeds
  7. Bake for 25-30 minutes or till done (A tooth pick inserted would come out clean)
Serve warm with chutney or ketchup & a smoothie of your choice :)

    Notes:

    1. Baking soda is for the bread to rise properly. So add it in the end just before putting it to bake in the oven
    2. You can add veggies of your choice which can be baked easily like peas, zucchini etc
    3. Do not use sour yogurt. It can compromise the taste

    Cheers,
    Chitz

    Monday, 8 February 2016

    Vanilla cupcake | Easy Vanilla cupcake (Eggless & Butterless)


    I do not want to start the post with yet another apology for being away ;) as it is just the beginning of another fabulous year & also I am in a happy happy mood to share with you all the arrival of our bundle of joy - Dhruv. He is nearing his 4th month now & so you would all be understanding my busy schedule & lack of time to concentrate on other affairs :D But many a times I had been wanting to visit this another baby of mine as well, but you see, Dhruv takes precedence :D :D


    I was planning to post this cupcake recipe on his 100th day as a celebration but was not able to. This cupcake stays close to my heart for another special reason as I craved for it the most during my pregnancy time. Weird or cute, you guys should say, but this muffin stays top on my list still ! It is super easy to make with quite a few calories loaded as it has no egg & no butter. And it is fluffy soft and moist and just melts in your mouth and you can relish it absolutely fine without any topping or frosting or icing. So I am sure you would want to try this out today eve itself with your coffee & do let me know how it turned out :) 


    I Took : 

    Preparation Time : 15 minutes

    Baking Time : 40 minutes


    Makes : 20-25 muffins


    I Used:

    All purpose flour/Maida - 1 ½ cups - 3 tbsp
    Corn flour - 3 tbsp
    Sugar - ¾ cup
    Baking powder - 1 tsp
    Baking Soda - ½ tsp
    Oil - ½ cup
    Curd - 1 cup
    Vanilla Essence - 1 tsp


    The Way:

    1. Pre-heat the oven to 180 degree C
    2. Keep the muffin tray ready with the muffin liners or if you want to bake it as a cake, grease a 6 or 7 inch pan with butter & dust it with a tsp of flour
    3. Sieve well the all purpose flour & corn flour in a bowl and ensure that they are evenly blended & mixed
    4. In another bowl, mix well sugar & curd. Now add baking powder & baking soda into the mixture & mix well and allow it to rest for 2-3 minutes
    5. Now to this frothy mixture add oil & vanilla essence & mix well
    6. And then add the sieved flour, one tbsp at a time, and whisk well
    7. Once all the flour is mixed, pour in 1-2 tbsps of the batter into the muffin liners (or the baking pan)
    8. Bake them for around 35-40 minutes or until a toothpick inserted comes out clean
    9. Allow them to cool for about 10 minutes & serve with ice-cream or chocolate syrup or any dressing of your choice

    Cheers,
    Chitz

    Saturday, 23 November 2013

    Kerala Mixture - My first Guest Post :)


    The first time experiences will always remain memorable & close to our heart, isn't it? I experienced that excitement when Rafee, the sweet tooth & sweet heart asked me to do a guest post for her wonderful space. I really like this segment at her space & used to look forward to the posts, which used to feature every Saturday before, but now due to her slightly busy schedule became biweekly. I got acquainted to a lot of fellow bloggers through this lovely event of hers :) So most of the times, the first times do makes us a little nervous, right? It was the same with me too. What to cook, how to present? Will Rafee's wide range of reader fans like it, especially after she left the choice of the dish to me :D After much debate (inside my head) and cooking two to three dishes I finally settled for the 'Kerala mixture'. 

    Rafee is an amazing person whom I befriended through the blogging world. I have to say person rather than blogger, coz blogging is just one aspect of her life that she handles amazingly in addition to the other roles of a daughter, wife, mother, home maker & a professional ! In spite of her busy schedule she does blog very frequently & never fails to express her two words of opinion & encouragement to what her fellows have cooked & presented ! And the highlight is she replies to every comment at her space. Now that's the heights of dedication & interaction for me. The intro for most of her posts would be her experiences or small quotes which would really make you understand that she is a warm human being who strives to be a better person with each passing day ! It's a pleasure to know you & be a fellow blogger, Rafee :) I am really glad that I could do this guest post for you & thank you for giving me this oppurtunity :)

    Do hop on to her space for the detailed recipe & pics :)


    Cheers,
    Chitz

    Wednesday, 18 September 2013

    Crouu-doughnuts | Kronuts - Baking Partner Challenge #14


     You know what is the latest sensation in the pastry or bakery world?? It's none other than the 'Cronut™' which is one of the most viral desserts of all time ! Developed by chef Dominique Ansel for Dominique Ansel Bakery in New York City & launched in May 2013, this dessert has fans all over the world & the imitation versions are being tried all over US & Australia. So what is this dessert actually? You can say in simple words that it is a hybrid of a croissant & donut, but let's listen to what the inventor says about the delicacy (from the Dominique Ansel Bakery website)


    Taking 2 months and more than 10 recipes, Chef Dominique Ansel’s creation is not to be mistaken as simply croissant dough that has been fried. Made with a laminated dough which has been likened to a croissant (but uses a proprietary recipe), the Cronut™ is first proofed and then fried in grapeseed oil at a specific temperature. Once cooked, each Cronut™ is flavored in three ways: 1. rolled in sugar; 2. filled with cream; and 3. topped with glaze. Cronuts™ are made fresh daily, and completely done in house. The entire process takes up to 3 days.


    So when Swathi decided to challenge us with making Kronuts this month, I was very excited. Since I could not get to eat this delicacy from any bakeries here, I wanted to make it at home & see how it tastes :) I must admit it is a long process & has a lot of work to do, but it was fun learning something new & getting to see the end result. I would never dare to say that I nailed it. There were a lot of hiccups like wet dough & oozy butter & separated layers while frying. But each failure taught me something new, thanks to the guidance of Swathi, Archana, Suja (whose notes on the method helped me) & my fellow bakers :) And I know that next time, I would definitely make a better one :) 


    So this is what I treated myself to, frying & eating kronuts when I turned a year older again yesterday ;) So let's see how it is made, do not get scared seeing the long steps & process & also do not omit reading any line, coz the tips & precautions are also listed along with the method :D Taste wise, they were great, crispy & flaky, but I did not use any filling or glaze to make them soft. And also I baked a few to see how it would turn out, but they were nowhere near the fried ones. They could not retain the shape & were falling apart & was also soft & tasted very doughy. So it is best to fry them to enjoy them :D


    Recipe Source: Bootleg Cronut

    I Took: 3 days/3-4 hours

    Makes: 16 kronuts


    I Used:


    For Dough
    All purpose flour - 510 gm | 3.75 cups
    Salt - 7 gm | 1 tsp
    Sugar - 100 gm | ½ cup
    Milk - 150 gm | ½ cup+2 tbsp
    Yeast - 2 ¼ tsp
    Eggs - 2 jumbo | 3 large
    Unsalted Butter - 50 gm | 3.5 tbsp

    For Butter Layer
    Butter - 295 gm | 1 ¼ cup+ ½ tbsp

    For Frying
    Canola Oil - 2-4 cups
    Water - 200 gm
    Cinnamon Sugar - 400 gm sugar + 100 gm cinnamon


    The Way:


    Day 1: Prep the dough
    1. Take out butter & eggs from the refrigerator half an hour before the dough preparation. This is to allow them to reach room temperature
    2. Prep-ing the yeast                                                                                                                                                                            Fresh Yeast  - Mix with milk (at room temperature) beforehand to activate the yeast                                                                    Active Yeast - Heat half milk to lukewarm (around 110F / 43C) & add yeast. Set aside for 5-7 minutes to proof
    3. Heat milk in microwave for about 30 seconds & add butter to it. This is for butter to melt easily. Keep aside
    4. Combine all the dry ingredients - flour, sugar, salt & instant yeast (if using) in a bowl of a stand mixer
    5. Add the butter-milk mixture to the dry ingredients. Add yeast (if not instant) & eggs
    6. Mix on low speed for 3 minutes or until everything is incorporated. Mix on high speed for another 8 minutes. If kneading by hand, as I did, knead well for about 10-15 minutes until you get a smooth shiny dough ! Do not over knead the dough
    7. Remove the dough & tuck under edges to form a ball. Grease a bowl with oil or cooking spray & place the dough in the bowl with seams down. Cut a cross across the top of the dough with a knife to help the dough relax
    8. Cover the bowl tightly with clear plastic wrap & make sure it is not in contact with the dough. Place the dough in a warm area & allow it to double in size, which would take about 60 minutes
    9. Once the dough has proofed to double, refrigerate it overnight

    Day 2: Incorporating butter to dough

    Prepping butter
    1. Cut the cold butter lengthwise into ½ inch thick slabs. Arrange the slabs on a piece of parchment/waxed paper to form a 5 or 6 inch square, cutting the butter crosswise as necessary to fit. Cover it with another piece of parchment paper
    2. Using a rolling pin, pound the butter with light even strokes. As the pieces begin to adhere, use more force
    3. Pound them until it's about a 4x6 inch rectangle. Then trim the edges & place the trimmings on top of the rectangle & pound again lightly. When done, place the butter in refrigerator for 2 hours
    4. Do not over work with butter. If the butter starts to leak, try to put it back in the refrigerator
    Laminating the dough
    1. Unwrap & place the dough on a lightly floured work surface. Roll into a 10 inch square. Brush excess flour off the dough
    2. Unwrap & place the butter at the centre of the rolled dough square
    3. Fold one flap of the dough over the butter, stretching it slightly that the flap just reaches the centre of the butter. Repeat the same with the 3 other flaps to form an envelope
    4. Press the edges together to completely seal the butter inside the dough
    First turn
    1. Lightly flour the top & bottom of the dough. With a rolling pin, firmly press the dough to elongate it slightly & then start rolling to lengthen the dough and keep the edges straight
    2. Now turn the dough so that the shorter end faces you. Roll again to expand the length of the dough. Make sure the dough does not stick to the work surface. Add flour if needed
    3. When the rolling yield you a rectangle of 21x9 inches, mark the rectangle into 3 equal columns. Fold the right third of the rectangle into the centre third. Fold the left third of the rectangle into the centre third like a business letter. This is the first turn
    Second Turn
    1. Try to do this right away after the first turn, but if the dough is too warm, wrap in film (aluminium foil) & place in refrigerator
    2. Repeat rolling just like the First Turn and make sure to lock the unsealed edges of the dough & roll over the dough to form a rectangular shape
    3. Again, as in first turn, mark the rectangle into 3 equal columns. Fold the right third of the rectangle into the centre third. Fold the left third of the rectangle into the centre third
    4. Marking the dough allows you to track your progress, and ensure that the orientation of the dough is correct when you remove it from the refrigerator
    5. Cover the dough in parchment paper & refrigerate for at least an hour
    Third Turn
    1. The dough will be hard, so gently pound the dough to warm the butter. If it is too cold the butter will separate and not spread as it should
    2. Repeat the previous steps, and turn again, marking the corner with three fingerprints
    3. Cover dough with parchment paper and plastic wrap and refrigerate for 1 hour
    Fourth Turn

    Make the final turn, repeating the steps from turns 1-3. Refrigerate overnight


    Day 3 - Kronuts frying day:

    Rolling out the dough

    1. Lightly dust a work surface with flour and roll out the dough to approximately the size of a sheet pan, ½ inch thick
    2. The dough should stay cold, without sticking to the surface. If it starts to stick, place in the refrigerator and roll again when cool
    3. Transfer to a sheet pan with parchment paper and chill before use
    Punching out Kronuts
    1. Prepare a sheet pan with parchment paper & greased with oil  
    2. Remove dough from fridge and take two ring moulds, with the larger mould around 3½ inch and inner around 1½ inch 
    3. Make sure that the dough is really cold while you punch out the holes. Or else the kronuts will not fry straight
    4. Transfer the punched kronuts to the sheet pan, leaving enough space between them to allow them to proof. Brush the top of the kronuts with water and set aside  
    5. Leave in a warm area until they have proofed which would take about 30 min
    6. Once it is proofed keep it in the refrigerator for 1 hour or in the freezer for 15 minutes before frying
    Frying the Kronuts
    1. Heat canola oil in a pot over medium temperature. about 3 inches high
    2. Once the oil is ready for deep frying, turn heat to low and place Kronuts in oil to fry (1-2 at a time to avoid overcrowding) 
    3. Turn and flip the kronuts often so that they brown evenly. Fry them in a low temperature otherwise outside become too dark soon and also the inside will not cook properly. Also if the temperature is very low, the layers would start to separate out in the oil & you would not get a full kronut
    4. Once golden brown throughout, remove from oil and strain them on paper towels
      Once it is no longer shiny transfer to a container with sugar and cinnamon and toss. Enjoy with some icing sugar dusting or with a glaze of your choice.

      Notes:

      • Eat them immediately as they have a short shelf life 
      • Do not refrigerate them as the humidity from the refrigerator will cause them to go stale and soggy 
      • If filled with cream or glazing, avoid serving them warm

      Cheers,
      Chitz

      Friday, 6 September 2013

      Ribbon Pakoda | Ola/Ottu Pakoda | Ribbon Murukku | Nada Thenkuzhal

      Ribbon shaped fritters prepared from besan flour


      Not many of you would need an intro to this lovely snack ! You might have always seen your mom or granny prepare this for Diwali or Janmashtami & just munching them as such is a delight on it's own :) It is also a very common snack/fritter in the South Indian bakeries. At times, on lazy days, we used to have them as an accompaniment to rasam sadam when cooking elaborate meals with poriyals & kootu were not in picture. Have you tried them that way? If not, do take a chance. You would love them. As a matter of fact, they taste awesome with sambar sadam too ! Very easy to make, just mix all the ingredients together & fry them in hot steaming oil. Voila, your fritters are ready. Now let's take a peep on the ingredients that needs to go in for the dough :)


      Recipe Source: Ma

      I Took: 40 minutes

      Serves: 3-4 cups


      I Used:

      Besan Flour - 1 cup
      Butter - 2 tsp
      Red Chilly powder - 1 tsp
      Black Sesame Seeds - 1 tsp
      Asafoetida - 1 tsp
      Oil - For deep frying
      Salt - As Needed

      The Way:

      1. In a bowl mix together the besan flour, butter (softened), red chilly powder, black sesame seeds, asafoetida & salt 
      2. Add water little by little & mix together to make a soft yet firm & non-sticky dough. It should not be watery & almost like the chapathi dough
      3. Meanwhile heat oil in a kadai to deep fry. Grease with oil the string hopper/idiyappam mould with the ribbon pakoda disc on. Fill the mould with the dough 
      4. Press the dough onto the hot oil in circular motion to form a single layer. Do not overcrowd as it will not ensure even & fast cooking
      5. Fry them until the sizzling (shh) sound ceases. Turn over to the other side & fry again till the sizzling ceases 
      6. Drain the excess oil onto a tissue paper & cool completely. Continue the same process with the remaining dough
      Store in airtight container and enjoy them over a cuppa chai !

      Notes:

      • If the sesame seeds are too big, then they might get stuck in the disc & you will not get the desired shape. If then, pulse them in the mixie before adding to the dough. This ensures that they are fine enough to get through the holes of the disc
      • If you like the pepper flavour you can add ½ tsp freshly ground pepper. Again make sure they are fine enough to get through the holes of the disc
      • Originally dalda is used in the preparation of this pakoda, but considering the side effects on health I used butter instead !
      Cheers,
      Chitz

      Thursday, 15 August 2013

      Chinese Almond Cookies - Baking Partner Challenge #13


      Here comes yet another beautiful challenge from the Baking Partners. This time it's cookies from around the world & I chose to go Chinese with these beautiful Almond cookies. I have baked Ameretti cookies (Italian) before, so I was sure that this would also be acceptable to our taste buds. And as I had expected this tasted crunchy & great with the lovely almond flavor. It's very easy to make & I found the method quite similar to the Indian flat bread 'Chapathi/Roti' :) Try this out as your yummy tea time snack !


      Recipe from here

      Makes: 8-12 cookies


      I Took: 

      Preparation Time: 30 minutes
      Refrigeration Time: 1 hour
      Baking Time: 20-25 minutes


      I Used:

      All purpose flour - ¾ cup + 1 tbsp
      Butter - 4 tbsp
      Sugar - ¼ cup
      Almond paste - 2 ½ tbsp
      Baking powder - ½ tsp
      Vanila Essence - ½ tsp
      Grated lemon zest - 1 tsp
      Salt - ¼ tsp
      Egg - 1 tbsp
      Beaten egg white - of 1 egg
      Almonds - 8-12 no


      The Way:

      1. In a large bowl sift together all purpose flour, baking powder & salt together. For even mixing sift for two or three times
      2. Beat the egg nicely & keep aside
      3. In another wide bowl cream the butter until pale yellow. You can use an electric mixer or whisk. I used whisk
      4. Add ¼ cup sugar, almond paste, lemon zest & amaretto (or vanilla essence) & mix until it is smooth & lump free
      5. Now add about one third of the beaten egg and mix well. Now gradually add the flour & mix well until everything is fully incorporated. Use hands instead of whisk while incorporating flour
      6. Transfer the dough into a parchment paper & refrigerate it for about an hour
      7. Preheat the oven to 175 degree C in conventional mode. Adjust the rack to the lower third of the oven. Line baking sheets with parchment paper
      8. Once the dough is chilled, prep your working surface with 1 tbsp of sugar. Roll the dough over the sugar and then make small balls out of it (like you do for Indian flatbread or chapathi)
      9. Flatten out the balls into cookie shapes of your desired diameter & thickness using your palm. Place them two inches apart on the prepared baking sheets
      10. Brush each cookie lightly with beaten egg white and press a whole or chopped almond into the center of each 
      11. Bake for 15- 20 minutes or until golden brown around the edges
      12. Remove the baked cookies from the oven and allow to cool  to room temperature before serving

      Notes:


      Almond paste is nothing but powdered almond. Grind around 15-20 almonds in a mixie to get the above mentioned almond paste

      Cheers,
      Chitz

      Friday, 26 July 2013

      Kerala Parippu Vada | Channa Dal Fritters | Lentil Fritters

      Fritters made from Channa Dal & Onions


      Come to the God's own country & it is difficult to leave the place without spotting this snack. This is one of the yummiest finger food that you can find in the 'chaya kadas' (Tea stall) in Kerala. Pair it up with a cuppa chai & that makes your eve on a rainy monsoon day :) And did you know that this combo of Parippu Vada & Kattan Chaya (Black Tea) was once the watchword or identity of the Communist comrades ! I guess it is the simplicity of the dish & the abundance that made it so. Again, strictly my views :D And one can never forget the train journeys in South India, especially Kerala & Tamil Nadu without hearing the 'Uzhunnu Vada/Parippu Vada' shoutings ;) 

      My mom seldom makes this one at home as it is Uzhunnu Vada that is popular at our abode, but my Mil is an expert in this. Give her 15 minutes (plus the soaking of the dal in the afternoon), she pulls up this yummy snack with hot steaming tea for us in the evening. And we are always ready to gobble this up in lesser time than she took to prepare it ;) So why don't we now see how to prepare this easy & popular snack?


      Recipe Source: Mil

      Makes: 25-30 medium sized fritters


      I Took: 

      Soaking Time: 2 hours
      Preparation Time: 15 minutes


      I Used:

      Channa Dal/Kadala Parippu - 2 cups
      Onions - 3 nos - medium sized 
      Green Chilly - 5 nos 
      Ginger - A 2 inch piece
      Curry leaves - 3-4 sprigs
      Oil - To Deep fry
      Salt - As Needed


      The Way:

      1. Rinse the channa dal in water 3-4 times. Soak it in water for 2-2.5 hours
      2. Chop the onion, green chilly, ginger & curry leaves finely
      3. After 2-2.5 hours, drain the water off the channa dal thoroughly. Use a colander if required & then pat dry the dal using a kitchen towel. Do not over soak the dal as it may increase the moisture content & may cause the vadas/fritters to break
      4. Now grind the soaked & dried dal coarsely in a mixie without water. Do NOT grind to a fine paste. Just pulse it 3 or 4 times. Add NO water at all as it may again increase the moisture content
      5. Add the chopped onion, green chilly, ginger, curry leaves & salt to the coarsely ground dal and mix well
      6. Heat oil in a kadai. When the oil is hot enough to fry the vadas, reduce the flame to medium high
      7. Make small gooseberry sized balls with the dal mix. Then flatten the balls using your palm. Hold the ball in one palm and press the other palm over the ball so that they get flattened 
      8. Take care not to break the balls. You may moisten your palm before flattening each ball. It is advisable to flatten the balls before adding to the oil, else they will break. Now deep fry the vadas until golden brown or till done
      Drain off the excess oil & serve hot.

      Cheers,
      Chitz