Showing posts with label Breakfast Recipes. Show all posts

Friday, 1 May 2020

Coconut Chutney | White Coconut Chutney | South Indian Thengai Chutney with Pottu Kadalai | Easy Side dish for Idly/Dosa/Uthappam/Pongal | Vella Cutney


This is one of the most versatile and easy chutney that you can ever make. You know why versatile, coz it can be paired with almost many of the South Indian tiffins/breakfast dishes like idly, dosa, uthappam, pongal, upma, vadai etc etc.. It is a simple, clean and yet another ready in a jiffy recipe :) Since it is a basic recipe I am tagging it under basics here :) Most of the households would have a variant of this chutney recipe yet some of the ingredients remain the core ;) Grind, taste, adjust and repeat.. That's how you roll when you are a beginner. After a few times you will get the hang of it. So let's see how this simple humble chutney is made..


Serves: 4 persons


I Took: 

Preparation Time: 10 minutes


I Used:


Grated Coconut - ½ cup
Green Chilly - 2 nos
Ginger - An inch piece
Fried Gram/Pottukadalai - 2 tbsp
Salt - As Needed
Water - As Needed

To Temper:

Oil (Coconut/Sunflower) - 2 tbsp
Mustard - ½ tsp
Curry Leaves - 2 sprigs


The Way:


1. Take the grated coconut and ginger in a mixer jar. Add little water (¼ cup) and grind them coarsely

2. Now add the green chilly, fried gram dal/pottu kadalai and salt and grind them nicely to a smooth (as smooth or coarse as you want) consistency


3. In a tadka pan, heat oil. Splutter mustard seeds

4. Then add the curry leaves. Switch off flame

5. Add the tadka to the chutney


Serve with idly, dosa, uthappam, pongal !


Notes:

  • Use freshly broken & scraped coconut. The taste really differs when you use even a day old (refrigerated) coconut
  • While you grate there will be some red or brown coloured scrapings as well. Avoid them for this chutney as it will affect the colour ;)
  • Avoid using old coconut and also kopra
  • Add water according to the consistency of the chutney that you need. I would suggest using less water while grinding. Add more if needed once you grind and transfer the chutney to a container
  • For runny chutney you can add more pottu kadalai but be cautious if you do not like the taste
  • Ginger is optional. Pottu kadalai is also optional. Add both or either one or none as per your liking
  • Adjust the chillies as per your taste. Quantity of ingredients given are guidelines and can be adjusted to suit personal tastes
  • You can use the green chillies which has become ripe and turned red in colour. They might slightly change the colour of the chutney but tastes yum
  • If the chutney becomes too runny, add more grated coconut and grind
  • While tempering can add a tsp of urad dal as well


Cheers,
Chitz

Saturday, 11 April 2020

Rava Upma | Upma recipe | How to make upma?


Upma is one of the easiest breakfast that can be made in a jiffy. If you ask me, that would be the fastest breakfast that I can make, not considering idly and podi. But for idly, I would go slightly overboard and make chutney and mostly sambar as well ;) So coming back to upma, many do not like upma. In fact I hated it as a kid. I must say that I started appreciating it more after getting married ;) Not coz it's easy to make. But because my mil makes some kickass upma which is neither dry nor gooey but the perfect consistency. The key is in finding the correct ratio of water required for the consistency that suits your liking. The rest is breeze. Experiment with that and I am sure you will reach there too soon :) The ratio I have mentioned here is for a more firm and fluffy upma. So let's see how to make it..


Serves: 2 persons


I Took: 

Preparation Time: 5 minutes

Cooking Time: 15 minutes


I Used:


Oil/Ghee - 1 tbsp
Mustard - 1 tsp
Urd Dal - 1 tsp
Curry Leaves - A sprig
Roasted Rava/Semolina - 1 cup
Onion - 1 no (medium sized - chopped)
Green Chilly
Asafoetida
-
-
2 nos 
¼ tsp
Water - 2 ¼ cups
Salt - As needed


The Way:

1. Take the rava/semolina in a kadai. Roast the rava on a low or medium flame for 3-4 minutes till they are crisp. Keep stirring else it will get burnt

2. Heat oil in a kadai/pan. Splutter mustard. When it splutters add the urd dal. Allow it to turn golden. Take care not to burn


3. Add curry leaves, chopped onions and green chilly and saute 

4. Add salt and asafoetida as well and saute till the onions slightly turn colour. I don't make them brown and just saute for 2-3 minutes as we like it that way


5. Now add water (refer notes) and check salt. It should taste salty. If not adjust salt. Allow the water to boil

6. Once it boils, reduce the flame and add the roasted rava little at a time and constantly stirring with your other hand. Keep the flame reduced, as the water can splutter 


7. The rava will absorb the water and become thick. Then close the pan with a lid and allow the rava to cook in low flame for about 5-6 minutes

8. Now open the lid and check. You can stir in between if needed or you are worried that it might stick to the bottom of the vessel


Garnish with little grated coconut or coriander leaves before you serve !

Notes:

  • Use ghee for a more yummy flavour and taste
  • You can also add fried cashews for a richer taste
  • I always use roasted rava/semolina as it makes my life easier! If you are using unroasted one, then as the first step roast the rava in a pan for 3-4 minutes in medium flame until you get a nice roasted flavour. Keep stirring else it will get burnt
  • We like our upma plain. If you want to add veggies like carrot, beans or peas, you can add them after sauteeing the onions and then proceed to the next step once the veggies get cooked
  • You can even add tomatoes for a tangy flavour
  • My mom adds some chopped ginger along with the onions, so if you like that flavour you can add them as well
  • The quantity of water mentioned here is for a fluffy upma. If you like more gooey one increase the quantity of water. Either ways make sure the rava is properly cooked. Low flame and covered cooking is the key for a properly cooked and fluffy upma !

Cheers,
Chitz

Friday, 21 June 2019

Mango Chia Seed Pudding | Chia Mango Pudding | Mango Chia Pudding Recipe


This is one dish that regularly makes it's appearance during summer. I love chia pudding and that too only with mangoes :D Last year when I made this and was trying to take pictures for the blog while Dhruv was sleeping. Just when I had the whole setup ready and clicked 2-3 pics, he woke up and came. And was not ready to part with the pudding. He was smirking and grinning that he sabotaged my set up and was happily having the pudding. Yes, my little one too loves this :) So this year I made it while he was away at school and clicked leisurely ;) And evening we both enjoyed having this.. It is best served chilled ! Usually it's quite sunny in Chennai. But day before yesterday when I clicked this it was quite gloomy. And yesterday it rained for about 10 minutes. This is the first rain of the year and it feels good too as there is a little relief from the scorching heat :)

Check out the other Mango recipes here if interested.. 


Makes: 1 cup


I Took: 

Preparation Time: 5 mins


I Used:


Mango - 2 sides of 1 big banganapalli
Chia - 3 tbsp
Milk (boiled & cooled) - 1 ½ cup
Honey (any sweetener) - 1 tbsp
Vanilla Essence - 1 tsp


The Way:


1. Take the chia seeds in a bowl. Add milk to it. Use milk that is boiled and cooled

2. Now add sweetener of choice. I added honey


3. Then add vanilla essence if using and mix well

4. Cover the bowl and leave it refrigerated for minimum 2 hours. Leave it overnight if possible


5. Next for assembling the pudding, peel a ripe mango and rinse it with water. Then cut into small bite sized cubes

6. In a serving glass, now layer the pudding with alternate layers of mango slices and the bloomed chia 

7. Garnish with pomegranate or cherry or nuts or raisins of your choice


Serve chilled !

Notes:


  • You can customize the pudding the way you want. You can layer it with mango puree instead of mango pieces
  • You can add a layer of rice flakes or granola to make it more healthy & wholesome
  • If the mangoes are sweet enough you wouldn't need any sweetener
  • You can also add in seeds like hemp, melon etc and nuts like almonds & dry fruits of choice
  • You can go for another fruits like strawberries or chikoo as well but personally I favour mangoes :)
Cheers,
Chitz

Tuesday, 21 May 2019

Red Coconut Chutney | Kerala Style Coconut Chutney with Shallots | Easy Kerala Style Coconut Chutney


An idly or dosa breakfast at my place usually means there will be a red chutney or white chutney to accompany it :) Both are coconut chutneys with the red one made with red chillies and the white one made with green chillies. Very easy to make if there is grated coconut at hand. Usually I grate the coconut the previous night or during weekends and refrigerate (You can even freeze them if you have more quantity) them. Morning first thing I take the grated coconut from fridge and keep outside. And while grinding I use slightly warm water so that it grinds easily without a slimy appearance (frozen grated coconut tends to make the chutney slimy, so better to use freshly grated ones) This makes life easier on busy mornings :) So today I will share how I make the red coconut chutney :) Other chutney recipes on the blog are Onion Tomato Kara Chutney, Ulli Sammanthi, Pudina Chutney (without coconut), Pudina Chutney with coconut, Pudina-Verkadalai Chutney


Serves: 3 persons


I Took: 

Preparation Time: 10 mins


I Used:


Grated Coconut - ½ cup
Red Chilly - 2-3 nos
Ginger (optional) - An inch piece
Shallots/Small Onions - 2-3 nos
Salt - As Needed
Water - As Needed

To Temper:


Coconut Oil - 2 tbsp
Mustard - ½ tsp
Curry Leaves - 2 sprigs


The Way:


1. Take the grated coconut, shallots, red chilly and ginger in a mixer jar along with required salt. Add little water (¼ cup)


2. Grind them nicely to a smooth (as smooth or coarse as you want) consistency


3. In a tadka pan, heat oil. Splutter mustard seeds

4. Then add the curry leaves. Switch off flame

5. Add the tadka to the chutney


Serve with idly, dosa, uthappam, pongal !


Notes:


  • Use freshly broken & scraped coconut. The taste really differs when you use even a day old (refrigerated) coconut
  • Avoid using old coconut and also kopra
  • Add water according to the consistency of the chutney that you need. I would suggest using less water while grinding. Add more if needed once you grind and transfer the chutney to a container
  • Ginger is optional
  • Adjust the chillies as per your taste. Quantity of ingredients given are guidelines and can be adjusted to suit personal tastes
  • If the chutney becomes too runny, add more grated coconut and grind

Cheers,

Chitz

Wednesday, 27 February 2019

Potato Ishtu | Easy Potato stew | Kerala Ishtu Recipe


So folks, I am back with yet another breakfast special recipe. Well, last time I posted how to prepare Idiyappam and so following that I am going to write how to make the Potato Stew or Ishtu, today, which is one of the commonly prepared side dish for Idiyappam at our place. It is unimaginably simple and sooper delicious and subtle and light on the tummy as well. The only prep work needed for the Ishtu is the coconut milk. If you have a tin of ready made milk or that instant powder to prepare coconut milk, then it's uber easy. 

But I always like to prepare coconut milk from scratch. I usually have grated coconut ready in my fridge if else I grate them and prepare fresh milk out of it. It smells and makes the dish extra special and fresh :) There is one more way of preparing stew which is my mom's way for me, that will have to wait for another day now. This is my mil's way of  making stew. In fact this ishtu is also a dish for our Onam Sadhya too. That time we make it a little less watery :) So let's see how to make this tasty and yummy side dish for Idiyappam.


Serves: 3 persons


I Took: 

Preparation Time: 10 minutes

Cooking Time: 15 minutes


I Used:


Onion - 2-3 medium sized (sliced)
Potato - 1 medium-big sized (cubed)
Green Chilly - 2 nos - slit
Ginger - An inch piece - sliced
Coconut Milk - 1 cup (from half a medium sized coconut)
Curry Leaves - 2 sprig
Coconut Oil - 1 tbsp
Salt - As Needed
Water - ½ cup


The Way:


1. Slice the onions into thin slices. Peel the potatoes and cut them into small cubes (size as per your preference). I make them into small cubes and once cooked mash them well

2. Slit the green chillies. Slice the ginger into thin strips (Alternately you can chop the ginger finely as well)

3. Take all of them - sliced onions, cubed potatoes, slit green chilly and sliced ginger in a pressure cooker or pan. Add salt and little water, around ½ cup

4. Pressure cook them till done. I keep for 2 whistles in high and 3-4 in sim 

5. Adding more water while cooking can dilute the stew. If you fear that the stew will get burnt at the bottom while cooking then add little more water. Once cooked and the pressure is released, open the cooker and cook on sim to allow the water to evaporate. This step is completely optional and is required only if you add more water

6. Mash the potatoes a bit. If you like them whole then don't mash. While mashing the potatoes, chances are the green chillies might also get mashed. This can increase the heat of the stew. If you do not prefer then remove the chillies before mashing


7. Keep the flame on simmer. Add the thick coconut milk (If you are making the isthu for sadhya then add ½ or ¾ cup of coconut milk as you would need the ishtu to be more thicker) and give a gentle stir. Do not keep on flame for long. A minute or two is more than sufficient. Switch off the flame

8. Add the curry leaves and drizzle the coconut oil on top. Transfer to a serving bowl and serve with idiyappams or appams


Notes


  • If you like you can add carrots too along with potato. Cut them in the same size as that of the potato and add along with the potatoes


Cheers,
Chitz

Thursday, 7 February 2019

Idiyappam | Nool Puttu | Sevai | How to make Kerala Idiyappam with rice flour | String Hoppers Recipe


Who doesn't love idiyappam? Well I know some folks who are not a great fan but setting them aside, many of you would love eating idiyappam right? For those who are not very aware of what it is, is a string hopper made from rice flour. Rice flour is made into a dough using hot water and then the dough is pressed into string hoppers and steamed. It is a very healthy and light on the tummy dish that can be had as a breakfast, dinner or snack. 

It pairs beautifully with many side dishes like Stew, Potato stew, Veg Kurma, Kadala Curry, Egg Curry, Chicken Curry, Chicken Stew, Mutton Stew.. And it can be had with simple sweetened (with sugar or jaggery) coconut milk or just sweetened milk. Kids love that combo. It can even be used as a base and made into other snacks like Masala Idiyappam, Sweet Sevai, Lemon Sevai or Tomato Sevai. While some find it a tedious process to make idiyappams, what I personally have experienced is, if there is some roasted rice flour handy, it can make a yummy and tasty breakfast within 15-20 minutes :) And there are some tips and tricks that I have learnt over the years for a fluffy and soft idiyappam which I am sharing below with you guys :)


What kind of rice flour should be used?

I always use plain rice flour for making idiyappams. Either roasted or plain. If it is not roasted, I roast it for a few minutes and then add water (boiling hot). If using roasted flour, then I do not roast it again but add hot water that has been heated to a rolling boil. I generally do not use store bought idiyappam flour but my mil uses it and it gives good results too. Some people use puttu flour to make idiyappam. If you have access to good quality rice flour or puttu or idiyappam flour, use that. Do not use old rice flour as it compromises the taste of the idiyappam

How much water to use?

I generally need around 1.3 cups of hot water for 1 cup of rice flour. It again depends on the quality of the rice flour. It takes around 1.25 to 1.5 cups of hot water for 1 cup of rice flour. Use hot water as it makes the dough smooth and soft. This is the key to soft idiyappams. Finally use your hands and knead to a smooth lump free dough. Also some use a mix of water and coconut milk (thick one) in an approximate ratio of 1:(0.3) to make softer idiyappams. I have not tried yet though :) coz making a smooth and soft dough always helps me in making soft idiyappams. Feel free to try adding coconut milk if you need. 

What makes the idiyappam hard?

1. Lesser water in the dough can make your idiyappam hard
So after using a spatula to mix the hot water onto the rice flour, use your hands and knead the dough to a smooth and soft texture. Any lumps should be removed. Feel the dough and you will know the difference. It should be as smooth as a baby bum :D 

2. If you over roast the flour, it can make the idiyappam hard or brittle 
Roast the flour on medium flame till it is hot and it starts to turn yellow at the bottom of the pan. The flour should turn from it's smooth consistency to a free flow consistency while you roast.

3. Keeping the dough open can make it dry and hence the idiyappam too
If you make a big batch of dough, keep the remaining dough (while you wait for the first batch to get steamed on the idly cooker) covered with a wet cloth and place it in a covered vessel. If you keep it open it will loose it's moisture and turn hard. Also use the entire batch immediately. I would not recommend to refrigerate the dough or use it later. 

4. Do not steam for more than 5-6 minutes
The rice flour would already have cooked almost half when you add hot water, so do not steam for a long time.It turns the idiyappam hard

So I believe I have covered and answered most of your queries. So let's see in detail how to make some soft and fluffy idiyappams with step by step pics. If you still have more questions feel free to drop a comment below or write to me :)


Makes: 12 nos


I Took: 

Preparation Time: 15 minutes

Cooking Time: 6 minutes


I Used:


Rice Flour/Idiyappam Flour - 1 cup
Salt - As Needed
Hot Water - 1.25 - 1.5 cups
Oil - 1-2 tbsp


The Way:


1. Take 1 cup rice flour in a kadai/pan. Add salt and mix. Heat the kadai on a low flame. If the rice flour that you have at hand is roasted, then ignore till step 4

2. Roast the rice flour for about 4-5 minutes on this low flame, stirring as frequently as possible to ensure that it doesn't get burnt at the bottom

3. Take care not to brown the flour. It should just start to turn yellow at the bottom of the kadai and the flour should become very hot to touch

4. Do not over roast as the flour as the idiyappam will become brittle. If the rice flour that you have at hand is roasted, then ignore the above steps


5. While roasting the flour, boil 1.5 - 2 cups water in a saucepan. When it starts boiling switch off the flame

6. Once the rice flour is roasted, add the hot water little by little and mix well using a ladle or spoon. You will need somewhere between 1.25 to 1.5 cups of water for 1 cup of rice flour

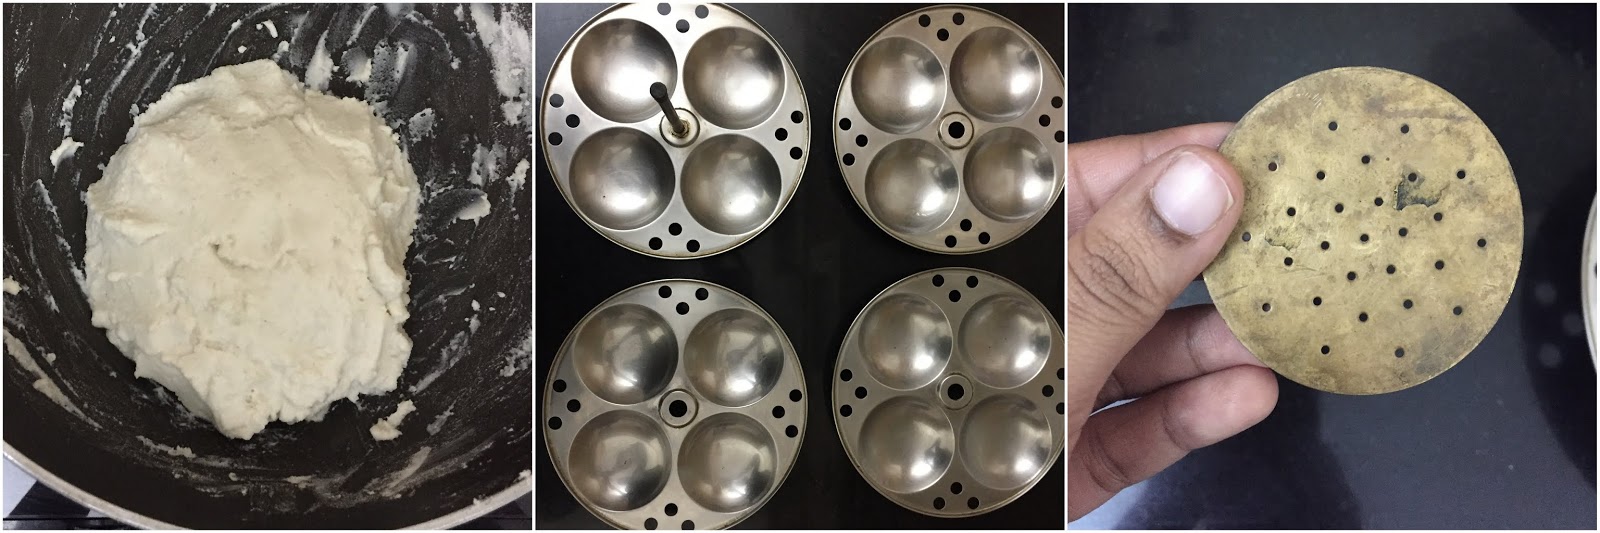
7. Keep mixing using the spoon. When the heat becomes bearable, use your hands and knead gently to a smooth and soft dough. The dough should still be hot when you knead


8. If the dough looks dry, then add few drops of water and knead. If it is sticky then add few tablespoons of rice flour and knead

9. Once the dough is ready, take the idly moulds/plates and grease each mould with little oil and keep aside. If you prefer add little (1 tsp or more as per your liking) grated coconut into each moulds. In the step by step pics I have not added grated coconut but in the final pics idiyappam I have done that

10. You need an idiyappam maker to make this. It is a cylindrical shaped apparatus with a twister handle at the top end and perforated disc at the bottom end. The perforated disc comes in various shapes and sizes. If you choose a disc with smaller holes the idiyappam will be more thin


11. Now grease the idiyappam maker with little oil (inside the cylinder and on the perforated disc) if preferred. Divide the prepared dough into 2-3 portions and make a log with one portion and place it in the idiyappam maker. Cover the pan that contains the rest of the dough while you press the idiyappam using the first portion, else the dough will turn dry


12. Gently press (or turn the handle, depends on the type of the idiyappam maker that you have) the idiyappam maker and allow the dough to fall into concentric round circles onto the idly mould

13. I make 3-4 rounds of the dough in one mould. Make sure that the dough does not rise too high in one mould and touch the bottom of the idly plate that is placed on top. So eyeball the amount of dough to be pressed onto a mould based on that

14. In a similar manner press the dough onto the remaining idly moulds as well. Here in the below pic, in the final plate I have pressed the remaining flour all over the idly plate (as I didn't have enough dough to make another batch and wanted to do in one go) Hence it looks different


15. The dough has to be hot while pressing. So immediately after roasting and adding water and making the dough, press it onto the idly plates. Do not allow to rest the dough

16. In a pressure cooker or pan (in which you usually make idly), take 2 cups of water. Place the prepped idly stand into the cooker and switch on the flame

17. Allow the idiyappam to steam for 5-6 minutes in high flame. Do not use the weight if steaming in cooker. Then switch off and allow the steam to be released (takes 1-2 minutes)


18. Then remove the idly stand from the cooker, remove the idiyappams onto the plate or a casserole if serving later

Serve warm with sweetened Coconut Milk or sweetened Milk or Stew or Potato stew or or Veg Kurma or Kadala Curry or Egg Curry or Chicken Curry or Chicken Stew or Mutton Stew (The list is endless ;)) !

Cheers,
Chitz