Showing posts with label Mango. Show all posts

Monday, 8 July 2019

Avakkai Pickle| Avakkai Mango Urugai Recipe | Andhra Avakaya Pachadi | Andhra Cut Mango Pickle


This recipe brings back tons of childhood memories. Almost everyone would beam with pride over the statement 'My mom makes the best comfort food and my grandma makes the best pickle'. And I'm no different. Even now I slurp over the mere thought of my grandma's (lost her 10 years ago) Avakai pickle. She used to make varieties of pickle like grated mango, cut mango, tomato and garlic during summer. There would also be vadams (that too variety flavoured ones like tomato, onion etc) and dried mango etc. 

My favourite of the lot used to be pickles and that too this avakai recipe. Unfortunately my mom didn't have the exact recipe to this pickle, so I had to resort to other blogs and finally found a close match to the taste of my grandma's pickle to Swasthi's recipe :) Now I too make this every year and Deeps too is a die hard fan of this pickle now :) My maternal grandma does not add garlic in this pickle but my paternal does. Me and my mom we both love to nibble to that garlic so I add them in my pickle too. The measurements mentioned here has never failed me, so I always stick to this one to the dot. If you haven't tried making this pickle at home do try once coz it's that simple and it will make you prepare at least one jar every summer :)


Makes: A 500 gm bottle


I Took: 

Preparation Time: 30 mins


I Used:


Cut Raw Mango pieces - 1 - 1½ cup 
Oil - ½ cup (+ ¼ cup or so as needed)
Mustard powder - ¼ cup
Fenugreek powder - ½ tsp
Red Chilly powder - ¼ cup (I use Kashmiri chilli powder)
Salt - ¼ cup
Garlic -
 cup


The Way:


1. Heat a kadai. Add the mustard seeds and methi seeds (I take slightly less than ¼ cup of mustard seeds and ¼ tsp methi seeds to roast and grind. If you have the individual powder handy then skip this step) to them and dry roast on a low flame for 2-3 minutes till they turn warm. Switch off the flame and spread the mustard seeds on a plate and allow them to cool. Once cooled, grind them to a fine powder in a mixer/blender

2. Wash the mangoes with water and soak them in water for sometime (30-60 minutes) so that the dirt on them is removed. Then remove them from water and pat them dry using a kitchen towel and allow them to dry completely by spreading on a large piece of cloth. They should be completely moisture free and dry for the pickle to have a larger shelf life


3. The vessels, knife, cutting board and the area that you use for the pickle preparation - cutting mangoes and preparing pickle should also be dry and clean and completely devoid of moisture

4. Trim the edge of the mango where you have the stalk. Then cut each mango into half (lengthwise) keeping the pit (the hard shell at the centre of the mango that encloses the seed) intact. Use a really sharp knife and cut them with caution. If you feel that you are not getting a grip on the mango then use a cotton cloth or towel and wrap it around the mango and hold

5. Remove the seeds if any and keep the pit intact. If the pit gets separated then those mangoes/mango pieces are not used for the pickle as it changes the taste of the pickle by becoming soggy


6. Now after removing the seeds, you can see a thin seed covering on the pit that can be removed using a spoon or knife. I gently use a knife and remove that seed cover as well


7. Now cut each mango halves into 3-4 pieces


8. . And again cut each of those pieces to 3-4 pieces. Each piece have to be around 2-3 inches in length. Make sure that each piece has the pit/shell attached to them as well


9. Measure and keep the mango pieces in a plate. A medium sized mango yields about 1 cup of mango pieces cut as described above


10. Now peel the garlic cloves and keep aside


11. Now take the mustard and fenugreek (methi) powder, red chilly powder, garlic and salt in a bowl. Mix them well


12. In another bowl, measure and keep ¼ cup of the gingelly oil


13. Now take the mango pieces using a spoon/slotted spoon and dunk them in the oil. Then take them from the oil and add them to the spice mix. Coat them well with the spice mix and then add them to a bharani or the glass bottle where you intend to preserve the pickle


14. Repeat the above step until the entire mango pieces are pickled. If you run short of oil, then add the remaining ¼ cup into the bowl and continue pickling


15. At the end, if there is any oil or spice mix remaining, then add them to the pickle


16. Cover the bharani/glass bottle with a lid. If needed you can use a extra covering of cotton cloth to tie it up


17. Keep it in a dry shelf for 3 days. After that open the lid and mix it up with a wooden spoon or laddle. Check if salt is sufficient. If not add more. Wait till next day to see if there is enough oil to cover the pickle. If not add a little more to cover it


After 3 days, the pickle is ready to eat. You can keep it in a dry place and use as needed. It stays good for an year without refrigeration


Notes:

  • If you are using 1 cup of mango pieces, the yield of the gravy will be rich and more. But if you do not want more gravy then use 1 ½ cup of mango pieces for the remaining quantity of ingredients mentioned
  • Do not go stingy on the oil or the salt, as they are the ingredients that preserve the pickle and give it a long shelf life
  • Always use clean, dry spoons to take for the pickles. If you have made a large batch then I strongly suggest to use a small bottle for regular use. Opening the pickle frequently diminishes the flavour and quality of the pickle
Cheers,
Chitz

Friday, 21 June 2019

Mango Chia Seed Pudding | Chia Mango Pudding | Mango Chia Pudding Recipe


This is one dish that regularly makes it's appearance during summer. I love chia pudding and that too only with mangoes :D Last year when I made this and was trying to take pictures for the blog while Dhruv was sleeping. Just when I had the whole setup ready and clicked 2-3 pics, he woke up and came. And was not ready to part with the pudding. He was smirking and grinning that he sabotaged my set up and was happily having the pudding. Yes, my little one too loves this :) So this year I made it while he was away at school and clicked leisurely ;) And evening we both enjoyed having this.. It is best served chilled ! Usually it's quite sunny in Chennai. But day before yesterday when I clicked this it was quite gloomy. And yesterday it rained for about 10 minutes. This is the first rain of the year and it feels good too as there is a little relief from the scorching heat :)

Check out the other Mango recipes here if interested.. 


Makes: 1 cup


I Took: 

Preparation Time: 5 mins


I Used:


Mango - 2 sides of 1 big banganapalli
Chia - 3 tbsp
Milk (boiled & cooled) - 1 ½ cup
Honey (any sweetener) - 1 tbsp
Vanilla Essence - 1 tsp


The Way:


1. Take the chia seeds in a bowl. Add milk to it. Use milk that is boiled and cooled

2. Now add sweetener of choice. I added honey


3. Then add vanilla essence if using and mix well

4. Cover the bowl and leave it refrigerated for minimum 2 hours. Leave it overnight if possible


5. Next for assembling the pudding, peel a ripe mango and rinse it with water. Then cut into small bite sized cubes

6. In a serving glass, now layer the pudding with alternate layers of mango slices and the bloomed chia 

7. Garnish with pomegranate or cherry or nuts or raisins of your choice


Serve chilled !

Notes:


  • You can customize the pudding the way you want. You can layer it with mango puree instead of mango pieces
  • You can add a layer of rice flakes or granola to make it more healthy & wholesome
  • If the mangoes are sweet enough you wouldn't need any sweetener
  • You can also add in seeds like hemp, melon etc and nuts like almonds & dry fruits of choice
  • You can go for another fruits like strawberries or chikoo as well but personally I favour mangoes :)
Cheers,
Chitz

Friday, 14 June 2019

Raw Mango Pachadi | Pacha Maanga Pachadi | Mangai Pachadi | Mamadikaya Pachadi


This is a dish with a lot of emotions attached to it.  This was one of my grandfather's favourite dish. This is my mom's favourite. And now it's mine too.. Earlier I was not a great fan of this. But after a point, I started relishing this relish. And what happened was I never used to get it right. So I have made this a couple of times and clicked a couple of times over a couple of years but somehow I was not satisfied. 

This year when my mom was home, I made her do this and after that I made it again a couple of times and it was tasting perfect each time. Just like that childhood days taste I have in my senses :) And this time I jotted down the measurements too and so it made it's way to the blog now. Sometimes (Many a times) the simplest of the dishes are the ones that take time to master than the complex ones. At least for me ;) This dish can be had like you have the pickle, as a side dish/relish for rice. Or if you are like me, can have it as such too :D

Makes: 1 cup


I Took: 

Preparation Time: 5 mins

Cooking Time: 20 mins


I Used:


Raw Mango - 1 medium sized (A heaped ½ cup)
Red Chilly Powder - 1 tsp
Turmeric Powder - ¼ tsp
Salt
Water
-
-
As Needed
¼ cup
Jaggery - 2-3 tbsp
Oil - 2 tsp
Mustard  - ½ tsp
Red Chilly   - 1-2 nos
Curry Leaves - 2 sprigs


The Way:


1. Trim the edges and peel the skin of the mango. Wash it well. The area near the stalk may have milk in it. So wash well else you will get a bitter taste

2. Chop the mango to small pieces (around ¼ inch pieces)

3. Take the chopped mangoes along with the red chilly powder, turmeric powder and salt in a kadai/pan. Add water and mix well


4. Keep the kadai on flame. When it comes to a boil, simmer the flame and  close the kadai with a lid and allow the mango pieces to get cooked. It will take around 5-7 minutes

5. Check once in a while to see that the water is not dried and the mango pieces doesn't get stuck at the bottom of the kadai

6. Once cooked you can see that much of the water has evaporated and you have a thick mix. Now add the jaggery granules to it. I use organic jaggery granules. So added as such

7. If you are using normal jaggery, scrape the jaggery and take them in a separate vessel. Add little water to it and heat it over flame. Once they dissolve switch off the flame and allow to cool. Then strain them using a strainer to remove any impurities in the jaggery and then add it to the pachadi


8. Once you add jaggery, it will release some water. Keep mixing over low flame for 2-3 minutes. The mix will come together. Switch off the flame then

9. In another tadka pan, heat oil. Splutter mustard


10.Add broken red chilly and curry leaves

11. Add this tadka to the pachadi. Mix well and serve


Notes:

  • Quantity of the red Chilly powder and jaggery mentioned here are that which I used for a moderately sour mango. Adjust them according to the mango that you use 
  • Use raw mangoes for making this pachadi. My mom says that the best ones for making this pachadi are the ones that are starting to turn ripe. The ones which are firm like raw mango but have a mild yellow colour to it
  • Adding tadka is optional. If you do not like, you can skip it

Cheers,
Chitz

Wednesday, 12 June 2019

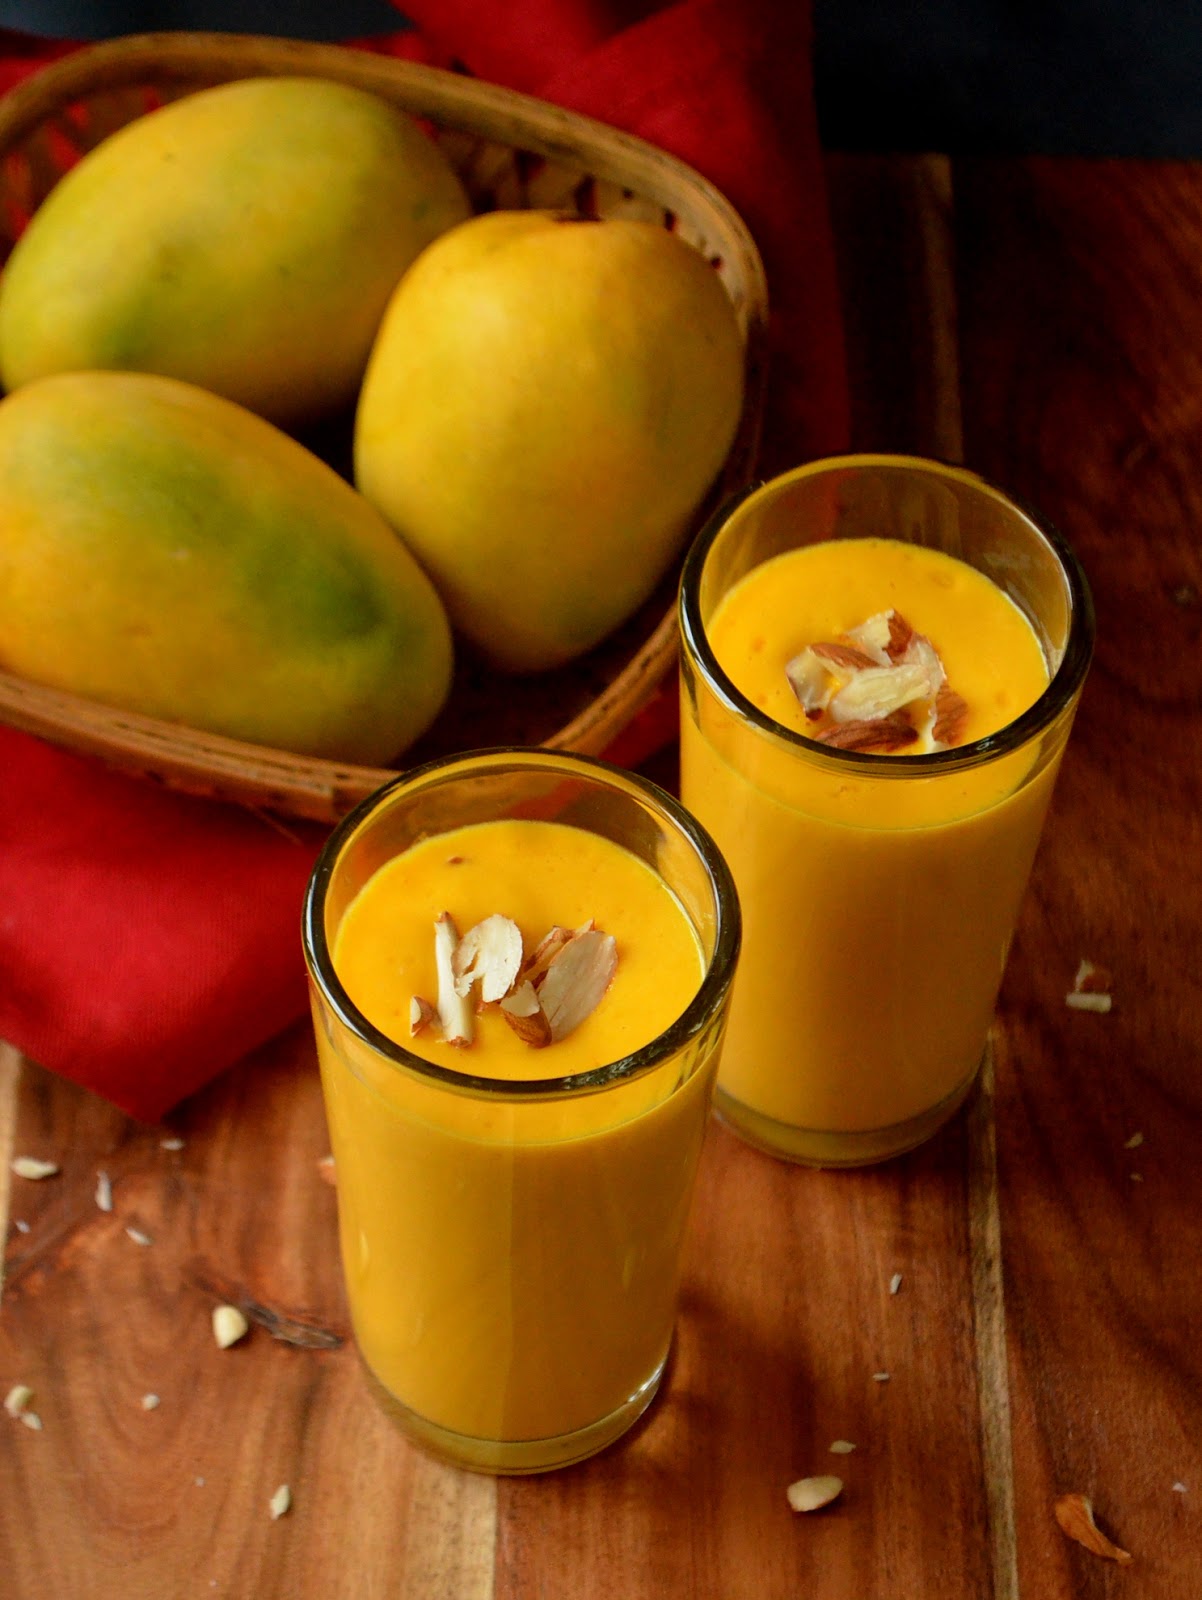
Mango Milkshake Recipe | How to make fresh Mango Milkshake at home?


Come summer, mango milkshakes have to be made.. Right? Yes, for us it is like "What is summer without a Mango Milkshake?' I would love to make some popsicles too but this year we are cutting low on sugar and some carbs too, so I guess the popsicles have to wait for another year maybe :( This milkshake can be tailored in many ways to suit our cravings and needs. You can make it rich by adding a pinch of saffron. You can make it healthy by skipping the sweetener. You can make it vegan by adding almond or coconut milk instead of the normal dairy milk. Or maybe add 2 scoops of ice cream instead of one ;) Choose as you may want to, but if the mangoes are reasonably sweet, then any variant of the shake is great and makes you feel  refreshed :) I generally make the shake with Alphonso (for it's bright colour :D) or Banganapally mangoes but you can choose any pulpy and reasonably sweet variety of mango for the shake..


Makes: 2 glasses


I Took: 

Preparation Time: 10 mins


I Used:


Alphonso Mango - 2 medium sized ones
Milk  - 1-1½ cup (boiled, cooled & refrigerated)
Sugar/Jaggery/Sweetner (optional) - 1-2 tbsp (As needed)
Ice cream (optional) - 1 scoop
Saffron/Kesar (optional)
Cardamom powder (optional)
-
-
A pinch
¼ tsp
Nuts (optional) - 2-3 tbsp


The Way:


1. Scrape the skin of the mango and trim the stalk off. Rinse it well in water. While trimming the stalk some milk can ooze out of the mango and it gives a weird taste if not rinsed properly

2. Cut the mango into small chunks and take them in a blender

3. Add milk to it and blend well


4. Now open the blender and taste the milkshake. If needed add sugar, kesar and ice cream and then give a final blend

5. Pour into tall glasses and serve cold. You can garnish with chopped nuts if needed


Notes:

  • I use Alphonso (or Banganapalli) mangoes for it's colour and taste. It gives a deep yellow colour and the shake feels like store bought :) You can use any ripe, pulpy, sweet and fibreless mangoes of your choice for making the shake
  • For a thick milkshake use less milk for blending. Also keeping the mango/mango pieces in fridge also helps
  • If using ice cream, use vanilla or mango flavour so that the taste is not compromised much
  • Use ice cubes while blending for chilled shake. It can make the shake a little runny. Instead use chilled milk and mango for making shake and serve the shake with ice cubes added in the glass
  • You can blend in the nuts or use for garnishing. Sometimes I like to blend in the nuts when I skip adding extra sweetner. Then it feels like having an extra crunch and I do not feel that I have skipped the sweetner (At times it is for satisfying the mind too ;))
Cheers,
Chitz


Friday, 22 June 2018

Mango Mastani | Pune's Mango Mastani | How to make Mango Mastani at home


I had been wanting to taste this mango mastani for quite a while after coming to Pune but never got a chance. This year after seeing so many posts from dear blogger friends and how they were describing it to be a Pune speciality, I so wanted to have it. So as many would recommend, I too went to a nearby outlet of 'Sujata Mastani' to have it. But was so diasppointed when what I got was a thin runny and over sweet milkshake. No ice cream and no toppings. I am sure that I was at the wrong place at the wrong time. If I had been to an outlet in the Pune city I would not have been disappointed. Also I later came to know that for toppings you need to order special mastani. 

Anyways as I had no plans to travel to the city during the summer, I decided to make my own mastani. It is so easy to put up and such a treat in the summer when mangoes are plenty. So I made it one fine Sunday afternoon, and bohoo the hubby was very delighted to have it after his afternoon nap. And it looks so pretty too that you will think twice before having them ;) It is said that Mastani, the beautiful Muslim princess who stole the Maratha Peshwa ruler Bajirao's heart is the inspiration behind the name of this drink. Mastani is said to be one of the most beautiful and elegant lady in Indian history. And hence this beautiful drink is also named so after the beautiful Princess warrior. 

And I also read here that, initially when this drink was served people used to remark 'mast' (awesome in Hindi) and hence this drink was named Mastani. If you are in Pune and would want to have this, try at Sujata Mastani or Gujjar Cold Drink. I have not personally had them here but have read rave reviews about them. Also have heard that the Custard Apple Mastani too tastes awesome. So now shall we see how to make them at home, if you are not coming by Pune anytime soon :) I know mangoes are sill available, so grab them and make some Mastani before they disappear from the market !


Preparation Time : 10 minutes

Cooking Time : 30 minutes


Serves : 3-4 persons


I Used:


Mango - 2 cups chopped
Sugar - 1 tbsp
Milk - 1 cup (boiled, cooled and chilled)
Ice cream  - 2-3 scoops
Almonds - 1 tbsp (slivered)
Pista - 1 tbsp (sliced)
Tutti frutti - 1 tbsp
Glazed cherry - 2-3 nos (cut into 2)
Mango cubes - few for garnish


The Way:


1. Peel and chop the mangoes roughly. Take them in a blender. Add sugar and give a quick blend. Now add milk (boiled, cooled and chilled) and blend to a smooth puree


2. Pour this thick milkshake into a tall serving glass

3. Add to it a large scoop of ice cream 

4. Top it with tutti frutti, slivered almonds, sliced pistachos, glazed cherry and some mango chunks (if needed)


5. They taste great when chilled. So I keep the mangoes and milk in fridge before making them. Or you can add some ice cubes while making the mango puree

Notes:

  • I used a large banganapalli mango to make this. Alphonso would taste even better
  • I used vanilla flavour ice cream. You can use any flavour like mango or pista of your choice
  • Toppings are purely your choice. I use the ones I have available at that time
  • You can even use canned mangoes to make this
  • Serve it immediately else the ice cream would melt
  • Add sugar (or skip) as per your preference
  • Do not add water while pureeing the mango. The milkshake should be thick and creamy
Cheers,
Chitz
a

Wednesday, 28 June 2017

Mambazha Pulissery | Mambazha Kaalan | Onam Sadhya Recipe Mambazha Kalan

Ripe Mangoes in Coconut sauce and Curd


I know that summer is gone and that the stock of mangoes is also gone along with that but what to do.. My laptop got some problems and I was not able to post the recipes in my draft. Now also the issue is not completely resolved, it's not connecting to the Wi-fi. But somehow got hold of a LAN cable and am working with that ! So what's the recipe today? It's a favorite of Deeps and is also a Sadhya recipe 'Kaalan' or Mambazha Pulisseri. 

It tastes THE best when made with the authentic naatu/naadan maanga (native variety of mango) with the juicy sweet pulp of the over ripe mangoes providing just the needed sweetness to the dish and the curd working on the sourness part. If you get hold of those variety of mangoes, then there should be nothing else holding you back from making this dish ! If you cannot find such mangoes but are so tempted to have this dish, then also don't fret.. try them with the normal ripe mangoes but if they are not sweet enough compensate with some jaggery or sugar. The taste will change but still you can enjoy them when you are very tempted :) 


Other recipes with Mango:


Other Sadhya recipes:

Recipe Source: Amma

Serves: 3-4 persons


I Took: 

Preparation Time: 10 minutes

Cooking Time: 30 minutes


I Used:


Naadan Maanga/Ripe Mango  - 2 nos
Red Chilly powder - ½ tsp
Turmeric Powder - ¼ tsp
Salt - As needed
Jaggery - 1 tbsp (acc to the sweetness)
Curd - 1 cup

To Grind:
Coconut - ¼ cup
Green Chilly - 2 nos
Cumin seed - ½ tsp

To Temper:

Coconut Oil - 1 tbsp
Mustard seeds - ¼ tsp
Red Chilly - 2 nos - broken
Curry leaves - A sprig


The Way:


1. Use ripe mangoes, preferably the nadan (native) ones which are smaller in size. These kind bring out the best pulissery. If you cannot find hold of some you can use the normal ripe ones. If they are bigger in size, rather than using the whole mango, cut into small bite sized pieces and go about with the dish

2. Peel the skin of the mangoes. In a pan or kadai, take the mangoes and add the turmeric powder, red chilly powder, salt and jaggery. Use jaggery only if the mango is not sweet enough. Adjust the quantity of the jaggery according to the sweetness of the mango

3. Add little water (around 1 - 1.5 cups, enough for the mangoes to boil) and cook the mangoes over low-medium flame with the pan covered. If the mangoes are very ripe and juicy then add less water as the pulp of the mangoes will be sufficient


4. In the meantime, grind together coconut, cumin seeds and green chilly (do not use water. If it 
is difficult to grind, use very little water) into a smooth paste

5. Keep an eye on the mangoes to make sure that they don't get burnt. Once the mangoes are cooked and the gravy reaches your desired consistency (the gravy tends to thicken upon cooling, so decide the consistency accordingly), add the ground coconut paste and stir. Allow it to boil for another 2 minutes and not more


6. Now add the whisked curd (can use the mixie to beat the curd) and give a nice stir. Switch off the flame immediately after


7. In a tadka pan, heat the coconut oil. Splutter mustard. The add fenugreek seeds, red chilly and curry leaves. Add the tadka to the gravy and give a quick clean stir


Serve it with rice and a hot and spicy side dish of your choice !

Cheers,
Chitz