Showing posts with label Summer Treats. Show all posts

Wednesday, 12 June 2019

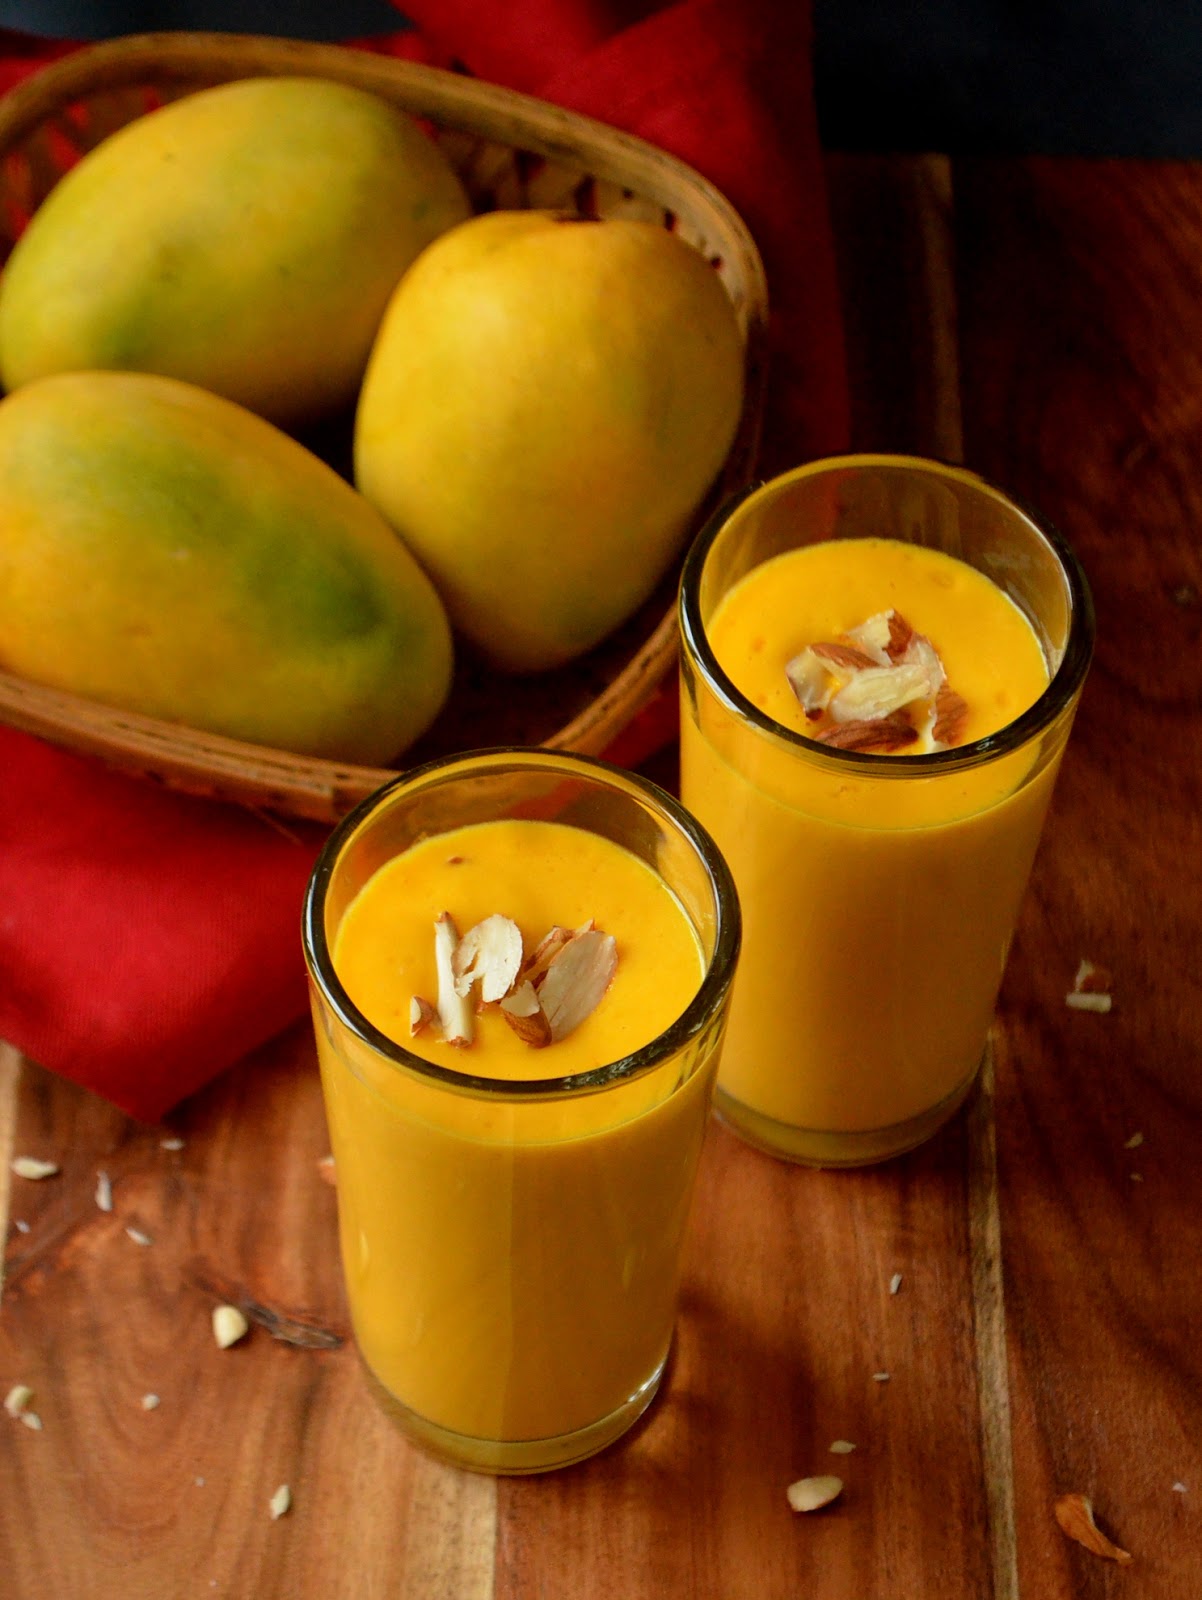
Mango Milkshake Recipe | How to make fresh Mango Milkshake at home?


Come summer, mango milkshakes have to be made.. Right? Yes, for us it is like "What is summer without a Mango Milkshake?' I would love to make some popsicles too but this year we are cutting low on sugar and some carbs too, so I guess the popsicles have to wait for another year maybe :( This milkshake can be tailored in many ways to suit our cravings and needs. You can make it rich by adding a pinch of saffron. You can make it healthy by skipping the sweetener. You can make it vegan by adding almond or coconut milk instead of the normal dairy milk. Or maybe add 2 scoops of ice cream instead of one ;) Choose as you may want to, but if the mangoes are reasonably sweet, then any variant of the shake is great and makes you feel  refreshed :) I generally make the shake with Alphonso (for it's bright colour :D) or Banganapally mangoes but you can choose any pulpy and reasonably sweet variety of mango for the shake..


Makes: 2 glasses


I Took: 

Preparation Time: 10 mins


I Used:


Alphonso Mango - 2 medium sized ones
Milk  - 1-1½ cup (boiled, cooled & refrigerated)
Sugar/Jaggery/Sweetner (optional) - 1-2 tbsp (As needed)
Ice cream (optional) - 1 scoop
Saffron/Kesar (optional)
Cardamom powder (optional)
-
-
A pinch
¼ tsp
Nuts (optional) - 2-3 tbsp


The Way:


1. Scrape the skin of the mango and trim the stalk off. Rinse it well in water. While trimming the stalk some milk can ooze out of the mango and it gives a weird taste if not rinsed properly

2. Cut the mango into small chunks and take them in a blender

3. Add milk to it and blend well


4. Now open the blender and taste the milkshake. If needed add sugar, kesar and ice cream and then give a final blend

5. Pour into tall glasses and serve cold. You can garnish with chopped nuts if needed


Notes:

  • I use Alphonso (or Banganapalli) mangoes for it's colour and taste. It gives a deep yellow colour and the shake feels like store bought :) You can use any ripe, pulpy, sweet and fibreless mangoes of your choice for making the shake
  • For a thick milkshake use less milk for blending. Also keeping the mango/mango pieces in fridge also helps
  • If using ice cream, use vanilla or mango flavour so that the taste is not compromised much
  • Use ice cubes while blending for chilled shake. It can make the shake a little runny. Instead use chilled milk and mango for making shake and serve the shake with ice cubes added in the glass
  • You can blend in the nuts or use for garnishing. Sometimes I like to blend in the nuts when I skip adding extra sweetner. Then it feels like having an extra crunch and I do not feel that I have skipped the sweetner (At times it is for satisfying the mind too ;))
Cheers,
Chitz


Friday, 6 July 2018

Chakkakuru Manga Curry | Kerala Style Chakkakuru Pacha Manga Curry | Jackfruit Seeds and Raw Mango Curry


Are you folks still getting raw mangoes at your place? I'm still able to see them in markets here but the quantity is getting lesser. I know some of these recipes should have been published last month but I got a little busy last month with the little one's Vidyarambham and other short trips and guests around. But if you have saved up some jackfruit seeds and can still get hold of some raw mangoes, this is a must try gravy for that Kerala red rice :) Tangy and crunchy and if you make some chicken ularthiyathu or mutton roast or mutton chukka, then all you need is that for a hearty meal and an afternoon siesta ;) I learned this recipe from my Mil. Every summer I look forward to having this yummy gravy for lunch at least once :) So let's see how this is made..

Other recipes with mango or jackfruit..


Preparation Time : 20 minutes

Cooking Time : 30 minutes


Recipe source : Mil


Serves : 3-4 persons


I Used:


Chakkakuru/Jackfruit seed - 8 nos
Raw Mango - 1 medium sized - chopped into 1 inch pieces
Red Chilly powder - 1 tbsp
Turmeric powder - ¼ tsp
Salt - As Needed

To Grind:

Grated Coconut - ½ cup
Cumin seed - ½ tsp

To Temper:

Coconut Oil - 2 tbsp
Mustard 
Fenugreek
-
-
½ tsp
¼ tsp
Red Chilly - 2 nos
Curry leaves - 2 sprigs


The Way:


1. To clean the chakkakuru, first remove the white outer cover of the seed (forgot to take that pic). Then soak the seeds in water overnight. You can clean them without soaking also, but it's difficult and time consuming

2. Take the soaked chakkakuru and using a knife scrape off the brown skin of the seed. Then cut the seed vertically into two or three (as possible) pieces

3. Now take the cleaned chakkakuru in a pressure cooker. Add little salt and water (1/4 cup) and pressure cook it till done. I kept for 2 whistles in high flame and 3 whistles in low flame


4. Meanwhile wash the raw mango thoroughly and pat dry using a kitchen towel. Now cut the mango into 1 inch long pieces (with the skin)

5. Take the cut mango pieces along with red chilly powder, turmeric powder, salt and little water (¼ cup - just enough for the mango pieces to be immersed) in a pan and boil them. Keep the flame on high

6. When the water starts boiling, reduce the flame to low and cover the pan and cook till the mango pieces are done (will take around 8-10 minutes). Don't let the pieces turn mushy. They should be cooked as well as firm


7. While the mango gets cooked, take the grated coconut and cumin seeds in a blender jar. Add little water and grind them into a smooth paste and keep aside

8. When the mangoes are cooked, add the cooked jackfruit seeds to it and give a stir


9. Now add the ground coconut paste and stir. Allow it to get cooked in low flame for 3-4 minutes so that the flavours blend in. Check salt and add if needed. Then switch off the flame


10. In a tadka pan, heat coconut oil. Splutter mustard and fenugreek seeds

11. Add broken dry red chilly and curry leaves. Take care not to burn

12. Add this tempering to the gravy and give a gentle stir


Serve with red rice and a spicy side dish of your choice!


Notes:


  • Adjust the quantity of the raw mango accordingly. Some mangoes may be too sour. Here we do not use curd or tamarind. The raw mango alone contributes to the sourness of the gravy. So adjust accordingly. Here I have used 1 full small sized raw mango 
  • You can also add drumstick or kumbalanga (ash gourd) also to this gravy. You can cook them along with the raw mangoes or pressure cook them with the seeds (As per convenience)

Cheers,
Chitz


Thursday, 5 July 2018

Coffee Popsicles | Vietnamese Coffee Popsicles


I always wanted to try my hand at coffee and ice tea popsicles coz Deeps, like any other Malayali, would never say no to a cuppa tea or coffee anytime of the day ! So I was sure that he would approve these popsicles ;) That was when I saw in Sharmis blog these coffee popsicles. Voila, this is the universe's way of telling me that I should make them soon (I'm her die hard fan, so now it makes sense right). Then I googled more and found that the combo of condensed milk and a strong French roast coffee decotion is what makes a Vietnamese coffee and this popsicle is inspired from that. A strong coffee decotion sweetened with condensed milk. What can go wrong na?? ;)

You know how the Vietnamese coffee is made? Condensed milk is taken in a glass. And French drip filters or Vietnamese Phin filters are placed on top. And coffee drips from those filters to the glass of condensed milk. When the coffee is done dripping, you stir them up and serve. If it is iced Vietnamese coffee, then you pour this coffee into a glass of ice and serve. So cool right :D For the coffee it is 4 parts of coffee to 1 part condensed milk. But for the popsicle it is 3 parts coffee to 1 part condensed milk. This is so because condensed milk is difficult to freeze well it seems! 

And as I anticipated, the little one was very much happy to have this popsicles. Deeps caught a cold when I made this and so couldn't taste them. So me and the little one shared the 6 pops between us ;) It is difficult to say no to him when he jumps up and down saying 'Ice cream, ice cream' every time I open the fridge you know :D So shall we now see how to make these rich and tasty pops?


Preparation Time : 15 minutes 

Setting Time : 8 hours (or freeze overnight)


Recipe Inspiration : Here


Makes : 6 popsicles


I Used:


Water  - ¾ cup
Milk (boiled & cooled) - 1 cup
Sugar (optional) - 2 tbsp (as needed)
Instant coffee powder - ¾ cup
Condensed Milk (sweetened) - 1/3 cup

The Way:


1. Take water in a saucepan. Add sugar (if you feel the sweetness of milkmaid is sufficient then can omit sugar) and instant coffee powder to it and mix well. Then boil it for around 2 minutes. Then switch off and allow it to cool down completely


2. Now add milk (boiled and cooled) and mix well

3. Then add the condensed milk (milkmaid) and mix well


4. Now pour this to the popsicle moulds so that they are 3/4 th filled. Then freeze them in refrigerator overnight

5. While serving, show the popsicle moulds under running tap water for a minute and then carefully de-mould them. This will ensure that they get removed smoothly and come out firm. Serve immediately


Notes:

  • If you want to have layers you can play around a bit. You can have a layer of coffee decotion or a layer of heavy cream and condensed milk (have seen this in some other blogs)

Cheers,
Chitz

Tuesday, 3 July 2018

Watermelon Juice | Fresh Watermelon Juice Recipe


I know summer is long gone in many parts of the world or at least in mine. But I do love to have chilled juices in this rainy weather at times. Are you too like me?? So while it lasts, I am making use of the watermelon available and making fresh juice and popsicles and enjoying. This is not a recipe as such, I know. But watermelon makes such good pics.. So I couldn't resist the urge to click.. I am way below average in clicking shots of drinks and beverages but I love to click them still.. And hence they make their way to the blog as well :)


Preparation Time : 10 minutes


Serves : 2 glasses


I Used:


Watermelon (chilled) - 1 cup (chopped)
Honey - 1 tsp
Salt - A pinch
Lemon juice (optional) - 1 tbsp

The Way:


1. Cut the watermelon. De-seed it. Then take out the red portion and chop it roughly

2. Add it to a blender jar and blend it smooth. Then add honey (if needed, if the melon is sweet enough you need not add honey. Also can use sugar instead) and a pinch of salt (enhances taste, if you do not like it then you can avoid salt) and lemon juice (if using, I did not use) and give a quick blend


3. Do not add water as the melon has a good amount of water content. If you are not using chilled watermelon, then refrigerate the juice for a while and serve chilled or you can use 2-3 ice cubes while serving. Do not keep the juice for long as it will not taste good. Recommend to serve immediately after making

Cheers,
Chitz

Friday, 11 May 2018

Watermelon Popsicle Recipe | Easy Watermelon Popsicle Recipe | Kids Special Summer Recipe


As I am drafting this recipe, it's my little one's reaction on seeing the popsicle that comes to my mind. He kept on jumping saying "ice-cream, ice-cream".. Popsicles are so easy to make and so refreshing in this summer heat right :) And when you make popsicles out of watermelon and likes, it is easy to up the little one's water intake who is otherwise very hesitant to drink water :( Here I have added just a tsp of honey to the pureed watermelon to make this pops. If you like a tangy flavour add little lemon juice as well. Maybe you can make it more colourful by sneaking in a slice of kiwi or lemon as well :) In the pics the colour seems a little pale coz they were snapped right after taking out of the freezer. After a while they turned bright red !


I Took: 

Preparation Time: 10 minutes


I Used:


Watermelon (cut into cubes) - 2 cups
Honey - 1 tsp (optional)
Lemon juice - 1 tsp (optional)

The Way:


1. Roughly chop the water melon into cubes. Remove the seeds and take them in a blender jar

2. Grind them. Add honey if using (if the watermelon is sweet enough you can omit them) and again give a quick blend


3. Pour the puree into popsicle moulds so that they are 3/4 full

4. Freeze them in refrigerator overnight or for at least 8 hours

5. After 8 hours de-mould them gently (can show under tap water while de-moulding) and enjoy !


Cheers,
Chitz

Thursday, 22 February 2018

Strawberry Milkshake | Easy Strawberry Milkshake without ice cream


Last recipe was with strawberry and this one too is with strawberry.. Blame it on the season ;) Around a month ago, when my parents came visiting us in Pune, we went on a short trip to Mahabaleshwar and visited the Mapro gardens in Panchgani. There we got strawberries at a cheap rate of 150 rupees per kilo. Actually some were saying that if you visit in the morning the rates are still cheaper and you an get them for an easy 80-100 rupees per kilo.. We were expecting to go pluck the strawberries at the farms but the locals there told that since it was peak season we were not allowed to and that would be allowed during March-April time.. So what did we do? We ate a lot of strawberries and bought a lot more and came back :D Dhruv was ready to eat them all as such but he caught a cold two days later, so we didn't give him much.. And me being a strawberry lover in just shakes and cakes, went ahead and made milkshakes with them using chilled milk ;) 


You can have variants of this simple recipe.. You can sneak in some ice cream - anything of your choice, be it vanilla or strawberry. Don't like milk? Then replace with some Greek yogurt or have a mix of both the yogurt and milk. Add in a nice ripe banana or a couple of dates.. Maybe a handful of chia seeds.. Or a tablespoon of cocoa powder ;) Want to cut low on sugar? Then add honey instead or maybe cane sugar..The options are plenty. You can adjust to your cravings and dietary requirements! 


Makes: 1 tall glass


I Took: 


Preparation Time: 5 minutes


I Used:


Strawberry - 4-5 nos 
Cashew - 5 nos
Almond - 4 nos
Sugar - 2 tsp
Chilled Milk - 1 cup


The Way:

1. In a mixer/blender, crush the cashews and almonds together

2. Once they are coarsely/finely (as you need) crushed, add the strawberries and sugar and give a nice blend

3. Now add the milk and blend smoothly. Serve cold !


Notes:

I normally boil the milk and let them cool down and then refrigerate them and use in my milkshakes and smoothies

Cheers,
Chitz