Showing posts with label Milk. Show all posts

Friday, 21 June 2019

Mango Chia Seed Pudding | Chia Mango Pudding | Mango Chia Pudding Recipe


This is one dish that regularly makes it's appearance during summer. I love chia pudding and that too only with mangoes :D Last year when I made this and was trying to take pictures for the blog while Dhruv was sleeping. Just when I had the whole setup ready and clicked 2-3 pics, he woke up and came. And was not ready to part with the pudding. He was smirking and grinning that he sabotaged my set up and was happily having the pudding. Yes, my little one too loves this :) So this year I made it while he was away at school and clicked leisurely ;) And evening we both enjoyed having this.. It is best served chilled ! Usually it's quite sunny in Chennai. But day before yesterday when I clicked this it was quite gloomy. And yesterday it rained for about 10 minutes. This is the first rain of the year and it feels good too as there is a little relief from the scorching heat :)

Check out the other Mango recipes here if interested.. 


Makes: 1 cup


I Took: 

Preparation Time: 5 mins


I Used:


Mango - 2 sides of 1 big banganapalli
Chia - 3 tbsp
Milk (boiled & cooled) - 1 ½ cup
Honey (any sweetener) - 1 tbsp
Vanilla Essence - 1 tsp


The Way:


1. Take the chia seeds in a bowl. Add milk to it. Use milk that is boiled and cooled

2. Now add sweetener of choice. I added honey


3. Then add vanilla essence if using and mix well

4. Cover the bowl and leave it refrigerated for minimum 2 hours. Leave it overnight if possible


5. Next for assembling the pudding, peel a ripe mango and rinse it with water. Then cut into small bite sized cubes

6. In a serving glass, now layer the pudding with alternate layers of mango slices and the bloomed chia 

7. Garnish with pomegranate or cherry or nuts or raisins of your choice


Serve chilled !

Notes:


  • You can customize the pudding the way you want. You can layer it with mango puree instead of mango pieces
  • You can add a layer of rice flakes or granola to make it more healthy & wholesome
  • If the mangoes are sweet enough you wouldn't need any sweetener
  • You can also add in seeds like hemp, melon etc and nuts like almonds & dry fruits of choice
  • You can go for another fruits like strawberries or chikoo as well but personally I favour mangoes :)
Cheers,
Chitz

Wednesday, 12 June 2019

Mango Milkshake Recipe | How to make fresh Mango Milkshake at home?


Come summer, mango milkshakes have to be made.. Right? Yes, for us it is like "What is summer without a Mango Milkshake?' I would love to make some popsicles too but this year we are cutting low on sugar and some carbs too, so I guess the popsicles have to wait for another year maybe :( This milkshake can be tailored in many ways to suit our cravings and needs. You can make it rich by adding a pinch of saffron. You can make it healthy by skipping the sweetener. You can make it vegan by adding almond or coconut milk instead of the normal dairy milk. Or maybe add 2 scoops of ice cream instead of one ;) Choose as you may want to, but if the mangoes are reasonably sweet, then any variant of the shake is great and makes you feel  refreshed :) I generally make the shake with Alphonso (for it's bright colour :D) or Banganapally mangoes but you can choose any pulpy and reasonably sweet variety of mango for the shake..


Makes: 2 glasses


I Took: 

Preparation Time: 10 mins


I Used:


Alphonso Mango - 2 medium sized ones
Milk  - 1-1½ cup (boiled, cooled & refrigerated)
Sugar/Jaggery/Sweetner (optional) - 1-2 tbsp (As needed)
Ice cream (optional) - 1 scoop
Saffron/Kesar (optional)
Cardamom powder (optional)
-
-
A pinch
¼ tsp
Nuts (optional) - 2-3 tbsp


The Way:


1. Scrape the skin of the mango and trim the stalk off. Rinse it well in water. While trimming the stalk some milk can ooze out of the mango and it gives a weird taste if not rinsed properly

2. Cut the mango into small chunks and take them in a blender

3. Add milk to it and blend well


4. Now open the blender and taste the milkshake. If needed add sugar, kesar and ice cream and then give a final blend

5. Pour into tall glasses and serve cold. You can garnish with chopped nuts if needed


Notes:

  • I use Alphonso (or Banganapalli) mangoes for it's colour and taste. It gives a deep yellow colour and the shake feels like store bought :) You can use any ripe, pulpy, sweet and fibreless mangoes of your choice for making the shake
  • For a thick milkshake use less milk for blending. Also keeping the mango/mango pieces in fridge also helps
  • If using ice cream, use vanilla or mango flavour so that the taste is not compromised much
  • Use ice cubes while blending for chilled shake. It can make the shake a little runny. Instead use chilled milk and mango for making shake and serve the shake with ice cubes added in the glass
  • You can blend in the nuts or use for garnishing. Sometimes I like to blend in the nuts when I skip adding extra sweetner. Then it feels like having an extra crunch and I do not feel that I have skipped the sweetner (At times it is for satisfying the mind too ;))
Cheers,
Chitz


Thursday, 7 March 2019

Gajar ka halwa | Gajar Halwa | Carrot Halwa Recipe | Easy Carrot Halwa recipe with full fat milk


Gajar ha Halwa is a traditional Indian dessert made with fresh red (Delhi) carrots, milk and sugar and of course some ghee. It is a winter delicacy as these carrots can be seen in market only during winters and especially in North India. It is a rare sight in the South. These carrots (most of them) are juicy and very yum to have as such, my little one loves to munch on them :) And the other special dish that can be made using them is this Carrot halwa or Gajar ka Halwa. I have also posted a Carrot Pudding last year using the same variety of carrots. If you are not able to find the red Delhi carrots but still would love to enjoy some halwa, go ahead and prepare with the normal carrots at hand. They too taste yum :)

This dish is a common sight in many weddings and so often you can find it in the Indian dessert section in the restaurant buffets. One of the best combos that you can go for is pair this halwa with a dollop of ice cream. I just love that combination. If you are not in a mood or like to have too much sweet, then this is an ideal way as the ice cream balances the sweetness of the halwa yet giving a rich feel :) 

There are many variations to this recipe, like using condensed milk or khoya. The richness varies with each variant. I & my family prefer it using full fat milk and hence the recipe I'm posting today is also the same. I always make this halwa using a heavy bottomed vessel but you can very well prepare it using pressure cooker or in a microwave as well. Somehow I believe the taste is a notch higher when you prepare the traditional way in a pan rather than pressure cook. 


Some tips that I follow to get my halwa great :)


1. Whenever available use red (Delhi) carrots to make this halwa. Also choose fresh carrots that are tender and juicy. Do not keep in fridge for a few days before you make it. Choosing it as fresh as possible makes a great halwa

2. Grate the carrots to medium thickness. Too thin will make your halwa mushy and too little in quantity. Preferably grate them using a hand held grater. Food processors make your life easier, but trust me, doing some things the traditional way will bring out better results :) After all, it's not everyday that we get to make the halwa, right :)

3. Some recipe calls for frying the carrot before adding milk. But that changes the colour of the halwa and I like the taste better when the carrots are not fried but just cooked in simmer in full fat milk

4. They stay good for a week in the fridge. You can serve hot or cold. If you like to serve warm, then microwave for a minute or two before serving

Serves: 3 persons


I Took: 

Preparation Time: 10 minutes

Cooking Time: 15 minutes


I Used:


Delhi Carrots - 1 cup (heaped)
Full fat Milk - 1 cup
Sugar - 6 tbsp
Ghee 
Cardamom Powder
-
-
1 tbsp + 2-3 tbsp for frying cashews
½ tsp
Cashew Nuts - 10-12 nos

The Way:


1. Rinse the carrots well in water. Then peel them and trim their ends

2. Grate them to medium thickness using a hand held grater (preferably) or a food processor

3. In a heavy bottomed pan (or kadai) add the grated carrots and milk and allow them to come to a boil on a medium heat. Then simmer


4. While on simmer, keep an eye, stirring in between. The carrots will cook in the milk and the milk will start to reduce and evaporate

5. When the milk has almost reduced, add the sugar, ghee and cardamom powder. 

6. Stir well and continue to cook on simmer, stirring in between 


7. In the meantime, heat ghee (around 2-3 tbsp) in a tadka pan. Fry the cashews on a low flame. Take care not to burn. Once they turn colour to golden, switch off the flame

8. Once all the milk is evaporated and the halwa becomes dry, add the fried cashews. Give a stir and switch off the flame


Serve warm or cold. Can garnish with more almonds, nuts or other dry fruits before serving !

Cheers,
Chitz

Thursday, 5 July 2018

Coffee Popsicles | Vietnamese Coffee Popsicles


I always wanted to try my hand at coffee and ice tea popsicles coz Deeps, like any other Malayali, would never say no to a cuppa tea or coffee anytime of the day ! So I was sure that he would approve these popsicles ;) That was when I saw in Sharmis blog these coffee popsicles. Voila, this is the universe's way of telling me that I should make them soon (I'm her die hard fan, so now it makes sense right). Then I googled more and found that the combo of condensed milk and a strong French roast coffee decotion is what makes a Vietnamese coffee and this popsicle is inspired from that. A strong coffee decotion sweetened with condensed milk. What can go wrong na?? ;)

You know how the Vietnamese coffee is made? Condensed milk is taken in a glass. And French drip filters or Vietnamese Phin filters are placed on top. And coffee drips from those filters to the glass of condensed milk. When the coffee is done dripping, you stir them up and serve. If it is iced Vietnamese coffee, then you pour this coffee into a glass of ice and serve. So cool right :D For the coffee it is 4 parts of coffee to 1 part condensed milk. But for the popsicle it is 3 parts coffee to 1 part condensed milk. This is so because condensed milk is difficult to freeze well it seems! 

And as I anticipated, the little one was very much happy to have this popsicles. Deeps caught a cold when I made this and so couldn't taste them. So me and the little one shared the 6 pops between us ;) It is difficult to say no to him when he jumps up and down saying 'Ice cream, ice cream' every time I open the fridge you know :D So shall we now see how to make these rich and tasty pops?


Preparation Time : 15 minutes 

Setting Time : 8 hours (or freeze overnight)


Recipe Inspiration : Here


Makes : 6 popsicles


I Used:


Water  - ¾ cup
Milk (boiled & cooled) - 1 cup
Sugar (optional) - 2 tbsp (as needed)
Instant coffee powder - ¾ cup
Condensed Milk (sweetened) - 1/3 cup

The Way:


1. Take water in a saucepan. Add sugar (if you feel the sweetness of milkmaid is sufficient then can omit sugar) and instant coffee powder to it and mix well. Then boil it for around 2 minutes. Then switch off and allow it to cool down completely


2. Now add milk (boiled and cooled) and mix well

3. Then add the condensed milk (milkmaid) and mix well


4. Now pour this to the popsicle moulds so that they are 3/4 th filled. Then freeze them in refrigerator overnight

5. While serving, show the popsicle moulds under running tap water for a minute and then carefully de-mould them. This will ensure that they get removed smoothly and come out firm. Serve immediately


Notes:

  • If you want to have layers you can play around a bit. You can have a layer of coffee decotion or a layer of heavy cream and condensed milk (have seen this in some other blogs)

Cheers,
Chitz

Wednesday, 21 February 2018

Eggless Whole wheat Strawberry Muffins | Butterless Strawberry Muffins | Strawberry Cupcakes


My family exhibits varied emotions towards strawberry.. The hubby won't touch it, my son loooveeees it and I love it in forms of cakes and shakes and likes but not a great fan to eat it raw. My son loves the sight of it and is always happy to eat them as such. I should say as of now coz his interests change really quick ! Anyways, I had no difficulty in finishing off that box of strawberries thanks to Dhruv but I had been wanting to try this muffins recipe from Aparna's blog for quite some time and so this time I did it.. 


It is made of half all purpose flour and half whole wheat flour and so it is a bit dense. Deeps liked it and gave a thumbs up and that should actually translate to "great" coz he is not a cake lover.. And as for Dhruv he likes muffins so he too loved it.. It's so easy to put up, just mix the dry and wet ingredients separately and fold them together and bake.. Easy right? And if you too do not want to eat strawberries raw but want to try some cake out of it, here is the perfect recipe!!


Recipe Source: My Diverse Kitchen


Preparation Time : 10 minutes

Cooking Time : 30 minutes


Makes : 12 medium sized muffins 


I Used:


Strawberry - 1 cup (chopped) (around 200 gm)
All purpose flour/Maida - 1 cup
Whole wheat flour - ¾ cup
Granulated sugar - ½ cup
Baking powder - 1 ½ tsp
Salt - ½ tsp
Milk - ½ cup
Oil - ¼ cup
Thick yogurt - 2 tbsp
Vanilla essence - 1 tsp


The Way:


1. Take all the dry ingredients - all purpose lour, whole wheat flour, baking powder and salt in a bowl and mix well

2. Add the chopped strawberries to the flour and mix gently. Ensure that the strawberries are coated well with the flour


3. In another bowl take the wet ingredients - milk, oil and vanilla essence and mix well

4. Add the wet mixture to the strawberry-flour mixture and gently mix together in a folding motion about 4 to 5 times

5. Do not over stir. The batter will be lumpy and floury. I had to add 2 to 3 tsp of milk extra to eat up all the flour. But that is fine. With whole wheat flour it will be like that

6. Fill the muffin tray with liners and fill the batter in the liners. This batter will not rise much and hence you can almost fill the liners with batter


7. Bake them at 190 degree C for about 25-30 minutes till done and the top turns golden brown. Then cool for 10 minutes and unmould and serve

Cheers,
Chitz

Friday, 11 August 2017

Aval Payasam | Poha Kheer | Easy Rice Flakes Payasam | Krishna Jayanthi Recipes

Rice Flakes Kheer with Sugar


With Gokulashtami nearing all of you must be gearing up to prepare all kinds of sweets, savouries and kheers right? So if you are a beginner like me in those areas, fret not ! I'm here to help you. I make some simple recipes that do not consume much time or doesn't burst or explode while preparing ;) You know what I'm talking about right ! Yes, the infamous seedai. I'm yet to experiment it. My mom is still scared to prepare them, so you can imagine my confidence level in that ! But like anything else, with good research and careful experiments there is nothing that can't be conquered in cooking as well, right :) 

So let's leave that aside for some other day and check how to make this yummy and easy to make kheer with poha or aval/rice flakes. I like to have this kheer the next day after refrigerating it for a day. It tastes very yummy then. Initially I used to make this kheer without grinding the poha. But then my hubby used to say, it just tastes like Aval in milk. Then after some googling I found that many grind the poha to use in the kheer. I tried that and the texture and taste was better then. So here's it now for all those beginners out there who are set to celebrating this year's Gokulasthami with some homemade sweets and savouries :)


Serves: 2-3 persons


I Took: 

Preparation Time: 5 minutes

Cooking Time: 20 minutes


I Used:


Aval/Rice Flakes/Poha - ½ cup
Ghee - 2 tbsp
Cashew nuts - 5-7 nos
Raisins - 15-20 nos
Milk - 2 - 2.5 cups
Sugar - ¼ cup
Cardamom powder - Of 1 pod

The Way:


1. Boil milk in a saucepan and keep it aside. Heat ghee in a pan (I use a saucepan and the same is used for making the kheer as well). Fry the cashews and raisins and keep them also aside


2. In the same pan with the remaining ghee, fry the aval/poha for 2-3 minutes. Then transfer it to a mixie and allow it to cool


3. Once cooled, coarsely grind the poha. 2-3 pulse would be sufficient

4. Now add the ground poha to the same saucepan. Add the boiled milk and allow the poha to cook over low flame. It would take around 5-7 minutes for the poha to cook. As it is already ground it takes less time. If adding whole poha as such then cook for around 10-12 minutes


5. Mix it intermittently in between so that it doesn't get burnt. 

6. Once the poha is cooked add the sugar and cardamom 


7.If the consistency is too thick can add extra milk (around 1/2 cup or as per your need) Mix well and let it boil once

8. Toss in the roasted nuts and raisins. Give a quick stir. Switch off flame and serve warm or chilled as desired ! 


Notes:


  • Some do not like to roast and grind the poha. If then just wash the poha and add to the milk in step 4
  • The kheer thickens as it sits. So while serving adjust accordingly. If needed add little warm milk while serving
  • I personally enjoy this kheer the next day after refrigeration. So if you are in for chilled kheer, try it that way !

Cheers,
Chitz

Friday, 14 October 2016

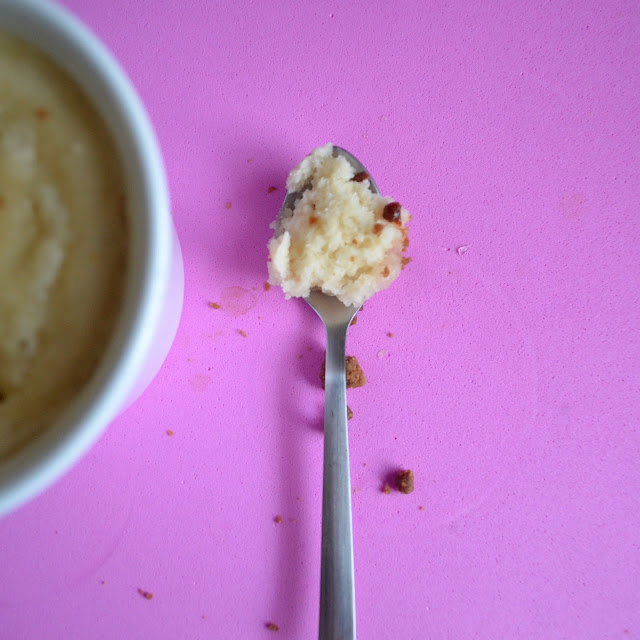
1 minute Vanilla Mug Cake | Easy Vanilla Mug Cake


Today's recipe is very simple and very quick to make. As the name suggests, it is a 1 minute microwaved mug cake. As it is a 1 minute cake, the quantity is less. So if you are a cake person whose cravings are difficult to satiate, I guess you would have to microwave 3-4 cups at a go ;) But this is a quick fix recipe for those sudden hunger pangs or craving callings. Today was one such day when I wanted to have a cake. I know this mug cake is best with chocolate, but I didn't have cocoa powder in my pantry, hence had to feel contented with the vanilla version. 

The best part is that, it looks like DD fell in love with this cake. He was coming back from his encounter with his toys every now and then for a nibble. When I wiped the ramekin clean, he leaned over and took a nice look at it. Made sure, it was empty and then returned back to his toys :D :D I feel I have a cake lover son. That thought does make me very happy indeed :D So, this recipe is to many more cake testing and eating together with my DD :) :)


I Took: 

Preparation Time: 5 minutes

Cooking Time: 2 minutes


Serves : 1 person


I Used:


Dry Ingredients:

All purpose flour/Maida - 2 tbsp
Sugar - 1.5 tbsp
Baking powder - ¼ tsp
Salt - A pinch


Wet Ingredients:

Milk - 2 tbsp
Oil - ¾ tbsp
Vanilla Essence - 3-4 drops (As much as you prefer)

The Way:


 1. In a bowl, take all the dry ingredients and mix them together. 

2. Add the wet ingredients to it and mix them well. The sugar should dissolve completely.

3. Now transfer the contents to a microwave safe ramekin or mug or glass.

4. Set the oven to microwave setting at the highest temperature for 1 minute. I set to 900 W.

5. Bake them. Check after a minute if a tooth pick inserted comes out clean or is without moisture. If not keep for a few more seconds according to how much the cake is moist at that point.

Serve hot. 

Notes:

  • If you let them sit for long, they become hard or rubbery. If you need to serve it later, transfer to another cup or serving dish
  • I doubled the measurements and made, as my ramekin is bigger in size. Hence I microwaved for 2 minutes

Cheers,
Chitz