Showing posts with label Cardamom. Show all posts

Thursday, 7 March 2019

Gajar ka halwa | Gajar Halwa | Carrot Halwa Recipe | Easy Carrot Halwa recipe with full fat milk


Gajar ha Halwa is a traditional Indian dessert made with fresh red (Delhi) carrots, milk and sugar and of course some ghee. It is a winter delicacy as these carrots can be seen in market only during winters and especially in North India. It is a rare sight in the South. These carrots (most of them) are juicy and very yum to have as such, my little one loves to munch on them :) And the other special dish that can be made using them is this Carrot halwa or Gajar ka Halwa. I have also posted a Carrot Pudding last year using the same variety of carrots. If you are not able to find the red Delhi carrots but still would love to enjoy some halwa, go ahead and prepare with the normal carrots at hand. They too taste yum :)

This dish is a common sight in many weddings and so often you can find it in the Indian dessert section in the restaurant buffets. One of the best combos that you can go for is pair this halwa with a dollop of ice cream. I just love that combination. If you are not in a mood or like to have too much sweet, then this is an ideal way as the ice cream balances the sweetness of the halwa yet giving a rich feel :) 

There are many variations to this recipe, like using condensed milk or khoya. The richness varies with each variant. I & my family prefer it using full fat milk and hence the recipe I'm posting today is also the same. I always make this halwa using a heavy bottomed vessel but you can very well prepare it using pressure cooker or in a microwave as well. Somehow I believe the taste is a notch higher when you prepare the traditional way in a pan rather than pressure cook. 


Some tips that I follow to get my halwa great :)


1. Whenever available use red (Delhi) carrots to make this halwa. Also choose fresh carrots that are tender and juicy. Do not keep in fridge for a few days before you make it. Choosing it as fresh as possible makes a great halwa

2. Grate the carrots to medium thickness. Too thin will make your halwa mushy and too little in quantity. Preferably grate them using a hand held grater. Food processors make your life easier, but trust me, doing some things the traditional way will bring out better results :) After all, it's not everyday that we get to make the halwa, right :)

3. Some recipe calls for frying the carrot before adding milk. But that changes the colour of the halwa and I like the taste better when the carrots are not fried but just cooked in simmer in full fat milk

4. They stay good for a week in the fridge. You can serve hot or cold. If you like to serve warm, then microwave for a minute or two before serving

Serves: 3 persons


I Took: 

Preparation Time: 10 minutes

Cooking Time: 15 minutes


I Used:


Delhi Carrots - 1 cup (heaped)
Full fat Milk - 1 cup
Sugar - 6 tbsp
Ghee 
Cardamom Powder
-
-
1 tbsp + 2-3 tbsp for frying cashews
½ tsp
Cashew Nuts - 10-12 nos

The Way:


1. Rinse the carrots well in water. Then peel them and trim their ends

2. Grate them to medium thickness using a hand held grater (preferably) or a food processor

3. In a heavy bottomed pan (or kadai) add the grated carrots and milk and allow them to come to a boil on a medium heat. Then simmer


4. While on simmer, keep an eye, stirring in between. The carrots will cook in the milk and the milk will start to reduce and evaporate

5. When the milk has almost reduced, add the sugar, ghee and cardamom powder. 

6. Stir well and continue to cook on simmer, stirring in between 


7. In the meantime, heat ghee (around 2-3 tbsp) in a tadka pan. Fry the cashews on a low flame. Take care not to burn. Once they turn colour to golden, switch off the flame

8. Once all the milk is evaporated and the halwa becomes dry, add the fried cashews. Give a stir and switch off the flame


Serve warm or cold. Can garnish with more almonds, nuts or other dry fruits before serving !

Cheers,
Chitz

Wednesday, 16 August 2017

Aval Kesari | Poha Kesari | Poha Sheera | Easy Krishna Jayanthi Recipes


So as I told you yesterday, I had made Aval Kesari for Krishna Jayanthi neivedhyam day before yesterday. And as it goes, it should be posted here right? :) Have I told you friends that I am a certified Cuemath teacher and I take math classes for kids at home. So I gave the kids who came for class day before yesterday this kesari. At first I offered them by asking, 'Do you kids like kesari?' And the reply I got was 'Aunty, who is there who wouldn't like kesari'. That's the speciality of this sweet right. It pleases everyone and it's so easy to make too.. It can be done in less than half an hour and when those unexpected guests arrive it's a life saver, right ! So now let's see how to make this easy and tasty sweet.. 


Makes: 1 cup


I Took: 

Preparation Time: 10 minutes

Cooking Time: 20 minutes


I Used:


Poha/Aval/Rice Flakes - ½ cup
Sugar - ½ cup
Water - 1 cup
Cardamom - 1 no
Ghee - 2 tbsp
Cashew Nuts - 6-8 nos
Food colour - A pinch


The Way:


1. In a pan, dry roast the poha/aval for 4-5 minutes in low flame till they turn crisp

2. Transfer it to a plate/mixie jar and allow it to cool. Once completely cool, grind them to a coarse powder like that of sooji/rava/semolina consistency


3. Now heat ghee in the pan. Roast the cashews to golden brown colour. Then transfer to another plate and keep aside

4. In the same ghee, roast the powdered aval/poha. The ghee should get coated evenly in the poha


5. Now pour water and allow it to boil. Once boiled, simmer the flame and allow it to cook

6. Mix the colour in a tbsp of water and add it to the poha 

7. The poha would take around 5-7 minutes to cook. The test is to check the poha with wet hands. If it is not sticking to your hand then it is cooked (learned this tip from Jayashri's kitchen :)) and also all water should be absorbed and it would become a thick mass. You can cook the poha covered.In that case stir it in between so that it doesn't get burnt


8. Now once cooked add sugar and mix well. The kesari will again turn watery but don't worry

9. Keep stirring. Add the powdered cardamom and roasted cashew nuts

10. The ghee would start leaving the sides and the kesari is ready then !


Cheers,
Chitz

Tuesday, 15 August 2017

Aval Laddu | Poha Ladoo | Easy Krishna Jayanthi recipes


So friends, how did your Janmashtami celebs go this year? Mine was simple as usual with some homemade butter, sago kheer and aval kesari as neivedhyam to kutty krishna. This year I did not have a great mood to dress up little Dhruv like last year. U know why, we cut his hair last week :( I was saving the trip to the hair dresser so that I can tie his hair and dress him up like kutty krishna but he was getting very irritated with those particularly longer strands near the ears that we had to cut his hair. I lost all my enthu coz of that and so it was a simple krishna jayanthi yesterday with just homemade neivedhyam. 

Last year it was nice, we dressed him up in his dhothi and tied his hair and made him wear some of my jewellery and he was looking like a thoppa (paunch) ganapathy in a kutty krishna attire :) Maybe next year I should plan something different ! So now recipe of the day is a simple poha ladoo with just 2 main ingredients poha and jaggery. If you want you can use sugar in place of jaggery. Just replace jaggery with ½ cup sugar in the recipe. I love this one. Simple and easy to make. And for the past one week, this was satisfying my sudden cravings for a sweet or quick bite ! So off to the recipe..

Makes: 8 ladoos


I Took: 

Preparation Time: 30 minutes


I Used:


Poha/Aval/Rice Flakes - 1 cup
Jaggery - ¾ cup
Cardamom - 1 no
Ghee - ¼ cup
Cashew Nuts - 3-4 nos
Raisins - 6-8 nos

The Way:


1. Dry roast the poha for 3-4 minutes in low flame. It will become crunchy. Then transfer it to another plate/mixie jar and allow it to cool

2. Add cardamom and jaggery to the cooled poha and blend to make a fine powder


3. Heat the ghee in a pan and fry the caashews and raisins. Once the cashews turn golden brown and the raisins turn big, switch off the flame ( I also remove the pan from the flame else the residual heat will keep it warm for some more time)


4. Add the powdered poha-jaggery mix to the ghee. Mix well. Make sure there are no lumps

5. Now make small laddus when the mixture is warm


Notes:

  • I use organic poha and organic jaggery. So there is not much impurities in them. If using normal poha dust away those ones that are visible before dry roasting them
  • Some use milk instead of ghee to make these ladoos. If then use warm milk else it will be difficult to shape the ladoos. If then the ladoos must be consumed within a day or two as they do not have a great shelf life
  • Grind the poha to a fine powder else it will be difficult to shape the ladoo
  • If more cashews or bigger pieces of cashews are used then also it will be difficult to shape the ladoos
  • These ladoos stay good and fresh for a week and make sure you store them in an air tight container
  • If using sugar instead of jaggery, the method is the same. Instead of grinding jaggery grind ½ cup sugar

Cheers,
Chitz


Saturday, 12 August 2017

Instant Wheat Appam | Godhumai Appam | Wheat Flour Appam | Krishna Jayanthi Recipes


So here it is as promised, next sweet recipe for your Janmashtami celebrations. It is an instant appam recipe, that too with wheat flour. If you have a paniyaram/appe pan then it's double damaka! No deep frying needed. And also it is sweetened with jaggery. What more does one need for a healthy sweet indulgence right? :) You can whip up the batter in 10 minutes and making 20 paniyarams would take around 20 minutes. So in half an hour you are done with it!
This recipe is very handy not only during festive occasions but also when you crave for a sweet with your evening cuppa kaapi/chai. Most of the ingredients would be readily there in any pantry. So it's an instant fix for that sudden sweet tooth. Initially I tried this with cup ½ jaggery and 2 bananas. Then Deeps felt it's not sweet enough and asked me to add more bananas next time. But that sweetness was fine with me. But anyways I did so the next time and also slightly increased the jaggery quantity as well. This time I got a thumbs up! So it all depends on your taste buds. So play along!

Makes: 20 appams


I Took: 

Preparation Time: 5 minutes

Cooking Time: 20 minutes


I Used:


Wheat Flour
-
1 cup
Rice Flour
-
1 tbsp
Grated Coconut
-
2 tbsp
Cardamom powder
-
of 1 pod
Baking Soda
-
A pinch
Salt
-
A big pinch
Jaggery
-
½ - ¾ cup
Banana
-
½ cup mashed (nearly 4 small bananas)
Water
-
As required

The Way:


1. Take the jaggery in a pan and add little water, just to immerse it. Heat it over low flame so that the jaggery dissolves completely. Filter it to remove any impurities (I use organic jaggery, hence did not filter) and keep aside. Allow it to cool

2. Mash the bananas to a smooth paste with a fork or you can also give a quick pulse in mixie


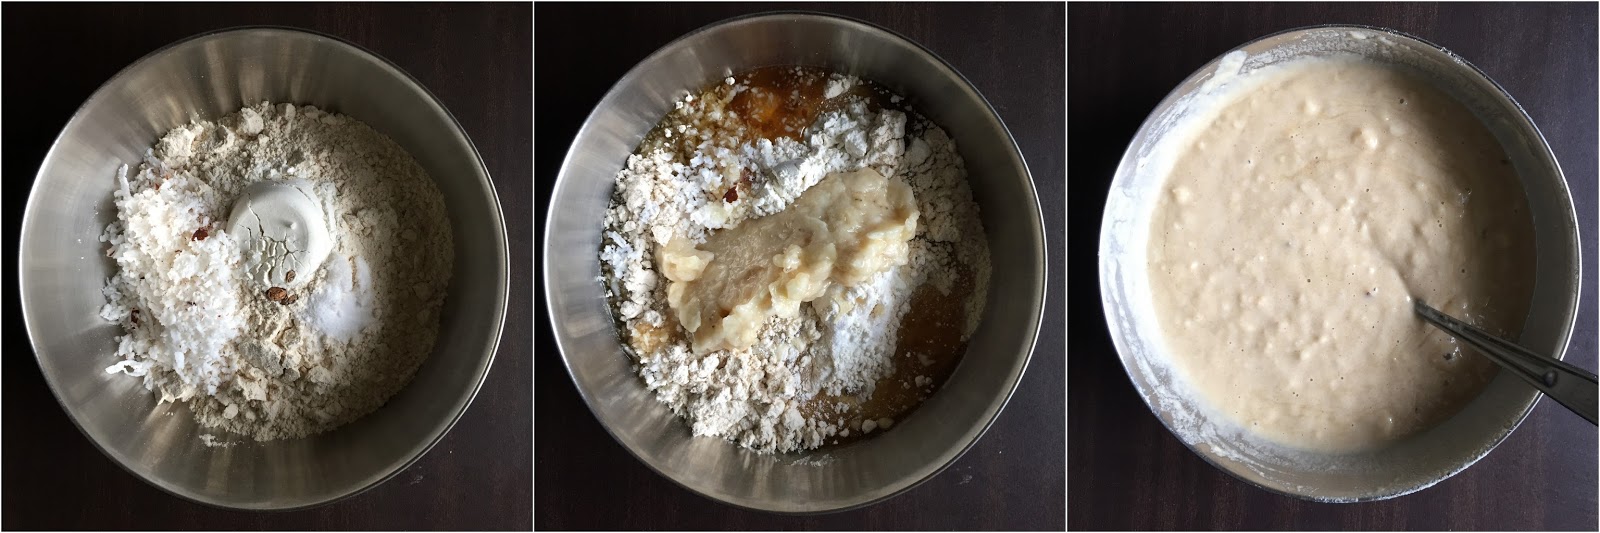
3. Now take the other ingredients together in a bowl viz. wheat flour, rice flour, grated coconut, baking soda, salt, cardamom and stir it well

4. Now add the mashed banana and jaggery syrup (it should not be hot) and mix evenly. Add water and mix well without any lumps. It should be of idly batter consistency


5. Now heat a paniyaram/appe pan. Add ½ tsp oil/ghee in all holes. Then add about 1 tbsp (depends on the size of your pan) of batter in each hole

6. Lower the flame and allow it to cook. You can cook covered for around 2-3 minutes and the flip over

7. Again now allow this side to cook for about 2-3 minutes. Transfer to a plate and it's now ready to be served with a hot cuppa chai !


Notes: 

  • If you do not have a paniyaram/appe pan you can also deep fry the appams. In that case take a laddle of the batter and pour it into hot oil. The appams should come up and not sink down. That would be the right temperature for the oil
  • If you do not have normal whole wheat flour you can also use atta. Taste would slightly vary as compared to normal whole wheat flour
  • I use cherupazham (yelakki) variety of banana for this recipe
  • Also don't pour the hot jaggery syrup to the flour mix. Allow it to cool and then add
  • Stick to a pinch of baking soda. More of it can make the appams flat and sticky and will be very difficult to cook properly

Cheers,
Chitz