Showing posts with label Kerala Recipes. Show all posts

Tuesday, 19 May 2020

Easy Moru Kachiyathu | Kerala Style Kachiyamoru | Moru Curry without Coconut | Seasoned Buttermilk


This is a simple, ready in a jiffy and yet a yummy gravy with yogurt that can please your palate as well as your time :) I make it mostly once a week, especially when I have non vegetarian side dishes like chukka or roast or some grilled chicken. My folks are happy and that makes me too happy :) It is basically nothing but tempered curd or yogurt. So I don't want to ramble much.. Just one more thing before we head on to the recipe. It tastes great with potato fry or koorka upperi as well ;) Here in this pic I have served it with Unnipindi upperi, simple chicken kebab, beef roast & beetroot pachadi :)


Serves: 2 persons


I Took: 

Preparation Time: 15 minutes


I Used:


Coconut Oil - 1 tbsp
Mustard/Kaduku - ½ tsp
Fenugreek/Uluva - ¼ tsp
Ginger - 1 tsp - finely chopped
Garlic - 1 tsp - finely chopped
Red Chilly - 2 nos - chopped/broken
Green Chilly - 2 nos - chopped/broken
Curry Leaves - 2 sprigs
Turmeric powder - ½ tsp
Salt - As Needed
Curd
Water
-
-
1 cup - beaten/whisked
As Needed - If required


The Way:


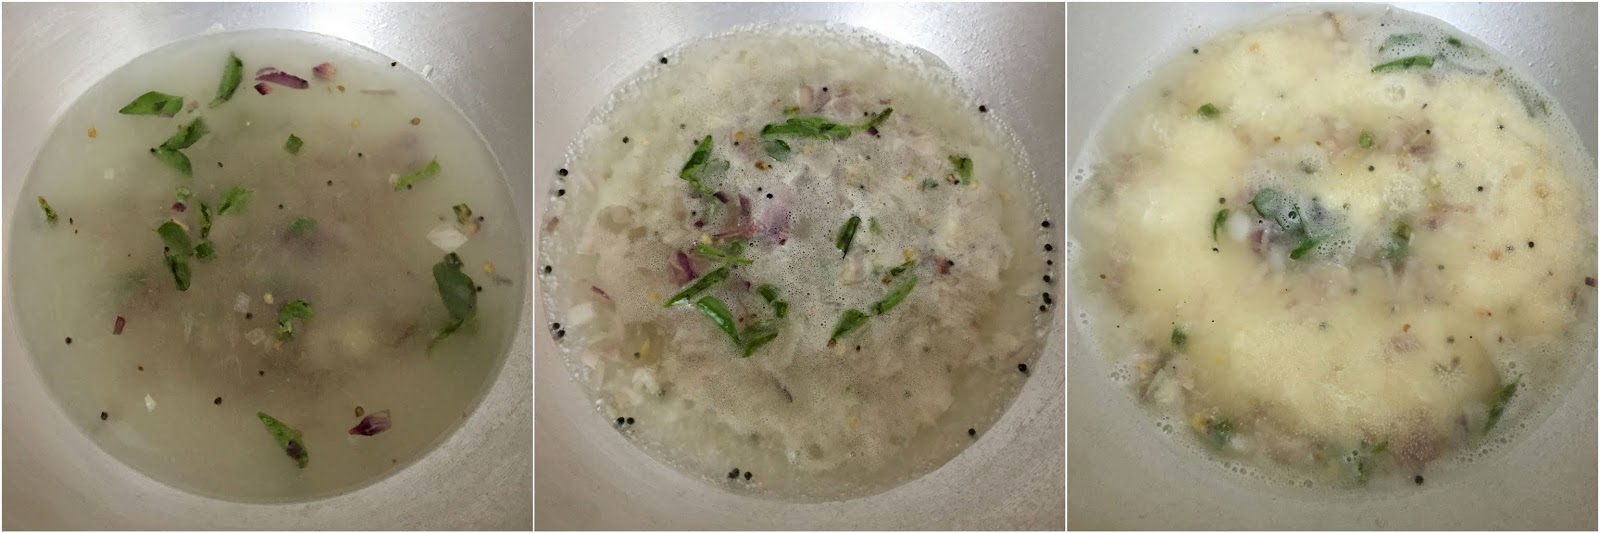
1. Beat the curd nicely and keep aside. You can use a mixie or whisk for this. If using a mixie, add the curd in the jar along with water and salt and pulse them once or twice and you will get smooth curd. If using whisk, add water to the curd along with salt and whisk well till no lumps are there and the curd is smooth

2. Heat coconut oil in a pan/kadai. When it's hot, splutter the mustard. When it splutters,add the fenugreek seeds 

3. Then the chopped ginger and garlic and saute for 30 seconds 

4. Then add the chopped green chillies, red chillies and curry leaves and give a quick saute


5. Finally add turmeric powder (with the flame at low, else the powder will get burnt easily) and asafoetida if using and saute for another 30 seconds

6. Now add the whisked curd and give a quick stir and switch off the flame. Else it will start to split


Serve warm with matta rice and a spicy non veg side dish of your choice!

Cheers,
Chitz

Saturday, 11 April 2020

Rava Upma | Upma recipe | How to make upma?


Upma is one of the easiest breakfast that can be made in a jiffy. If you ask me, that would be the fastest breakfast that I can make, not considering idly and podi. But for idly, I would go slightly overboard and make chutney and mostly sambar as well ;) So coming back to upma, many do not like upma. In fact I hated it as a kid. I must say that I started appreciating it more after getting married ;) Not coz it's easy to make. But because my mil makes some kickass upma which is neither dry nor gooey but the perfect consistency. The key is in finding the correct ratio of water required for the consistency that suits your liking. The rest is breeze. Experiment with that and I am sure you will reach there too soon :) The ratio I have mentioned here is for a more firm and fluffy upma. So let's see how to make it..


Serves: 2 persons


I Took: 

Preparation Time: 5 minutes

Cooking Time: 15 minutes


I Used:


Oil/Ghee - 1 tbsp
Mustard - 1 tsp
Urd Dal - 1 tsp
Curry Leaves - A sprig
Roasted Rava/Semolina - 1 cup
Onion - 1 no (medium sized - chopped)
Green Chilly
Asafoetida
-
-
2 nos 
¼ tsp
Water - 2 ¼ cups
Salt - As needed


The Way:

1. Take the rava/semolina in a kadai. Roast the rava on a low or medium flame for 3-4 minutes till they are crisp. Keep stirring else it will get burnt

2. Heat oil in a kadai/pan. Splutter mustard. When it splutters add the urd dal. Allow it to turn golden. Take care not to burn


3. Add curry leaves, chopped onions and green chilly and saute 

4. Add salt and asafoetida as well and saute till the onions slightly turn colour. I don't make them brown and just saute for 2-3 minutes as we like it that way


5. Now add water (refer notes) and check salt. It should taste salty. If not adjust salt. Allow the water to boil

6. Once it boils, reduce the flame and add the roasted rava little at a time and constantly stirring with your other hand. Keep the flame reduced, as the water can splutter 


7. The rava will absorb the water and become thick. Then close the pan with a lid and allow the rava to cook in low flame for about 5-6 minutes

8. Now open the lid and check. You can stir in between if needed or you are worried that it might stick to the bottom of the vessel


Garnish with little grated coconut or coriander leaves before you serve !

Notes:

  • Use ghee for a more yummy flavour and taste
  • You can also add fried cashews for a richer taste
  • I always use roasted rava/semolina as it makes my life easier! If you are using unroasted one, then as the first step roast the rava in a pan for 3-4 minutes in medium flame until you get a nice roasted flavour. Keep stirring else it will get burnt
  • We like our upma plain. If you want to add veggies like carrot, beans or peas, you can add them after sauteeing the onions and then proceed to the next step once the veggies get cooked
  • You can even add tomatoes for a tangy flavour
  • My mom adds some chopped ginger along with the onions, so if you like that flavour you can add them as well
  • The quantity of water mentioned here is for a fluffy upma. If you like more gooey one increase the quantity of water. Either ways make sure the rava is properly cooked. Low flame and covered cooking is the key for a properly cooked and fluffy upma !

Cheers,
Chitz

Wednesday, 6 November 2019

Chiranga Olan | Bottle Gourd Olan | Churakka Olan | Surakka Olan | Lauki Olan


When the family loves Olan, I try to sneak in as many kind of veggies as I can into it :) Cheranga as such is not liked by us, but Olan with it is an exception. We love it when the bottle gourd is paired with the mild coconut milk and the soft crunch from the boiled red eyed beans.. I have already made olan with Zucchini and Pumpkin & Ash Gourd and this one is no different from them. It is simple to make and healthy and yummy too :) So let's see how to make this easy Olan with bottle gourd..


Serves: 2-3 persons


I Took: 


Preparation Time: 10 minutes

Soaking Time: 8 hours

Cooking Time: 30 minutes


I Used:


Cheranga/Bottle Gourd
Red Eyed Beans/Vanpayar
-
-
1 cup - cubed
¼ cup heaped (after boiling)
Green Chilly - 2 nos - slited
Salt - As Needed
Coconut Milk - ½ cup
Curry leaves - 2 sprigs
Coconut Oil - 1 tbsp

The Way:


1. Rinse and soak the vanpayar (red beans - I used 1/8 cup of the beans to soak) overnight for around 8 hours. In the morning, discard the water. Take the beans in a pressure cooker. Add enough water (around 2 cups) and salt and pressure cook till done. It took me 2 whistles in high and 2 in low. Keep aside

2. While they get cooked, extract the coconut milk and keep ready. I used around ½ cup of grated coconut and ¼ cup of water and ground it in a mixie till the coconut was smoothly ground. Then using a muslin cloth, extracted the milk from the ground coconut


3. Cut and discard the skin of the bottle gourd. Discard the thick pith if it's too ripe. Then cut them into thin cubes as shown in the picture. The thickness should not be more than ¼ inch along both width and length

4. Now take the cut pieces in a saucepan and add required salt and green chilly along with little water (¼ cup) (Instead of water you can also use 2nd coconut milk and boil the bottle gourd) and cook it till done. It will take around 15-20 minutes to get cooked

5. If there is excess water after cooking the bottle gourd, I remove them. Else the coconut milk becomes very thin


6. Add the cooked beans (a heaped ¼ cup) without water to the veggies. Give a gentle stir


7. Then add in the coconut milk and curry leaves and again give a gentle stir. Check the salt now. Add if required. Once the coconut milk is added, it should not boil. It should only get warm. And it would take about a minute or so. Switch off the flame. Add coconut oil and just swirl the pan


Transfer to the serving dish and serve along with rasam and pickle or as a dish in your Onam Sadhya leaf !

Cheers,
Chitz

Wednesday, 30 October 2019

Nadan Chicken Curry | Kerala Style Simple Chicken Curry | Easy Chicken Curry without Coconut - Type 2 :)


Nothing gives me more pleasure than the food I cook being wiped clean by my 2 boys :) And I'm sure that would be the same for every person who loves to cook, right :) Though we love to cook chicken in myriad number of ways, this is that recipe that we go back to every now and then mainly coz it's sooper easy (the basic Indian chicken gravy recipe) and my little one loooves it.. Even if I make it a little extra hot he will have this with the same enthusiasm and a little moist eyes ;) This is nothing fancy, just the basic onion-tomato base gravy and the normal spices simmered with lots of love :) 

During my initial days of cooking I never used to get the dense gravy in my chicken curry and it would be loose or watery. I always used to wonder what was going wrong and finally found that adding a bit of onion and tomato puree while preparing the base gravy changes the consistency. It was partly my laziness of grinding them to avoid washing an extra set of utensils that kept me away from that consistency for quite some time ;) So if any of you wondering why your gravy is watery, now you know! I love having this versatile gravy with practically anything from steamed rice / chapathi / porotta / appam / dosa / idly / idiyappam / puttu / ghee rice / coconut milk rice. Do try out and let me know which combo is your favourite :)

My other chicken recipes that you can find in the blog would be

Chettinadu Kozhi Kulambu
Chicken Masaledar | Spicy Chicken Masala


Recipe Source: Amma

Serves: 3-4 persons


I Took: 

Preparation Time: 20-30 mins

Cooking Time: 45 mins


I Used:


Chicken - 750 gm
Coconut Oil - 2-3 tbsp
Onion - 3 nos - medium sized (2 chopped & 1 for grinding)
Tomato - 2  - medium sized
Ginger - A fat 2 inch piece
Garlic - 15-20 nos (medium sized)
Green Chilly - 2 nos - slit
Red Chilly powder - 2 tbsp
Coriander powder - 1 tbsp
Turmeric powder - ½ tsp
Garam Masala - 1 tsp
Salt - As Needed
Curry leaves - 2-3 sprigs
Coriander leaves
Water
-
-
2-3 sprigs
As Needed (½-1 cup)


The Way:

1. Clean the chicken and cut them into small bite size pieces. Cutting the chicken into small 2 inch size pieces makes it easier for the gravy and masala to sink in to the pieces and make them more succulent 


2. In a mixie jar, take the peeled ginger (15-20 medium sized ones), garlic (A fat 2 inch piece) and onion (1 no - cut into 8-12 chunks) and grind them to a smooth paste. If needed you can add 2-3 tbsp of water for grinding. Keep aside

3. Heat 2-3 tbsp of coconut oil in a pan/kadai. When the oil is hot, reduce the flame and add the 2 medium sized onions (finely chopped) along with 2 slit green chillies. Saute them well on medium flame till the onions turn translucent. You can add salt as well while sauteing the onions to help them cook faster


4. Now once the onions are translucent, add the ground onion paste to it and saute on a low flame till they start to turn brown. Keep sauteing occasionally else they might get burnt

5. Once the gravy starts to turn brown add the masalas - 2 tbsp red chilly powder, 1 tbsp coriander powder, 1 tsp garam masala and ½ tsp turmeric powder and saute well again. Keep sauteing for another 2-3 minutes till the raw smell of the masala goes

6. Meanwhile, roughly chop 2 medium sized tomatoes and add them to the mixer jar. Grind them to a smooth paste


7. Once the raw smell of the masala goes off, add the pureed tomato to the gravy and saute well. Allow it to cook for 5-6 minutes on low flame and keep sauteing occasionally

8. Then add the cleaned chicken pieces and give a nice stir. Add the required amount of water for your gravy and also 1 sprig of curry leaves. Keep in mind that the chicken will ooze water while cooking, so adjust the quantity of water accordingly


9. Cover the pan/kadai and cook in medium-low flame for 15-20 minutes till the chicken pieces and cooked tender. Keep stirring occasionally to avoid the gravy getting stuck to the bottom of the pan and getting burnt

10. Once the hicken is cooked, uncover the pan and add the remaining 1 sprig of curry leaves and 2-3 sprigs coriander leaves. Give a quick saute


Switch off the flame and serve the gravy hot with steamed rice / chapathi / porotta / appam / dosa / idly / idiyappam / puttu / ghee rice / coconut milk rice of your choice !

Cheers,
Chitz


Tuesday, 16 July 2019

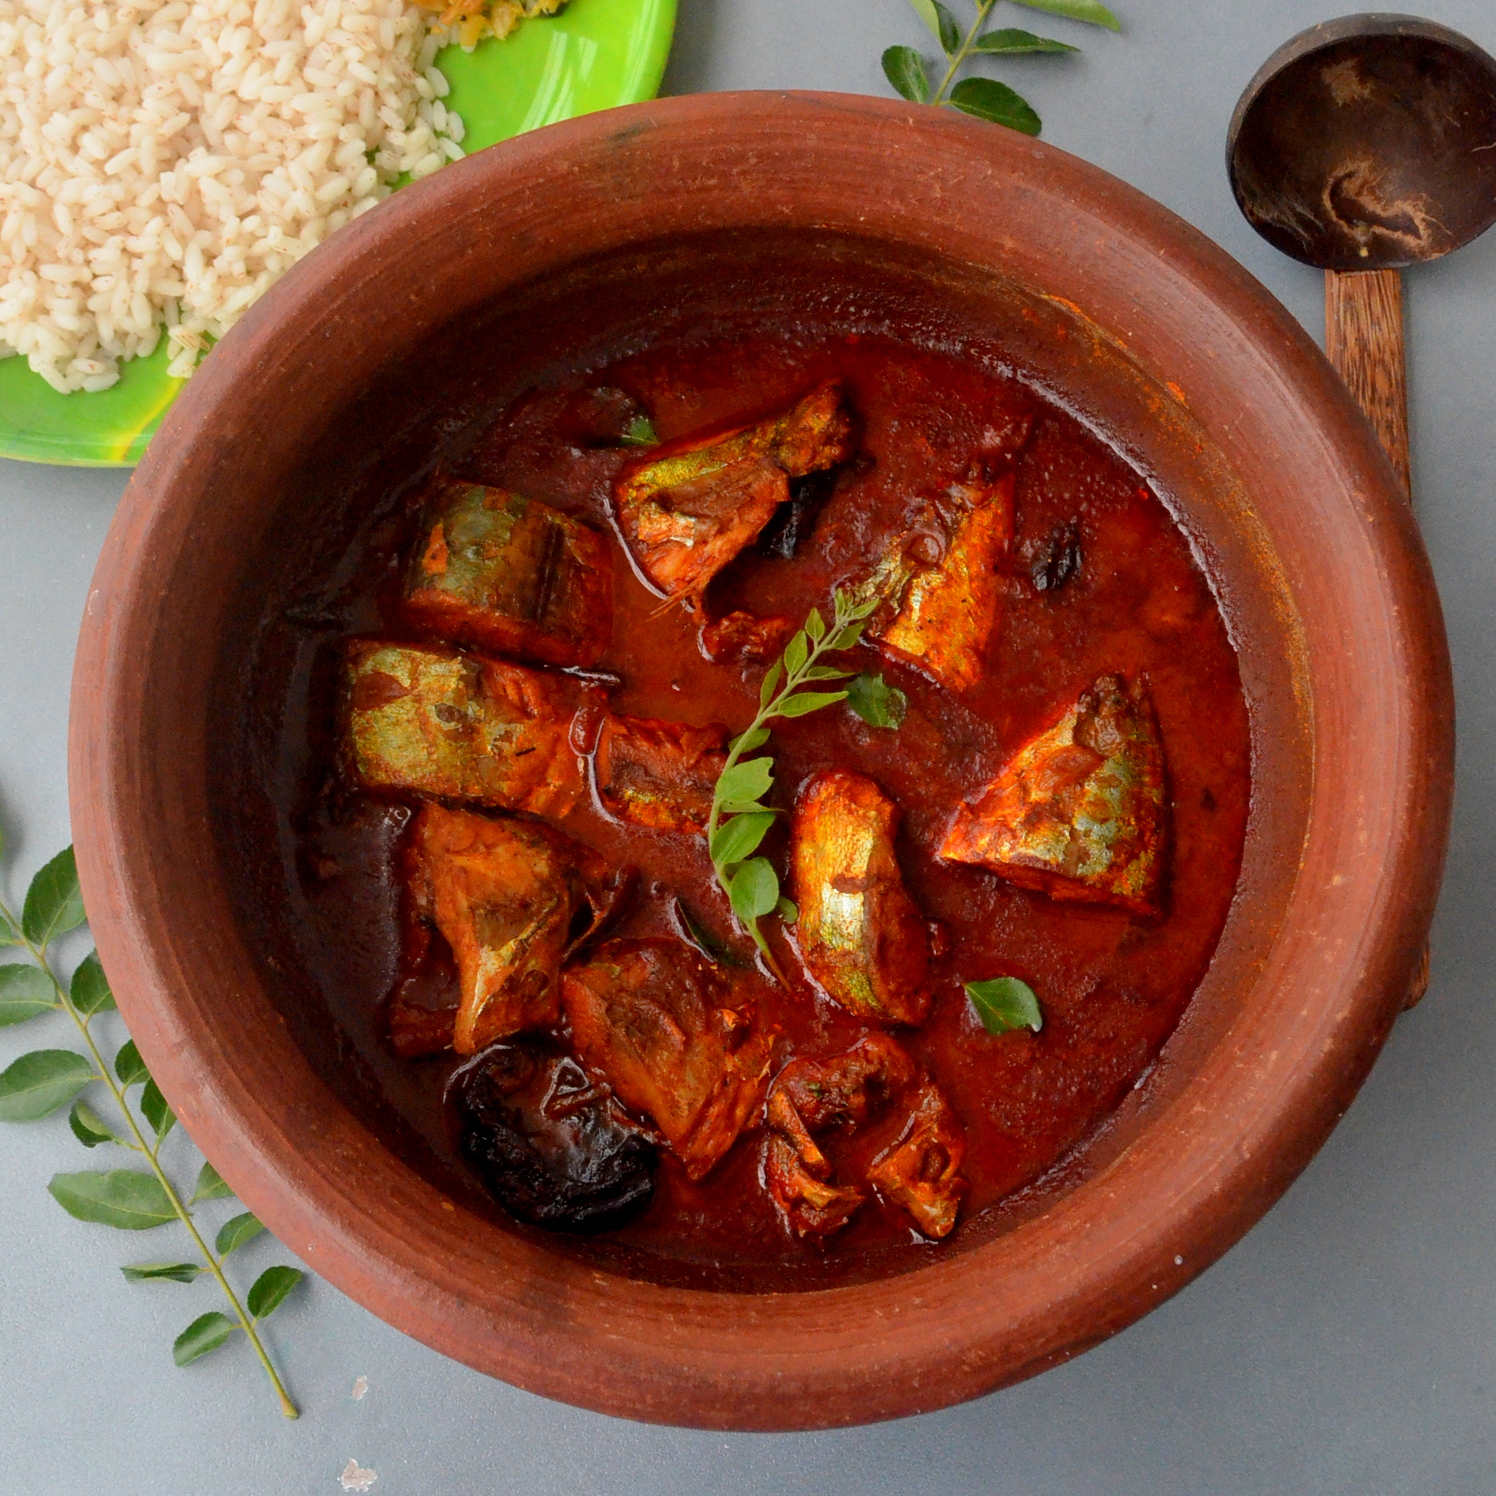
Meen Mulakittathu | Kerala Fish Curry with Kudampuli/Gambojee | Meen Vevichathu | Ayala Fish Curry with Kudampuli


I have had the privilege to taste many yummy fish curries in my life. Be it my mom, grandma, mom-in-law, hubby's aunt, uncle.. All of them make yummilicious fish curries. And for a Malayali, it is a staple as well as pride to make the perfect hot, fiery, tangy and delicious fish curry. Just a spoonful of this perfectly made fish curry is enough for you to eat with scoopfuls of matta rice. Accompany it with some fresh fish fry, boy I tell you, it makes your day and gets you set for an afternoon siesta ;)  This particular fish curry goes well with matta rice but some have it with puttu, idiyappam as well as idly :) But I prefer it with rice the most. There are many ways in which you can make Kerala style fish curry.. Easy Malabar style fish curry with coconut, Fish curry without coconut, yet another fish curry with coconut and so on. For all these recipes I use normal tamarind.

It was slightly difficult for me to get that perfect balanced taste (you call that 'chodi' in Malayalam :)) with this recipe. And hence this was one recipe that I took sometime to master. The base for all the recipes that I saw - both online on blogs and my relatives preparing was more or less the same. The right taste is always in the amount of red chilly powder and salt that you use. I have tried quite a handful of recipes from many blogs and I found the perfect measurements that suited my family's tastebuds here. This is a foolproof recipe and it never has failed me :) And let me tell you one more thing. It is always better to prepare this gravy at least 2 hours prior to serving. The more it stands the better. The flavours sink in to the fish and tastes awesome, to be precise, the next day :) So do make them and let me know how you liked them!


Recipe Source: Here

Serves: 3-4 persons


I Took: 

Preparation Time: 10 mins

Cooking Time: 25 mins


I Used:


Fish (I used Ayala/Mackerel) - 500 gm (3 medium sized fish cut into 3 pieces each)
Gambojee/Kokum/Kudampuli - 4 pieces soaked in ¼ cup of water
Coconut Oil - 2 tbsp + 1 tsp
Shallots - 6-8 nos - sliced
Garlic - 4-6 nos - sliced or chopped
Ginger - A 2 inch piece - sliced or chopped
Green Chilly - 1 no - slit
Curry leaves - 2 sprigs
Red Chilly powder - 3 tbsp (Kashmiri or normal)
Coriander powder - 1 tbsp
Turmeric powder - ½ tsp
Pepper powder - ½ tsp
Fenugreek powder (optional) - ¼ tsp
Salt - As Needed
Water - 1 cup


The Way:


1. Rinse the tamarind pieces in water to remove any dirt on them. Then soak them in ¼ cup of water

2. Take all the masala powders - red chilly powder (spice mentioned is a bit on the hotter side, adjust as needed), coriander powder, turmeric powder, pepper powder and fenugreek powder in a small plate or bowl. Mix them with 2 tbsp of water and keep aside

3. Peel and slice the shallots, garlic and ginger and keep ready. Ginger and garlic can be sliced or chopped. Slit the green chillies and keep aside


4. In a earthen pan (or a kadai or pan but preferably an earthen pot as it enhances the flavour of the gravy) heat the coconut oil

5. Now add the shallots, ginger, garlic and green chillies and saute

6. Add 1 sprig of curry leaves too


7. Saute for 3-4 minutes till they turn translucent and slowly start to change colour. No need to make them brown

8. Now add the prepared masala paste and saute on low flame for 3-4 minutes till the raw smell of the masala goes. You can add the powders directly without making into a paste, but then much caution is needed while sauteeing them. They can easily get burnt and change the taste and colour of the gravy

9. The colour attained now will determine the colour of the gravy. So if you want them to be really deep in colour saute them for a tad bit longer on the minimum flame available. And take care not to get the masalas burnt. It simply translates to 'Do not leave the dish unattended at this point'

10. When the raw smell is gone, add the soaked tamarind along with the water. Further add 1 more cup of water (adjust the quantity of water according to the consistency that is needed. Ideally make sure that the fish pieces are immersed in the gravy, that's the quantity of water that you will need) and give a nice stir and allow it to boil


11. Once the gravy starts boiling, add the cleaned fish pieces to it. Cover and cook for 10-15 minutes. If the water added is less then you might want to check in between that the fish pieces or the gravy is not burnt or stuck at the bottom of the pan

12. Uncover the pan and check for salt and add if needed. If you feel the gravy is watery then cook uncovered till it thickens to the desired consistency

13. After adding the fish pieces do not use a spoon or spatula to stir the gravy. Gently hold the pan on both sides and swirl them

14. Finally add 1 sprig of curry leaves and a tsp of coconut oil and give a gentle swirl. Close the pan and allow it to rest for some time before serving. Best served after at least 2 hours. The more you allow it to rest it the more tastier it becomes :)


Serve with matta rice or mashed or boiled tapioca.

Cheers,
Chitz

Sunday, 9 June 2019

Raw Banana Fry | Vazhakkai Fry | Vazhakya Tawa Fry | Vazhakkai varuval | Easy Vazhakka Roast


This is yet another shallow fry recipe that features quite often in my menu. As the husband man (and now at times the little man too) has a relatively low tolerance (it's the mind that speaks not the tummy ;)) towards veggies, I resort to more of frying the veggies and make them look like close cousins to non-vegetarian dishes ;) For me to feel less guilty, I mostly use 2 or at the max 3 tbsp oil and shallow fry them. It tastes yum and makes the boys eat (not love, no way I can make them I guess) the veggies as well. So this is a simple and crispy fry that pairs well with rice an curd or Sambar or Rasam or even with a Puli Kuzhambu :) Do try and let me know how you wooed your loved ones :)


Serves: 2-3 persons


I Took: 

Preparation Time: 20 mins

Cooking Time: 30 mins


I Used:


Raw Banana - 2 medium sized ones (1.5 cups after cutting)
Chilly powder - 1 tsp
Coriander powder - 1 tsp
Turmeric powder - ¼ tsp
Garam Masala
Rice Flour (optional)
Oil
Mustard
Curry leaves
-
-
-
-
-
½ tsp
1-2 tbsp
2-3 tbsp
¼ tsp
2 sprigs
Salt - As Needed


The Way:


1. Gently scrape the skin of the plantains with a knife or a scraper. Do not remove the whole skin. Lightly scrape, maybe just the black spots alone you can scrape away. Rinse them in water. Trim the edges and cut them into thin round slices


2. Take the cut plantain slices in a steel bowl. Add the red chilly powder, coriander powder, turmeric powder, garam masala and salt to it and mix well. Allow it to rest for 10-15 minutes

3. Heat oil for shallow frying in a frying pan


4. Once the oil is hot, splutter the mustard seeds and curry leaves. This is optional

5. Then reduce the flame to minimum. Arrange the plantain pieces in the frying pan and shallow fry them 

6. Once one side slightly turns colour, flip over and roast the other side as well. 

7. Once done, remove them onto a plate and fry the remaining plantain pieces also like this in batches and serve with rice and gravy


Notes:

  • If you may like, add a ¼ tsp of ginger garlic paste also while marinating the plantain pieces
  • If you like your plantain fry more crispier, add 1-2 tbsp of rice flour to the marination

Cheers,
Chitz

Friday, 24 May 2019

Pavakkai Fry | Pavakya Fry | Kakarakaya Fry | Easy Bitter Gourd Fry (Deep Fry)


By know you guys would be knowing my family's love for bitter gourd. Though I am very picky about the dishes made with pavakkai, this one is a personal as well as family favourite. Deep frying can make even the boring bittery bitter gourd yum and this recipe is a testimonial for that ;) And even my guests adore this fry. It tastes yum with curd rice, rasam sadam and samabar sadam.. My little one munches them as such :D And this is the only way he eats bitter gourd. Can't blame him ;) So let's hop on to the recipe now..

Some other recipes with bitter gourd that are there in the blog are PitlaPavakya Pulin Curry, Pavakkai Puli Kuzhambu & Khatta Meeta Karela..


Serves: 2-3 persons


I Took: 

Preparation Time: 10 mins

Cooking Time: 15 mins


I Used:


Bitter Gourd/Pavakkai - 2 medium sized ones
Red Chilly powder - 1 ½ tsp
Coriander powder - 1 ½ tsp
Turmeric powder - ½ tsp
Tamarind Paste - 1 tsp (or a gooseberry sized piece)
Grated Jaggery (refer notes)
Salt
Oil
-
-
-
1 tsp
As Needed
To deep fry


The Way:


1. Rinse the bitter gourd well in water. You can scrape off the edges if needed. Else can use them as such. Trim the edges and cut them into thin round slices. The seeds and the skin are edible. If you do not prefer you can remove the seeds

2. Take the cut bitter gourd slices in a bowl. Add the red chilly powder, coriander powder, turmeric powder, salt, jaggery and tamarind paste, besan and rice flour (if using) to it and mix well. I did not have tamarind paste handy so I added a goseberry sized tamarind instead

3. Allow it to rest for 10-15 minutes


4. Heat oil for deep frying in a kadai or tadka pan

5. First add the tamarind piece (if using paste, directly add the marinated bitter gourd slices) to it. After 30-40 seconds, add a batch of the bitter gourd pieces and fry it till it turns colour and becomes deep and crisp

6. Remove onto a plate and fry the remaining bitter gourd pieces also like this in batches and serve with rice and gravy


Notes:

  • To remove some bitterness you can rub salt to the bitter gourd pieces and rest it for 20 minutes. Then rinse it under water and then use. Alternately you can soak in curd as well and squeeze or rinse off the curd and then use. But since this recipe calls for deep frying the bitter gourd, the bitter taste is not felt much and hence I avoid that step
  • You can skip jaggery if you do not want. The tamarind and jaggery are to reduce the bitterness of the gourd
  • You can add 2-3 tbsp each of besan flour and rice flour or either one of the flour to the bitter gourd slices while marinating. The flours will add a coating to the bitter gourd slices and make them look more appealing :) I generally do not add them

Cheers,
Chitz