Showing posts with label Side dish for Appam. Show all posts

Wednesday, 30 October 2019

Nadan Chicken Curry | Kerala Style Simple Chicken Curry | Easy Chicken Curry without Coconut - Type 2 :)


Nothing gives me more pleasure than the food I cook being wiped clean by my 2 boys :) And I'm sure that would be the same for every person who loves to cook, right :) Though we love to cook chicken in myriad number of ways, this is that recipe that we go back to every now and then mainly coz it's sooper easy (the basic Indian chicken gravy recipe) and my little one loooves it.. Even if I make it a little extra hot he will have this with the same enthusiasm and a little moist eyes ;) This is nothing fancy, just the basic onion-tomato base gravy and the normal spices simmered with lots of love :) 

During my initial days of cooking I never used to get the dense gravy in my chicken curry and it would be loose or watery. I always used to wonder what was going wrong and finally found that adding a bit of onion and tomato puree while preparing the base gravy changes the consistency. It was partly my laziness of grinding them to avoid washing an extra set of utensils that kept me away from that consistency for quite some time ;) So if any of you wondering why your gravy is watery, now you know! I love having this versatile gravy with practically anything from steamed rice / chapathi / porotta / appam / dosa / idly / idiyappam / puttu / ghee rice / coconut milk rice. Do try out and let me know which combo is your favourite :)

My other chicken recipes that you can find in the blog would be

Chettinadu Kozhi Kulambu
Chicken Masaledar | Spicy Chicken Masala


Recipe Source: Amma

Serves: 3-4 persons


I Took: 

Preparation Time: 20-30 mins

Cooking Time: 45 mins


I Used:


Chicken - 750 gm
Coconut Oil - 2-3 tbsp
Onion - 3 nos - medium sized (2 chopped & 1 for grinding)
Tomato - 2  - medium sized
Ginger - A fat 2 inch piece
Garlic - 15-20 nos (medium sized)
Green Chilly - 2 nos - slit
Red Chilly powder - 2 tbsp
Coriander powder - 1 tbsp
Turmeric powder - ½ tsp
Garam Masala - 1 tsp
Salt - As Needed
Curry leaves - 2-3 sprigs
Coriander leaves
Water
-
-
2-3 sprigs
As Needed (½-1 cup)


The Way:

1. Clean the chicken and cut them into small bite size pieces. Cutting the chicken into small 2 inch size pieces makes it easier for the gravy and masala to sink in to the pieces and make them more succulent 


2. In a mixie jar, take the peeled ginger (15-20 medium sized ones), garlic (A fat 2 inch piece) and onion (1 no - cut into 8-12 chunks) and grind them to a smooth paste. If needed you can add 2-3 tbsp of water for grinding. Keep aside

3. Heat 2-3 tbsp of coconut oil in a pan/kadai. When the oil is hot, reduce the flame and add the 2 medium sized onions (finely chopped) along with 2 slit green chillies. Saute them well on medium flame till the onions turn translucent. You can add salt as well while sauteing the onions to help them cook faster


4. Now once the onions are translucent, add the ground onion paste to it and saute on a low flame till they start to turn brown. Keep sauteing occasionally else they might get burnt

5. Once the gravy starts to turn brown add the masalas - 2 tbsp red chilly powder, 1 tbsp coriander powder, 1 tsp garam masala and ½ tsp turmeric powder and saute well again. Keep sauteing for another 2-3 minutes till the raw smell of the masala goes

6. Meanwhile, roughly chop 2 medium sized tomatoes and add them to the mixer jar. Grind them to a smooth paste


7. Once the raw smell of the masala goes off, add the pureed tomato to the gravy and saute well. Allow it to cook for 5-6 minutes on low flame and keep sauteing occasionally

8. Then add the cleaned chicken pieces and give a nice stir. Add the required amount of water for your gravy and also 1 sprig of curry leaves. Keep in mind that the chicken will ooze water while cooking, so adjust the quantity of water accordingly


9. Cover the pan/kadai and cook in medium-low flame for 15-20 minutes till the chicken pieces and cooked tender. Keep stirring occasionally to avoid the gravy getting stuck to the bottom of the pan and getting burnt

10. Once the hicken is cooked, uncover the pan and add the remaining 1 sprig of curry leaves and 2-3 sprigs coriander leaves. Give a quick saute


Switch off the flame and serve the gravy hot with steamed rice / chapathi / porotta / appam / dosa / idly / idiyappam / puttu / ghee rice / coconut milk rice of your choice !

Cheers,
Chitz


Monday, 15 January 2018

Kerala Mutton Roast | Easy Kerala style Mutton Varatiyathu | Nadan Mutton Roast Dry


Hello folks.. How is the New year treating you? My year is so far good and going sort of ok! That means, I am atleast keeping up on half of my resolutions so far ;) My laptop was giving me a lot of trouble in the past 2-3 months and finally I have had it repaired and so the second task I wanted to do was to publish a post in this humble little space of mine. And the first one is to upload my little one's pics and take a backup of it somewhere safe ! I almost had a nightmare when my lappie crashed as I was scared that I would lose his videos. But thank God, I could recover them ! Some little crazy cute things that we hang on to in life na :)

So whoever knows me would know that I love chicken, both to cook and to eat and for me the first thing that comes to mind while deciding a menu for any celebration is to include a chicken dish. But today's recipe is not about chicken, it's mutton. This recipe is very easy one and can be done with the regular ingredients from your pantry and it is super tasty too. This is a hit in my family and Deeps goes ga-ga about this every time I make it and he always says it tastes as good as a restaurant style roast.. Now that's something that can make you both happy and proud right? So why you thinking further? Head on to the recipe and make some soon and let me know how you got appreciated for it :)


Preparation Time : 10 minutes

Cooking Time : 45-60 minutes


I Used:


To Marinate:
Mutton
Red Chilly Powder
-
-
½ kg
1 tsp
Lemon juice
Ginger Garlic paste
Salt
-
-
-
½ of a medium sized one
½ tbsp
As needed

For the Masala:

Onion
Shallots
Green Chilly
-
-
-
2 small sized - chopped
10 nos - sliced
1 no slited 
Tomato-1 medium sized - chopped
Ginger-Garlic paste-1 tbsp
Red Chilly Powder-1 ½ tsp
Coriander Powder-1 ½ tsp
Turmeric Powder-½ tsp
Garam Masala
Pepper Powder
Cumin Powder
-
-
-
1 tsp
½ tsp
¼ tsp
Salt-As needed
Curry leaves-2 sprig

To Temper:
Coconut Oil-3 tbsp
Fennel seeds-½ tsp
Cinnamon-½ inch stick
Cloves-2-3 nos
Bay leaf-1 leaf
Curry leaves-2 sprigs


The Way:

  1. Cut the mutton into medium bite sized pieces. Rinse the pieces thoroughly in water
  2. Marinate the mutton with red chilly powder, salt, ginger garlic paste and lemon. If you have time allow it to marinate in the freezer over night else marinate them for 30-60 minutes
  3. Then pressure cook them until done. I kept on high flame for 2 whistles and low for 2 whistles
  4. In a pan heat oil. Temper the fennel seeds. Add bay leaf, cinnamon and cloves. Saute for about 30 seconds
  5. Then add the sliced onions, shallots and slit green chilly along with little salt and saute
  1. When they become translucent and slightly turn to start brown add ginger- garlic paste. Saute for 3-4 minutes for the raw smell to go off 
  2. Now add red chilly powder, coriander powder, turmeric powder, cumin powder and pepper powder and saute for 2-3 minutes
  3. Then add the chopped tomatoes and saute well. It should turn pulpy and mash completely
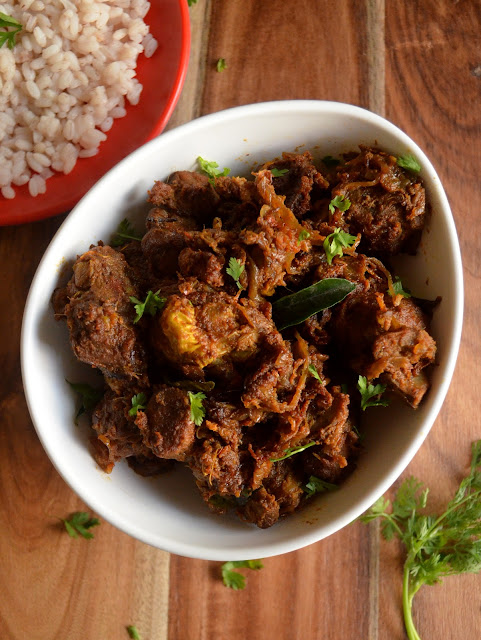
  1. Then add the cooked mutton & curry leaves. Cook on low flame until the water evaporates and it becomes completely dry

Serve with Jeera Rice/Peas Pulav/Coconut Milk Rice/Mutton Biriyani or Roti/Porrottas


Notes:


  • Adjust the spice levels according to your taste buds. I have used chilly powder, pepper powder and green chillies here. So adjust the amount of  chilly powder while marinating and also while using the masala
  • Use good juicy tomatoes to balance that sour taste perfectly
  • And allow the mutton to roast till the masala becomes completely dry and completely coated to the mutton
  • Use coconut oil for that authentic taste. It does bring in a lot of difference

Cheers,
Chitz

Thursday, 1 December 2016

Kerala Style Vendakka Gravy | Vendakka Mappas | Vendakka Thengapaal Curry

Okra in Coconut Milk - the best gravy for Kerala Appam


I like to experiment with new veg gravies for my lunch. I make them, eat them and then ask Deeps to taste them when he is back home for the day. If he likes them, then the dish features in our regular menu. If he doesn't like it and it's only me who has fallen for the recipe, then it is made for my lunch at times. This is one such dish which I found while googling, from a dear blogger buddy Julie at 'Erivum Puliyum'. And the best part is I finished the whole gravy at lunch itself not leaving anything for Deeps to taste even ;) 

I love coconut milk in my gravies. They have a mild taste yet feels so rich and tasty and they are very light on the tummy as well. It is much easier to prepare also, if you are using coconut milk powder. The curry will be ready in a jiffy. But if you are extracting milk from freshly grated coconut, then it is a slightly different story. It may take an extra 15 minutes. But I always vouch for homemade dishes from scratch. There is an un-doubting taste and freshness and authenticity in those dishes that can never be replaced with short cuts. 

And although I had this gravy with rice, with every mouth that I took, I had that inner voice telling me at the back of my head that this is going to taste just awesome with Appam, as this curry tastes like a cousin of our regular Vegetable Stew. I have that in mind, sometime soon I am going to try that combo :) If you are looking for some easy fast recipes for lunch at home or for your lunch dabba to office, do try this out. I am sure you will not regret :)


Recipe Source: Adapted from here


I Took: 

Preparation Time: 15 minutes

Cooking Time: 30 minutes


Serves : 2-3 persons


I Used:


Vendakka/Ladies Finger - 10 nos
Coconut Oil - 2 tbsp
Cinnamon - An inch piece
Cloves - 2 nos
Green Chilly - 2 nos - slited
Ginger - 1 tsp - chopped
Onion - 1 no - medium sized - sliced
Turmeric powder - ½ tsp
Red Chilly powder - 1 tsp
Curry leaves - A sprig
Coconut Milk - Thick - 1 cup
Coconut Milk - Thin - 1.5 cups
Lemon juice - 1 tbsp

To Temper:

Coconut Oil - 3 tbsp
Mustard seeds - ¼ tsp
Shallots - 4-5 nos - sliced
Curry Leaves - A sprig


The Way:


1. Rinse and clean the ladies finger in water. Chop off the edges and cut them into 2 inch length pieces or bite sized pieces as per your preference.

2. Heat 1 tbsp oil in a pan and add the cut ladies finger pieces and saute them for about 3-4 minutes till the stickiness of the ladies finger goes away.Once done transfer to another plate/bowl and keep them aside.

3. If preparing coconut milk from fresh coconut, grind coconut with water (as required) and extract the thick and thin coconut milk and keep aside. If using instant coconut milk powder, add the powder in warm water (as mentioned in the packet), prepare the thin and thick milk and keep aside.


4. Heat oil in a pan/kadai. Add the whole spices - cinnamon and cloves. Keep the flame in low or medium. After about a minute add the chopped ginger and green chillies. Saute for about half a minute.


5. Add the sliced onions and saute till it turns translucent. No need to make it brown.

6. Now add curry leaves, salt, turmeric powder and red chilly powder and saute well for about 2-3 minutes till the raw smell goes off.

7. Now add the sauteed ladies finger and give a nice stir.


8. Add the thin coconut milk and give a stir. Cover and cook till the ladies finger is cooked. This may take abut 6-7 minutes.

9. Now add the lemon juice (is optional) and adjust salt if needed.

10. Once the ladies finger is cooked, add in the thick coconut milk. Give a quick and nice stir. Switch off flame.


11. In another pan (tadka pan) heat oil. Splutter mustard seeds. Add in the chopped shallots and curry leaves. Saute till the shallots turn light brown in colour. Take care not to burn them. Add the tempering to the gravy and give a nice stir.


Serve hot with Appam / Idiyappam / Steamed Rice & Fish Fry :)

Cheers,
Chitz

Thursday, 3 November 2016

Udaitha Muttai Gravy | Udacha Mutta Curry | Egg Drop Gravy | South Indian Style Poached Egg Gravy


Does the name of this dish intrigue you? Or is this your family favorite, a quick fix recipe at your place? Many might not know or would not have heard of this recipe. At least, Deeps does not know. It was a surprise for him that eggs can be cooked this way. Actually it was a surprise for me too, that Deeps did not know this way of preparing eggs as he is an avid egg eater :D So all egg lovers and eggetarians' out there, here is an easy quick recipe with eggs for you. Instead of adding boiled eggs to the gravy, we break and drop the eggs as such into the gravy and allow them to cook in the gravy and thereby slowly infusing the heat, salt and tart from the gravy into the eggs :) Sounds nice??

My mom used to make this dish regularly at our home before. Actually this was one of the dishes that she learnt to cook during her initial days after marriage. She learnt this recipe from one of my dad's buddy as this was one of my dad's favorite way of having eggs back then :) So you can call this a bachelor special recipe as well as it is easy to make and tastes great and is a non-veg dish as well. So let's see step by step how this is made..


Other Egg Recipes:
Egg Rice | Muttai Sadam


Recipe Source: Ma


I Took: 

Preparation Time: 20 minutes

Cooking Time: 10 minutes


Serves : 2 persons


I Used:


Oil - 2-3 tbsp
Egg - 2 nos
Mustard - ½ tsp
Onion - 1 medium sized - chopped
Tomato - 2 medium sized - chopped
Green Chilly - 1 no - slited
Tamarind - A small goosberry sized
Turmeric powder - ½ tsp
Red Chilly powder - 2 tsp
Coriander powder - 1 tsp
Garam Masala - ½ tsp
Salt - As needed
Curry leaves - To garnish
Coriander leaves - To garnish


The Way:


1. Soak tamarind in ¼ cup of water (preferably warm) for 10-15 minutes. Then extract the pulp and keep aside.

2. Heat oil. Splutter mustard seeds.


3, Add onion, green chilly and salt. Saute well. The onion should turn slightly brown in colour.

4. Now add all the masala powders - turmeric powder, red chilly powder, coriander powder and garam masala. Saute well for 2-3 minutes till the masala blends nicely with the onion and the raw smell goes off.

5. Now add the tomatoes and saute. 


6. The tomatoes should become soft and mushy. Saute occasionally till then. Take care that they do not stick to the bottom of the pan or get burnt.

7. Now when the tomatoes have mashed down well, add the extracted tamarind juice.

8. Also add sufficient quantity of water. You can add water suitable for your gravy needs. I added 1.5 cups of water.


9. Allow the water to come to a boil. Check the salt at this point and add if required.

10. Now break the eggs and drop them gently into the gravy.

11. If you like, you can gently break the yolk as shown in the pic below so that they cook well and also faster.


12. Allow the eggs to cook well. You can close the pan and also cook. This may take about 3-4 minutes. 

13. Once the eggs are cooked, garnish with curry leaves and coriander leaves and serve hot with phulkas/rice.


Notes:

  • Instead of chopped tomatoes, you can add tomato puree as well. Just grind two tomatoes in mixie and add them instead of the chopped ones
  • You can add ginger-garlic paste if you like, Without them also, the gravy tastes awesome :)
  • Add little tamarind only as specified in the ingredients list. Else both the tomatoes and tamarind can contribute and make the gravy extra sour
  • You can use tamarind paste also instead of extracting juice from fresh tamarind. Use ½ tsp then

Cheers,
Chitz

Thursday, 21 July 2016

Nadan Chicken Curry - Kerala Style without coconut - Type 1

Chicken cooked in onion, tomatoes & dry roasted Indian spices


All those regular readers of mine would know my love for chicken & how I love to prepare chicken dishes ! So here I am back with a basic & simple chicken recipe. This one is very easy to prepare, do not be taken aback with the number of steps, it's just a pinch of this & a handful of that from your masala dabbas/pantry & voila, you are left with a very flavorful & aromatic side dish that will definitely elevate your mild flavored rice or simple phulkas & leave you contented :) 

This is a personal favorite at home & Deeps loves to prepare this by himself, so as usual, I'm the happy apprentice then. This time we paired it up with 'Nei Choru' & we lost count of how many helpings we took while having lunch with one of our favorite 'House' series on ;) This is just one of the types in which Nadan chicken curry is made at our place. There are many variations to this which I will post in the future. So this time, try this out & let me know how you liked it :)

Other Chicken recipes:

Chettinadu Kozhi Kulambu
Chicken Masaledar | Spicy Chicken Masala


Recipe Source: Deeps


I Took:

Marination: 30 minutes

Preparation: 40 minutes


Serves : 3-4 persons


I Used:


For Marination:

Chicken - 500 gm
Turmeric powder - ½ tsp
Salt - As needed
Lemon juice - ½ of a small sized lemon

To Roast & Grind:


Red Chilly - 4 nos
Coriander Seeds - 1 tsp
Mustard - ¼ tsp
Cumin seeds - ½ tsp
Pepper - ½ tsp
Cinnamon - 1 inch piece
Cloves - 2 nos
Cardamom - 1 no
Star Anise - 1 no
Bay leaf - 1 no

For Gravy:


Onion - 4-5 medium sized (sliced)
Tomato - 2 medium sized (sliced)
Green Chilly - 2 nos
Ginger Garlic paste - 2 tbsp
Red Chilly powder - 1 tsp
Coriander powder - 1 tsp
Turmeric powder - ½ tsp
Curd - 2 tbsp (optional)
Coriander leaves - 2 sprig
Curry leaves - 2 sprig
Salt - As needed
Oil - As needed
Water - As needed


To Temper: (optional)

Oil  - 2 tbsp
Garlic - 1 pod
Pepper - 1 tsp


The Way:


1. Dry roast the ingredients under 'To roast & grind' in a pan. Add little water to it & grind  it to a fine paste

2. Marinate the cleaned & cut chicken pieces with the ingredients under 'For Marination' &  keep aside for 30 minutes


3. In a kadai, heat oil. Add the sliced onions & salt & saute well. The taste of this dish depends on how well you saute the onions. This is the key step & it may take you around 10-12 minutes. Keep sauteing occasionally till it reduces to half & becomes mushy. You can cover & cook as well in between

4. Once the the onions are nicely sauteed, add the sliced tomatoes & slit green chillies & saute well till the tomatoes becomes mushy

5. Now add the ginger-garlic paste & saute till the raw smell goes off. This may take around 2-3 minutes


6. Now add turmeric powder, red chilly powder, coriander powder & saute well for about a minute or two


7. Dunk in the marinated chicken pieces & give a nice stir. Close the kadai & cook in a medium/low flame till the chicken pieces become soft & are half-cooked. This takes about another 10 minutes

8. Now uncover the kadai & you can see that the chicken has let out some water. At this stage add the ground paste & sufficient water (if required) to bring it to the consistency for the gravy that you require. Close the kadai & cook again till the chicken is done


9. Now add in curd & give a stir. This step is totally optional. We like to add curd as it brings a tangy zing to the gravy which enhances the flavour of the dish

10. Add in the chopped coriander leaves & curry leaves & give a stir. Leave it in medium flame for another 30-60 seconds for the flavour of the leaves to sink in


11. Now for the tempering, heat oil in a kadai & fry the garlic pods & pepper separately


12. The garlic pods should slightly change colour & the pepper should just start to crackle. This tempering is also totally optional. We add it as Deeps like the crunch that the tempering adds to the gravy


You can serve hot with Nei Choru / Coconut Milk Rice / Roti / Idiyappam / Appam / Porotta / Chiratta Puttu / Puttu or any mild flavoured rice !

Cheers,
Chitz