Showing posts with label Side dish for Idly/Dosa. Show all posts

Friday, 1 May 2020

Coconut Chutney | White Coconut Chutney | South Indian Thengai Chutney with Pottu Kadalai | Easy Side dish for Idly/Dosa/Uthappam/Pongal | Vella Cutney


This is one of the most versatile and easy chutney that you can ever make. You know why versatile, coz it can be paired with almost many of the South Indian tiffins/breakfast dishes like idly, dosa, uthappam, pongal, upma, vadai etc etc.. It is a simple, clean and yet another ready in a jiffy recipe :) Since it is a basic recipe I am tagging it under basics here :) Most of the households would have a variant of this chutney recipe yet some of the ingredients remain the core ;) Grind, taste, adjust and repeat.. That's how you roll when you are a beginner. After a few times you will get the hang of it. So let's see how this simple humble chutney is made..


Serves: 4 persons


I Took: 

Preparation Time: 10 minutes


I Used:


Grated Coconut - ½ cup
Green Chilly - 2 nos
Ginger - An inch piece
Fried Gram/Pottukadalai - 2 tbsp
Salt - As Needed
Water - As Needed

To Temper:

Oil (Coconut/Sunflower) - 2 tbsp
Mustard - ½ tsp
Curry Leaves - 2 sprigs


The Way:


1. Take the grated coconut and ginger in a mixer jar. Add little water (¼ cup) and grind them coarsely

2. Now add the green chilly, fried gram dal/pottu kadalai and salt and grind them nicely to a smooth (as smooth or coarse as you want) consistency


3. In a tadka pan, heat oil. Splutter mustard seeds

4. Then add the curry leaves. Switch off flame

5. Add the tadka to the chutney


Serve with idly, dosa, uthappam, pongal !


Notes:

  • Use freshly broken & scraped coconut. The taste really differs when you use even a day old (refrigerated) coconut
  • While you grate there will be some red or brown coloured scrapings as well. Avoid them for this chutney as it will affect the colour ;)
  • Avoid using old coconut and also kopra
  • Add water according to the consistency of the chutney that you need. I would suggest using less water while grinding. Add more if needed once you grind and transfer the chutney to a container
  • For runny chutney you can add more pottu kadalai but be cautious if you do not like the taste
  • Ginger is optional. Pottu kadalai is also optional. Add both or either one or none as per your liking
  • Adjust the chillies as per your taste. Quantity of ingredients given are guidelines and can be adjusted to suit personal tastes
  • You can use the green chillies which has become ripe and turned red in colour. They might slightly change the colour of the chutney but tastes yum
  • If the chutney becomes too runny, add more grated coconut and grind
  • While tempering can add a tsp of urad dal as well


Cheers,
Chitz

Wednesday, 30 October 2019

Nadan Chicken Curry | Kerala Style Simple Chicken Curry | Easy Chicken Curry without Coconut - Type 2 :)


Nothing gives me more pleasure than the food I cook being wiped clean by my 2 boys :) And I'm sure that would be the same for every person who loves to cook, right :) Though we love to cook chicken in myriad number of ways, this is that recipe that we go back to every now and then mainly coz it's sooper easy (the basic Indian chicken gravy recipe) and my little one loooves it.. Even if I make it a little extra hot he will have this with the same enthusiasm and a little moist eyes ;) This is nothing fancy, just the basic onion-tomato base gravy and the normal spices simmered with lots of love :) 

During my initial days of cooking I never used to get the dense gravy in my chicken curry and it would be loose or watery. I always used to wonder what was going wrong and finally found that adding a bit of onion and tomato puree while preparing the base gravy changes the consistency. It was partly my laziness of grinding them to avoid washing an extra set of utensils that kept me away from that consistency for quite some time ;) So if any of you wondering why your gravy is watery, now you know! I love having this versatile gravy with practically anything from steamed rice / chapathi / porotta / appam / dosa / idly / idiyappam / puttu / ghee rice / coconut milk rice. Do try out and let me know which combo is your favourite :)

My other chicken recipes that you can find in the blog would be

Chettinadu Kozhi Kulambu
Chicken Masaledar | Spicy Chicken Masala


Recipe Source: Amma

Serves: 3-4 persons


I Took: 

Preparation Time: 20-30 mins

Cooking Time: 45 mins


I Used:


Chicken - 750 gm
Coconut Oil - 2-3 tbsp
Onion - 3 nos - medium sized (2 chopped & 1 for grinding)
Tomato - 2  - medium sized
Ginger - A fat 2 inch piece
Garlic - 15-20 nos (medium sized)
Green Chilly - 2 nos - slit
Red Chilly powder - 2 tbsp
Coriander powder - 1 tbsp
Turmeric powder - ½ tsp
Garam Masala - 1 tsp
Salt - As Needed
Curry leaves - 2-3 sprigs
Coriander leaves
Water
-
-
2-3 sprigs
As Needed (½-1 cup)


The Way:

1. Clean the chicken and cut them into small bite size pieces. Cutting the chicken into small 2 inch size pieces makes it easier for the gravy and masala to sink in to the pieces and make them more succulent 


2. In a mixie jar, take the peeled ginger (15-20 medium sized ones), garlic (A fat 2 inch piece) and onion (1 no - cut into 8-12 chunks) and grind them to a smooth paste. If needed you can add 2-3 tbsp of water for grinding. Keep aside

3. Heat 2-3 tbsp of coconut oil in a pan/kadai. When the oil is hot, reduce the flame and add the 2 medium sized onions (finely chopped) along with 2 slit green chillies. Saute them well on medium flame till the onions turn translucent. You can add salt as well while sauteing the onions to help them cook faster


4. Now once the onions are translucent, add the ground onion paste to it and saute on a low flame till they start to turn brown. Keep sauteing occasionally else they might get burnt

5. Once the gravy starts to turn brown add the masalas - 2 tbsp red chilly powder, 1 tbsp coriander powder, 1 tsp garam masala and ½ tsp turmeric powder and saute well again. Keep sauteing for another 2-3 minutes till the raw smell of the masala goes

6. Meanwhile, roughly chop 2 medium sized tomatoes and add them to the mixer jar. Grind them to a smooth paste


7. Once the raw smell of the masala goes off, add the pureed tomato to the gravy and saute well. Allow it to cook for 5-6 minutes on low flame and keep sauteing occasionally

8. Then add the cleaned chicken pieces and give a nice stir. Add the required amount of water for your gravy and also 1 sprig of curry leaves. Keep in mind that the chicken will ooze water while cooking, so adjust the quantity of water accordingly


9. Cover the pan/kadai and cook in medium-low flame for 15-20 minutes till the chicken pieces and cooked tender. Keep stirring occasionally to avoid the gravy getting stuck to the bottom of the pan and getting burnt

10. Once the hicken is cooked, uncover the pan and add the remaining 1 sprig of curry leaves and 2-3 sprigs coriander leaves. Give a quick saute


Switch off the flame and serve the gravy hot with steamed rice / chapathi / porotta / appam / dosa / idly / idiyappam / puttu / ghee rice / coconut milk rice of your choice !

Cheers,
Chitz


Tuesday, 21 May 2019

Red Coconut Chutney | Kerala Style Coconut Chutney with Shallots | Easy Kerala Style Coconut Chutney


An idly or dosa breakfast at my place usually means there will be a red chutney or white chutney to accompany it :) Both are coconut chutneys with the red one made with red chillies and the white one made with green chillies. Very easy to make if there is grated coconut at hand. Usually I grate the coconut the previous night or during weekends and refrigerate (You can even freeze them if you have more quantity) them. Morning first thing I take the grated coconut from fridge and keep outside. And while grinding I use slightly warm water so that it grinds easily without a slimy appearance (frozen grated coconut tends to make the chutney slimy, so better to use freshly grated ones) This makes life easier on busy mornings :) So today I will share how I make the red coconut chutney :) Other chutney recipes on the blog are Onion Tomato Kara ChutneyUlli SammanthiPudina Chutney (without coconut)Pudina Chutney with coconutPudina-Verkadalai Chutney


Serves: 3 persons


I Took: 

Preparation Time: 10 mins


I Used:


Grated Coconut - ½ cup
Red Chilly - 2-3 nos
Ginger (optional) - An inch piece
Shallots/Small Onions - 2-3 nos
Salt - As Needed
Water - As Needed

To Temper:


Coconut Oil - 2 tbsp
Mustard - ½ tsp
Curry Leaves - 2 sprigs


The Way:


1. Take the grated coconut, shallots, red chilly and ginger in a mixer jar along with required salt. Add little water (¼ cup)


2. Grind them nicely to a smooth (as smooth or coarse as you want) consistency


3. In a tadka pan, heat oil. Splutter mustard seeds

4. Then add the curry leaves. Switch off flame

5. Add the tadka to the chutney


Serve with idly, dosa, uthappam, pongal !


Notes:


  • Use freshly broken & scraped coconut. The taste really differs when you use even a day old (refrigerated) coconut
  • Avoid using old coconut and also kopra
  • Add water according to the consistency of the chutney that you need. I would suggest using less water while grinding. Add more if needed once you grind and transfer the chutney to a container
  • Ginger is optional
  • Adjust the chillies as per your taste. Quantity of ingredients given are guidelines and can be adjusted to suit personal tastes
  • If the chutney becomes too runny, add more grated coconut and grind

Cheers,

Chitz

Friday, 30 November 2018

Pudina Chutney with Coconut | Mint Chutney recipe with Coconut | Pudina Chutney for Idly/Dosa


Chutneys with mint and coriander leaves appear often in my mom's menu. I make them slightly rarely coz greens in chutney is not much accepted in my house :D But this one with coconut is a slight exception. It is an easy chutney recipe with nice flavours from the mint and also coconut is added which does not overpower the strong mint flavours (strictly for those who are not a fan ;)) So let's check out how to make this easy chutney then. 

The other chutney recipes that might interest you are 


Recipe Source: Ma


I Took: 

Preparation Time: 10 minutes

Cooking Time: 15 minutes


Serves : 3-4 persons


I Used:


Pudina - 1 cup (tightly packed)
Coconut - ½ cup
Urad Dal - 1 tbsp
Ginger - 1 tbsp (a 2 inch fat piece)
Green Chilly - 3 nos
Asafoetida - ¼ tsp
Tamarind - 1 tsp (a small blueberry sized)
Salt - As Needed


The Way:


1. Separate the mint leaves from the stalk. Rinse them nicely in water so that all the mud or dirt is removed

2. In a pan heat oil. Add the urd dal, chopped ginger and green chilly and fry till the dal turns golden in colour. Keep in flame in medium low


3. Now add the mint leaves and saute. Do not keep in flame for long. They have to just get wilted


4. When they get wilted add asafoetida and tamarind and allow them to just get warm. Don't have to saute for long. Remove from flame and allow them to cool

5. Now take them in a mixie and add grated coconut and salt. Grind them smoothly by adding little water. When ground, transfer them to a bowl. You can add more water as per your required consistency. Check for salt after adding water and add more if required


6. For the tadka, heat oil in a tadka pan. Splutter mustard. Then add curry leaves and off the flame

7. Add the tadka to the chutney and serve with idly or dosa !


Notes:

  • You can add red chilly instead of green chilly. Taste may vary slightly but both variations taste great
  • Can omit urad dal. Then the chutney will be more smooth. Urad dal imparts a crunchy texture to the chutney

Cheers,
Chitz


Thursday, 16 August 2018

Karuveppilai Podi | Easy Karuvepilai Podi for Idly/Dosa/Steamed Rice | Karivepila podi | Curry leaves powder recipe


I am a fan of this podi recipe of my mom's. It is slightly different from the normal recipes which use more of dal but my mom uses coriander seeds. They give a nice flavour as well as a slightly different taste to the podi. She is a fan of the coriander flavour so she uses more of them in her cooking :) I feel that coz of the coriander this podi tastes more yum with rice and I eat them with rice more than with idly/dosa. Where as Deepak feels this is more yum with idly and dosa and has it only with them. So you get the general feeling right? This recipe is a winner. We make some or the other excuse and finish them off soon ;)  And it is a nice way to include curry leaves in your diet too :) So let's see how this is made.. 


Preparation Time : 25 minutes

Cooking Time : 25 minutes


Recipe source : Ma


Makes : A 200 gm bottle


I Used:


Curry Leaves  - 1 cup 
Urad Dal - 1/8 cup
Coriander Seeds - 1/8 cup
Red Chilly - 2 nos
Jeera/Cumin Seeds - 1 tbsp
Hing/Asafoetida
Salt
-
-
1 tsp
As Needed

The Way:


1. Remove the curry leaves from the stalks and rinse them in water 2-3 times. Sometimes they may contain dirt or sand particles. Hence rinse them thoroughly

2. Then drain them well and spread them in a plate or a flat surface and allow them to dry properly. If there is moisture content the podi will not have a longer shelf life

3. When it is dried properly, take them in a pan/kadai and saute them on low flame till they become crisp and dry. Then keep them aside


4. Then take the coriander seeds and red chilly in the pan and saute. The coriander seeds should slightly change colour and become deep in colour. This would take about 3-4 minutes in low flame. Then remove them and keep aside

5. Next take the urad dal and keep roasting them also in low flame till it changes colour to golden. This would also take around 3-4 minutes. Once done remove and keep aside


6. Now take the cumin seeds and hing and saute on low flame. Once the cumin seeds start to splutter, remove them from flame as well

7. Now take everything in a blender/mixie jar. Add sufficient salt and grind to a coarse powder


8. Preserve them in an air tight container and keep away from moisture. Use a clean and dry spoon to take the podi every time so that the shelf life is not affected

Serve with gingelly (sesame) oil for your idly or dosa or even steamed rice!

Notes:

  • Store in a clean and dry air tight container for longer shelf life
  • Always use a clean dry spoon to take the podi from the bottle

Cheers,
Chitz

Thursday, 19 April 2018

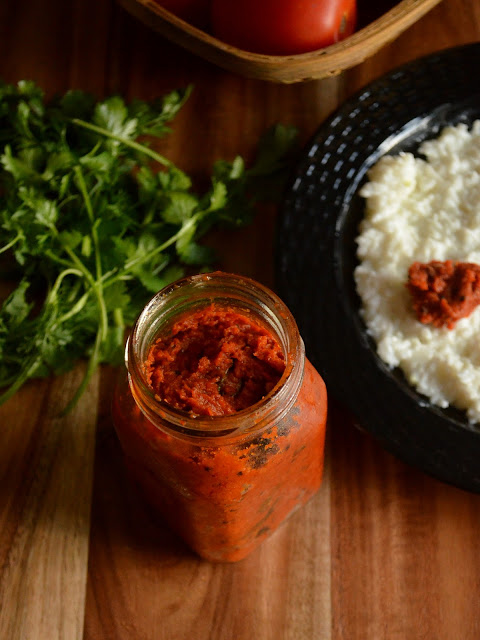
Easy Tomato Pickle | Tomato Thokku | Thakkali Thokku Recipe | Thakkali Urukkai


Tomatoes are getting cheaper now right? So why don't we pickle some? And if it can serve you as a relish or side for your idly, dosa, chapathi, curd rice, sambar rice or rasam rice. then isn't the recipe a winner? Yes, I am not joking. This is such a pickle, a versatile one ;) I enjoy it the most with curd rice and dosa.. It is also an ideal one to make and give for your loved ones travelling abroad! So let me stop the talking now and let the recipe and pics do the work for you :)


Preparation Time : 5 minutes

Cooking Time : 40 minutes


Recipe source : Ma


Makes : A 120 gm bottle 


I Used:


Tomatoes - 4-5 medium ones (½ kg)
Tamarind  - A small gooseberry sized
Chilly powder - 2-3 tbsp
Oil - 3 tbsp
Mustard 1 tsp
Asafoetida - 1 tsp
Curry leaves - 2-3 sprigs
Salt - As Needed
Turmeric powder - ½ tsp
Ginger-Garlic paste - 2 tbsp
Fenugreek-Mustard powder - 2 tsp (Use 2 tsp each of mustard & fenugreek seeds)


The Way:


1. In a pan dry roast the mustard seeds (2 tsp) and fenugreek seeds (2 tsp) for 4-5 minutes on low flame. Take care not to burn them. It starts giving a nice aroma and also the mustard will start spluttering. Then off the flame. Allow it to cool and powder them in a clean and dry mixer jar. You can grind this powder in bulk and use it for all of your pickles


2. Grind together the tomatoes, tamarind and red chilly powder together to a smooth paste

3. In a wide pan, heat oil. Splutter mustard. Then turn the flame to low and add asafoetida. Make sure that they do not get burnt. Then add the curry leaves


4. Then slowly pour in the ground tomato paste. Take care while pouring, since the pan is hot they can splutter out on you

5. Then add in the required amount of salt, turmeric powder and ginger-garlic paste. Now turn in the heat to medium


6. Let the pulp cook in medium flame until the water gets evaporated and it slowly starts turning into a mass. This will take about 15-20 minutes. Keep stirring in between to avoid them getting burnt

7. When it gets to solidify check for salt and hotness. Add salt and red chilly powder if required as per your needs

8. Once it gets thick add the fenugreek-mustard powder and give a nice stir. Leave for about a minute or two and then switch off the flame


9. Store in a clean and dry glass jar or container. If making in large quantities then preserve them in fridge

Can serve with idly, dosa, chapathi, curd rice, rasam rice and sambar rice !


Notes:


  • The amount of red chilly powder given here is what I used. It will vary depending on the sourness of the tomatoes. So adjust as per your needs
  • Adding tamarind is purely optional. If your tomatoes are too sour, then omit them
  • Ginger-garlic paste is also optional. If you do not need them, then go ahead and skip them
  • Instead of grinding the tomatoes, you can also chop them into fine pieces and add them. In that case the skin of the tomatoes tend to come off separately and it is slightly difficult to get a smooth texture or the pickle
  • Make sure that the water content from the tomato pulp completely dries off else your shelf life might get reduced
  • Use a clean and dry spoon every time you use the pickle to ensure a longer shelf life

Cheers,
Chitz